


The new patio looks incredible in October. Crisp joints, tight edges, furniture placed just so.
Then comes the first real freeze. The first downpour. The first summer of chairs dragging across it.
Most patio failures aren’t bad taste. They’re bad decisions made at the bottom of the install, where nobody can see them — a base that’s too shallow, a pitch that runs the wrong way, a stone that was never rated for ground contact.
Contractors know exactly which choices come back. They’ve been called out to fix the same twenty mistakes for thirty years.
Here are 36 patio and walkway choices that look fine on day one and turn into regret by year five — plus what the pros lay instead.
1. The 3-Inch Gravel Base
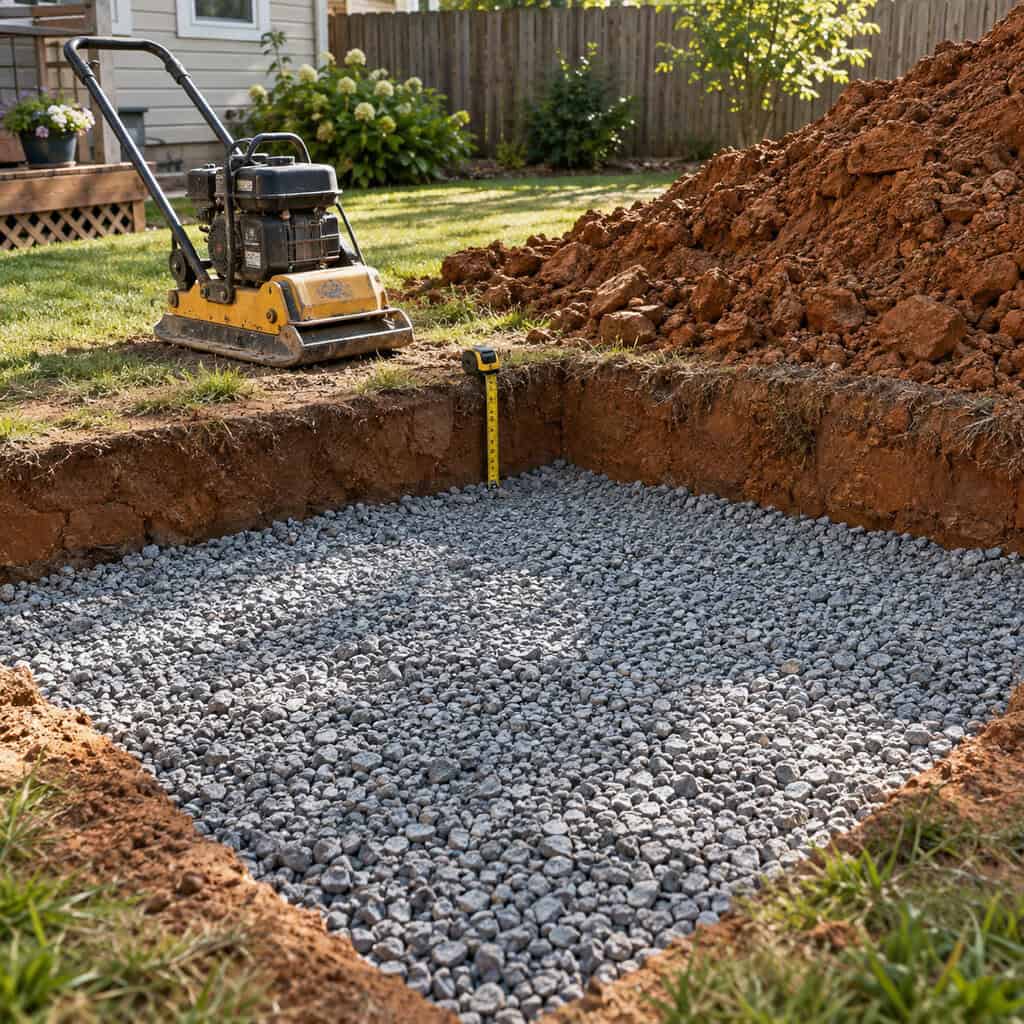
Start here, because almost every other failure on this list is this failure wearing a different outfit.
A patio is a structure. The part you paid for — the bluestone, the clay pavers, the travertine — is just the wear surface. What holds it flat is the compacted aggregate underneath, and that’s precisely where homeowners and cut-rate crews save money.
Three or four inches of loose gravel dumped in a trench and tamped with a hand plate is not a base. It’s a cushion. Under clay soil or freeze-thaw cycling, it ripples within two winters, and the ripple always shows up where traffic concentrates — the door, the grill, the table legs.
Pros excavate 6 inches of compacted aggregate minimum for a pedestrian patio in well-drained soil. In clay, in cold climates, or anywhere a vehicle might touch it, that goes to 8 to 12 inches. The material goes in as 3-to-4-inch lifts, and each lift gets compacted with a plate compactor before the next one lands. One 10-inch dump compacted once is not the same as three 3-inch lifts compacted three times, no matter what it looks like from above.
And if the excavator hits old construction fill, a buried stump hole, or soft organic muck, the digging continues until it’s out. Building on fill is building on a slow-motion sinkhole.
Settling, rippling and sunken sections are the complaints paver contractors field most often, and base depth is nearly always the culprit, as Earth, Turf & Wood lays out in their rundown of common paver problems.
A $12,000 surface on a $900 base is a $12,000 surface that ripples.
2. A Pea Gravel Patio You Actually Want to Sit On
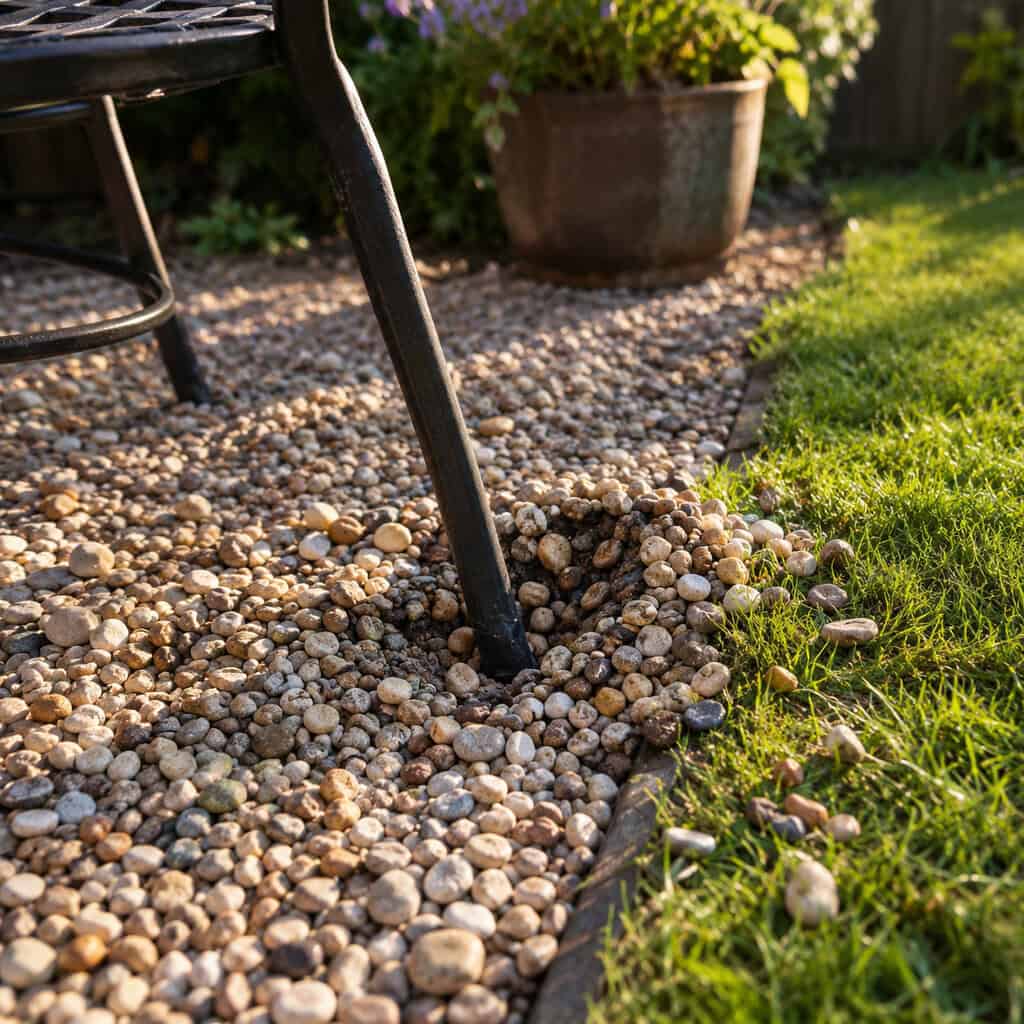
Pea gravel photographs like a courtyard in Provence. It lives like a ball pit.
The stones are round and smooth, which means they never lock together. Chair legs sink. Heels sink. Strollers and walkers plow through it. And the gravel migrates — into the lawn, into the beds, into the mower deck, where it becomes a projectile.
Pros use angular 3/8-inch crushed stone instead, or stabilized crusher fines. The sharp faces wedge against each other and knit into a surface that holds a chair leg.
Same look from ten feet. Completely different experience underfoot.
3. Stamped Concrete Made to Look Like Stone

The showroom sample is freshly sealed, misted with water, and sitting indoors under good light. Your backyard is none of those things.
The color hardener and release agent wear off traffic lanes first, so within three years there’s a pale path from the back door to the grill. It gets slick when wet unless grit was broadcast into the sealer. And it needs resealing every two to three years for as long as you own the house.
The real problem is the crack. When the slab moves, the crack runs straight across the faux stone pattern, ignoring the fake joint lines entirely, and it can never be patched invisibly.
Pros lay real unit pavers. A damaged paver lifts out with two screwdrivers and gets swapped for a new one in four minutes.
4. Stepping Stones Dropped Straight Into the Lawn
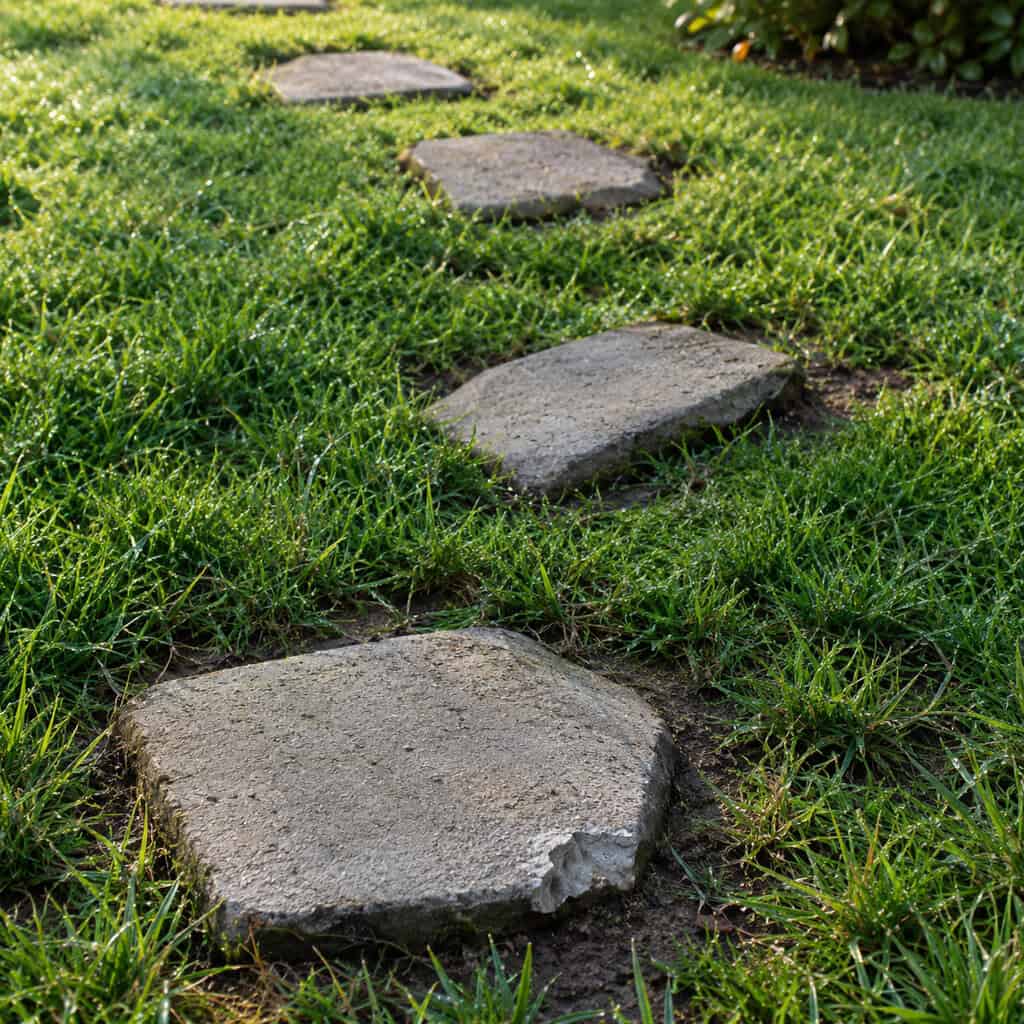
The classic Saturday project. Cut a stone-shaped divot in the sod, drop the stone in, admire it, go inside.
With no compacted base, each stone sinks at its own rate. Within two seasons you have a path of tilted plates that grab toes and catch mower blades.
Do it the real way. Excavate 4 to 6 inches, compact crushed stone, add a bedding layer, then set each stone a half inch below finished grade.
That half inch is the trick — the mower rides right over the top and never touches it.
5. Landscape Fabric Under a Gravel Path
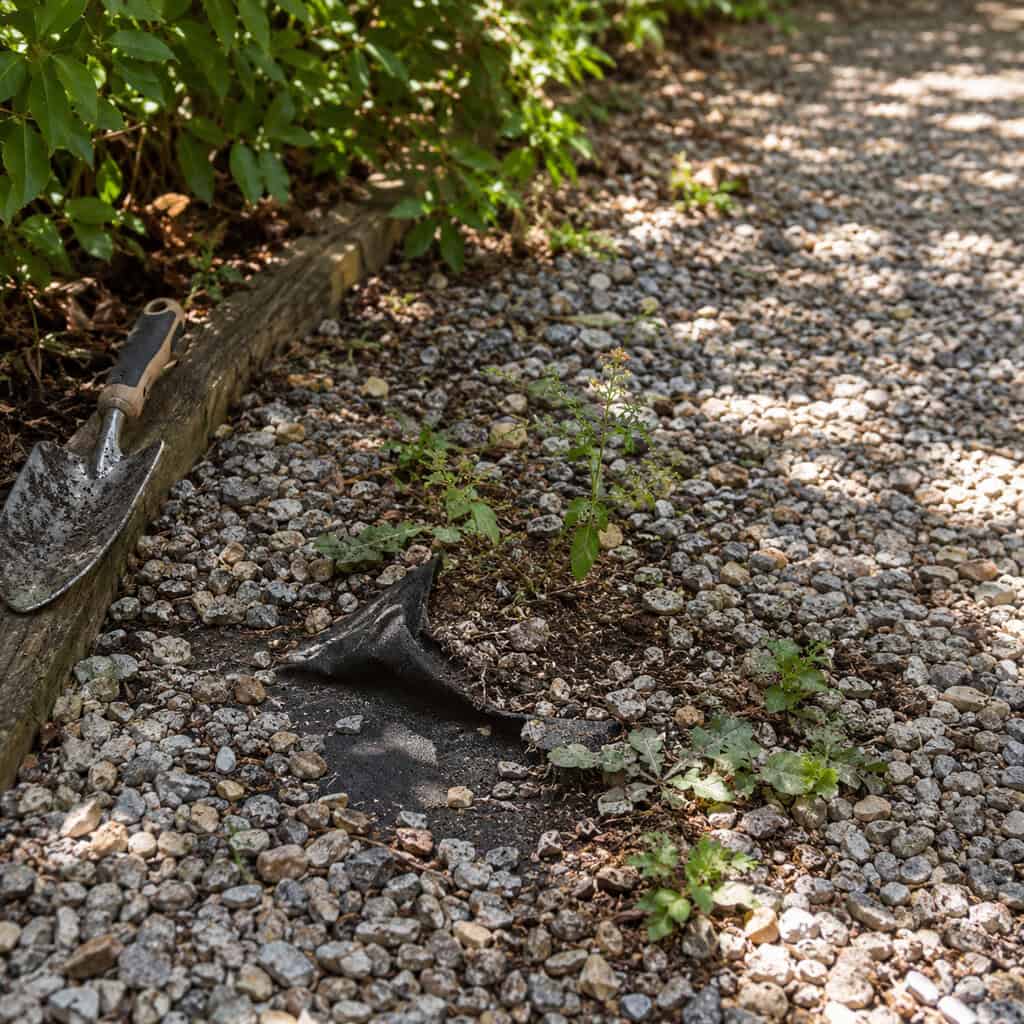
Fabric does not stop weeds in gravel. It never did.
Weeds in a gravel path don’t come up from below. They germinate in the silt, dust and organic debris that collects on top of the stone over a couple of years — a seedbed sitting directly on the fabric you installed to prevent it.
Meanwhile the fabric rucks up, surfaces as black ribbons after every heavy rain, and makes re-grading impossible without tearing the whole thing out.
Pros use woven geotextile at the subgrade only, as a soil-separation layer that keeps mud from pumping up into the stone. Above that, it’s depth, angular aggregate and a crisp edge doing the work.
6. Flagstone Mortared Over a Concrete Slab

Wet-laid flagstone over concrete is the most expensive regret in freeze-thaw country.
Water finds its way behind the stone through hairline joint cracks. It freezes. It expands. Mortar joints pop out in chunks and individual stones go hollow underfoot.
Then the repair mortar never matches the original color, so the patch stays visible for the life of the patio.
Pros dry-lay the identical flagstone on a compacted base with stone dust or polymeric joints. The patio flexes with frost instead of fighting it — and a lifted stone gets reset in an afternoon with a rubber mallet.
7. Charcoal and Black Pavers in Full Sun
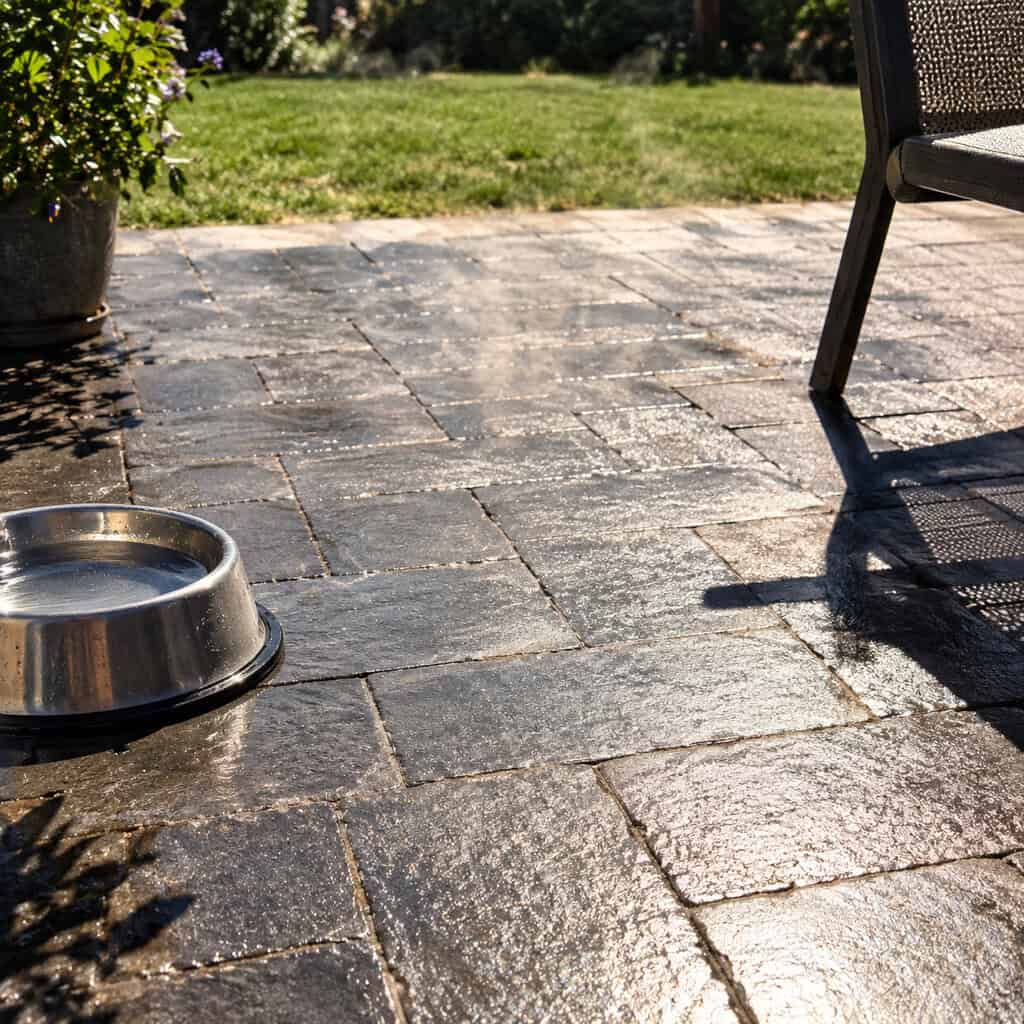
Dark hardscape has been the design default for a decade, and on a south- or west-facing patio it’s a heat trap.
Dark paving in direct afternoon sun can run 40 to 60 degrees above air temperature. At 90 degrees out, that’s a surface no bare foot wants.
Dog paw pads are worse off than yours. They have no shoes and no choice, and pad burns from hot paving are a routine summer vet visit.
Pros push sunny patios toward buff, tan and mid-grey blends — or design real shade into the plan from the start.
8. Bark Mulch as a Permanent Walkway
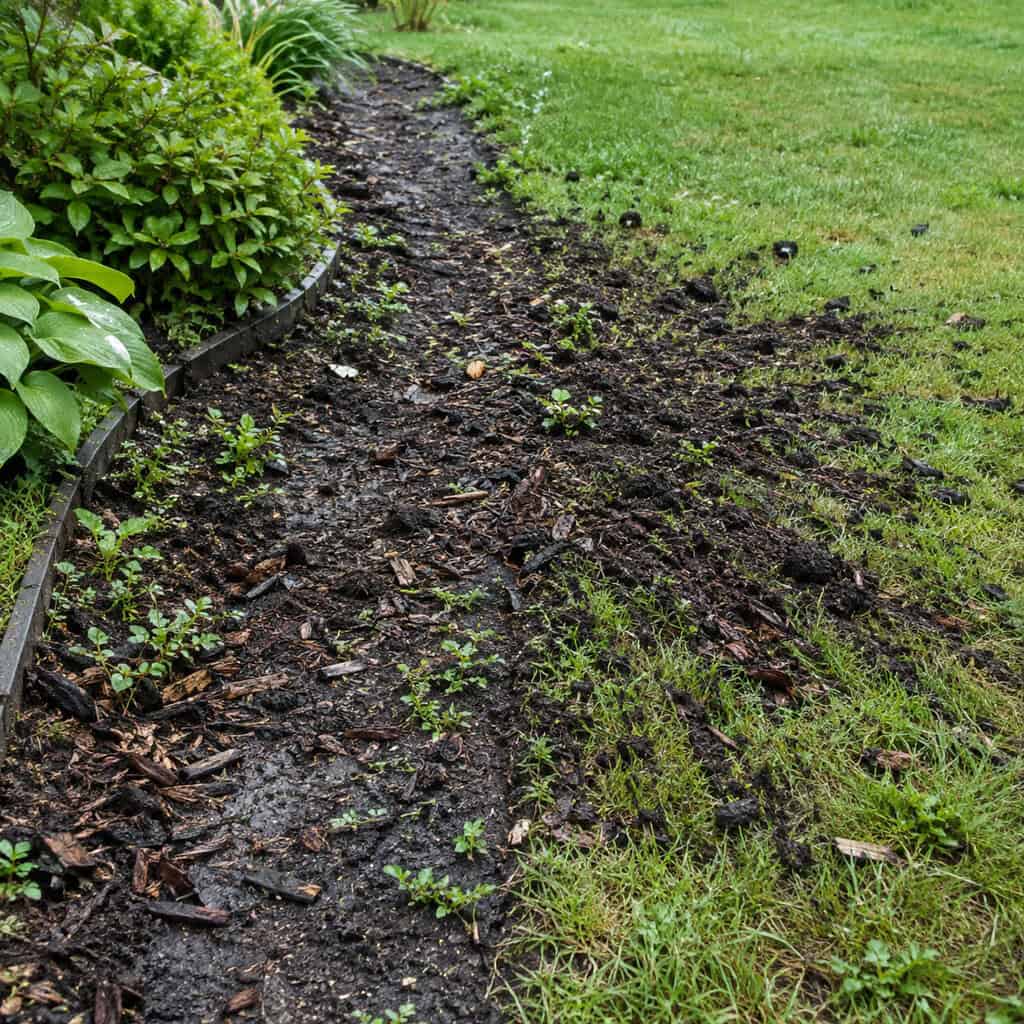
Mulch is a soil amendment wearing a walkway costume.
It’s designed to decompose. That’s the whole point of it in a planting bed. On a path, decomposition turns it into the rich, moist, perfectly weed-friendly seedbed you were trying to avoid.
It floats off in heavy rain, migrates into the lawn, and tracks into the house on every shoe.
Pros keep mulch on woodland paths nobody walks in the rain. For routes people actually use, it’s crushed stone or stabilized fines.
9. A Paver Patio With No Edge Restraint

A paver field is held together by lateral confinement. Remove the edge and the whole system starts unzipping.
The outer course creeps outward a fraction with every freeze cycle and every footstep. Joints open. Sand washes out. A visible “smile” develops along the perimeter, and weeds move into the gaps.
Pros spike a buried edge restraint into the compacted base — not the topsoil — with 10-inch spikes every foot, or they pour a hidden concrete toe along the perimeter.
It’s the cheapest line item on the quote and the one DIYers skip most.
10. A Round River Rock Walkway
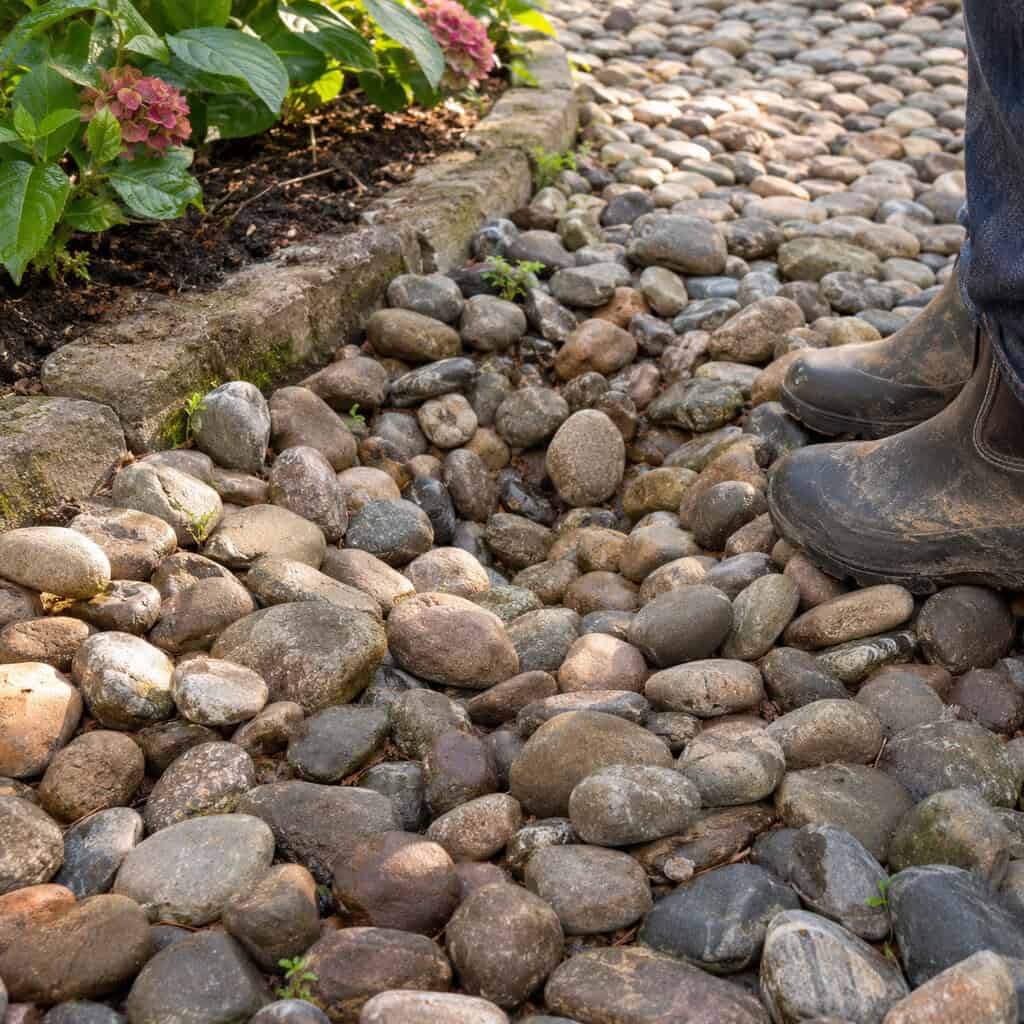
One- to two-inch smooth cobble is the most beautiful unusable surface in landscaping.
It rolls underfoot. Ankles roll with it. For anyone over 70 or carrying groceries, it’s a genuine fall risk, and it can’t be raked flat or shoveled in winter.
Pros love river rock — in dry creek beds and drainage swales, where water goes and feet don’t.
11. Indoor-Rated Tile Taken Outside

Glazed ceramic is slick as ice when wet. That’s not a maintenance issue, it’s the material.
Indoor-rated porcelain has a higher water absorption rate than exterior-rated product, so moisture gets into the body, freezes, and spalls the face off. Meanwhile the thinset bond fails wherever the slab beneath it moves.
Pros specify through-body porcelain pavers rated for exterior use with a published slip resistance number, set on pedestals or a compacted base.
Never thinset over a slab that moves.
12. Railroad Ties as Steps and Edging
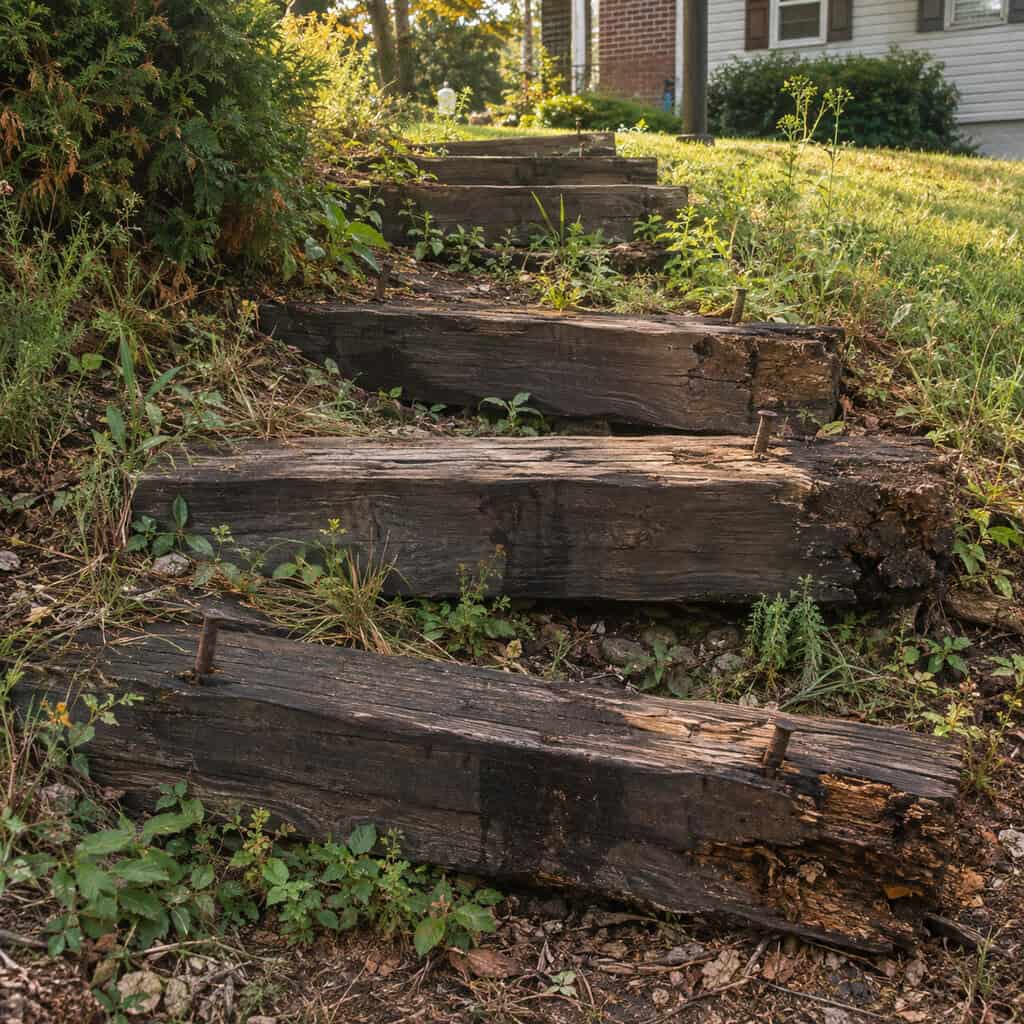
Every yard built between 1978 and 1996 has them somewhere.
Authentic used ties are treated with creosote. On a hot July afternoon they smell like it, and the compound leaches into the soil around them — not what you want framing a vegetable bed or a spot where kids and dogs sit.
They also rot from the bottom, twist out of alignment, and shed splinters the size of pencils.
Pros use granite curbing, natural stone blocks, or wet-cast concrete step units on real footings.
13. Polymeric Sand in the Wrong Joint

Polymeric sand is a system with a narrow operating window, not a magic powder you sweep into anything.
Every product has a joint width range — commonly 1/8 to 1 inch for standard formulas, with wide-joint versions for flagstone. Use a narrow-joint product in a 1.5-inch flagstone gap and it cracks out in sheets. Use a wide-joint formula in a tight paver seam and it bridges on top instead of filling.
Sweeping it over damp pavers is the other killer. Any residue left on the face hardens into a permanent white haze that no pressure washer removes without stripping the paver surface with it. Under-water the activation and it stays powder. Over-water it and the polymer floats out of the joint entirely.
Now the part nobody warns you about: open joints are the front door for ants.
Pavement ants and the common black field ant colonize paver joints specifically because the sand is loose, well-drained and warm. They excavate from below and push fine tailings up through the joint, which is why you see those little volcano mounds along the seams every spring. Each mound is sand removed from under your pavers. Enough of it and the paver above starts rocking.
Once a colony is established under a patio, surface sprays accomplish almost nothing — the nest is 8 to 18 inches down. Granular bait carried back to the queen works far better, but the permanent fix is denying them the habitat in the first place.
Pros match the product to the measured joint width, install on a bone-dry surface, compact and refill in lifts so the joint fills from the bottom up, and How To Hardscape notes that drainage failures — water sitting in the joint — undo even a correct installation.
14. Artificial Turf Used as a Walkway
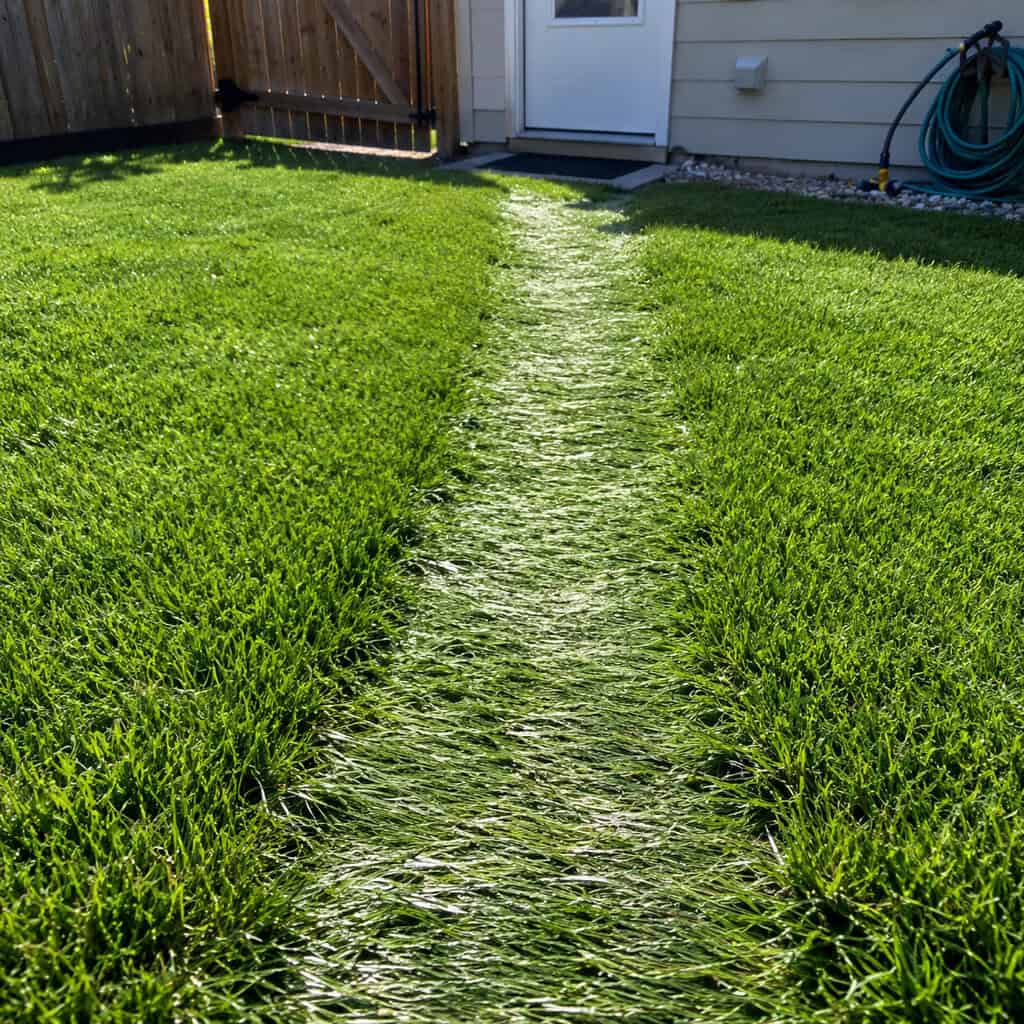
Turf is marketed as zero-maintenance. It isn’t, and the walkway application exposes it fastest.
Traffic lanes mat flat within two to three years and never spring back, so you end up with a shiny plastic trail across your artificial lawn. Infill migrates out of those lanes and has to be topped up.
In full sun it runs far hotter than real grass — real grass transpires and cools itself, plastic doesn’t.
And for dog owners, urine odor is only manageable if the base is genuinely free-draining and the turf gets flushed regularly. Most installs are neither.
Pros put a hard surface in the traffic lane and save turf for low-traffic panels.
15. One-Inch Big-Box ‘Patio Stones’

Those 12×12 and 16×16 wet-cast squares stacked by the garden center entrance are stepping stones. The label often says “patio stone” anyway.
At roughly an inch thick, they can’t bridge even minor base irregularity. Put a chair leg or a loaded wheelbarrow on one and it snaps across the middle.
Pros spec 60mm (2 3/8-inch) interlocking pavers, which are manufactured specifically to transfer point loads down into the base instead of taking the stress in the unit.
Three times the thickness. Twenty times the service life.
16. A Rubber Mulch Path
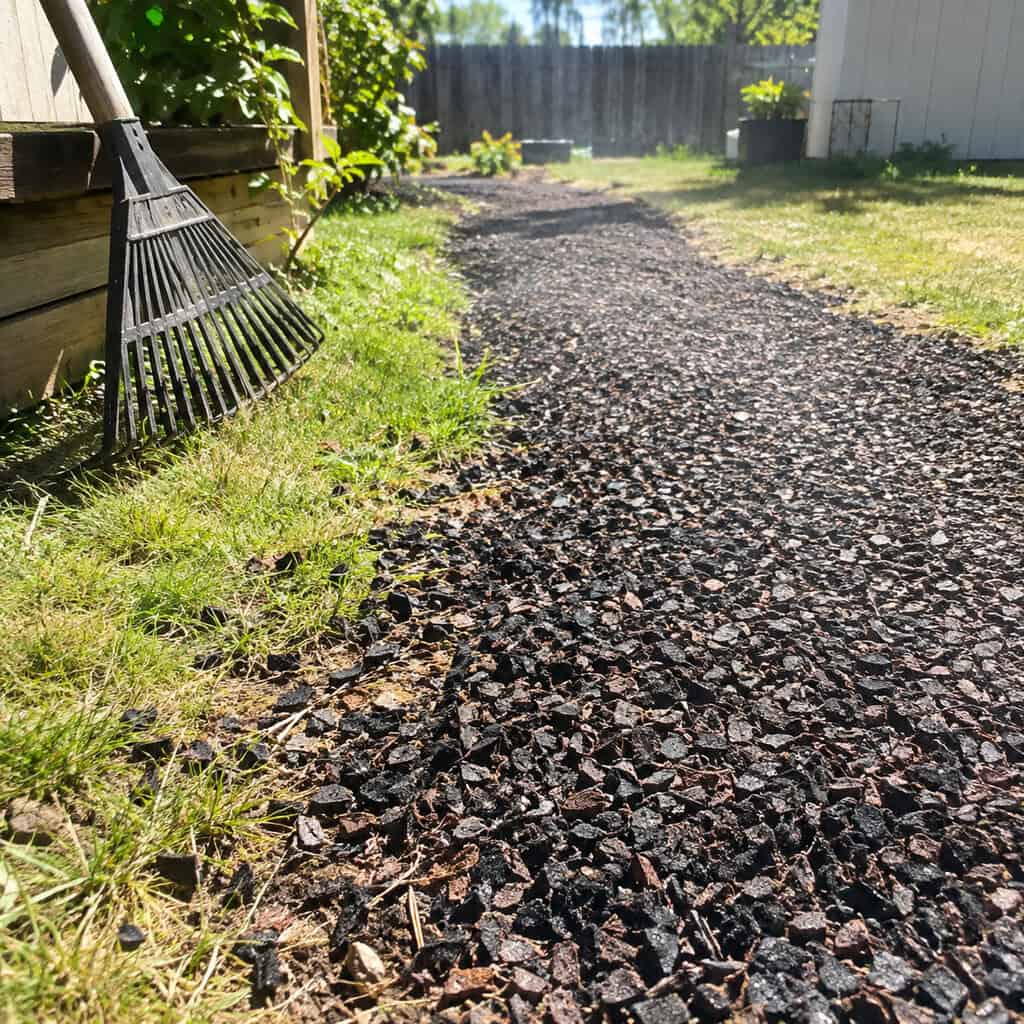
Sold as permanent, soft and clean. It’s permanent, at least.
Rubber crumb absorbs solar heat aggressively and gives off a distinct tire smell on hot days. It floats in heavy rain and migrates out of the path edge by edge.
The real trap is removal. Once rubber fragments work into soil, they don’t decompose and they can’t be screened out at any reasonable cost. You’ve made a permanent decision with a temporary-feeling product.
Pros use engineered wood fiber under play equipment and crushed stone on paths.
17. Concrete Resurfacer Over a Cracked Slab

Resurfacers and micro-toppings are skins. They have no structural capacity whatsoever.
Any crack that’s still moving — and most are — telegraphs straight back through the overlay within one or two freeze cycles. Then the overlay delaminates in sheets along the crack edges, and now you have a cracked slab and peeling flakes.
Before spending anything, diagnose the cause. A hairline shrinkage crack in an otherwise flat, stable slab is cosmetic and genuinely worth skinning. A crack with a vertical offset — one side sitting higher than the other — means the slab is settling or heaving, and no topping will survive it.
Settlement gets corrected from below. Slabjacking and polyurethane foam injection lift a sunken slab back to grade, typically for a fraction of replacement cost, and they’re done in hours. Heaving usually means water or roots, and the water has to be redirected first or the slab lifts again.
If the slab is spalled, scaled across the surface and crumbling at the edges, it’s at the end of its life. Bob Vila covers the salvage options, but at a certain point the honest answer is demolition.
18. Tree-Cookie Stepping Stones
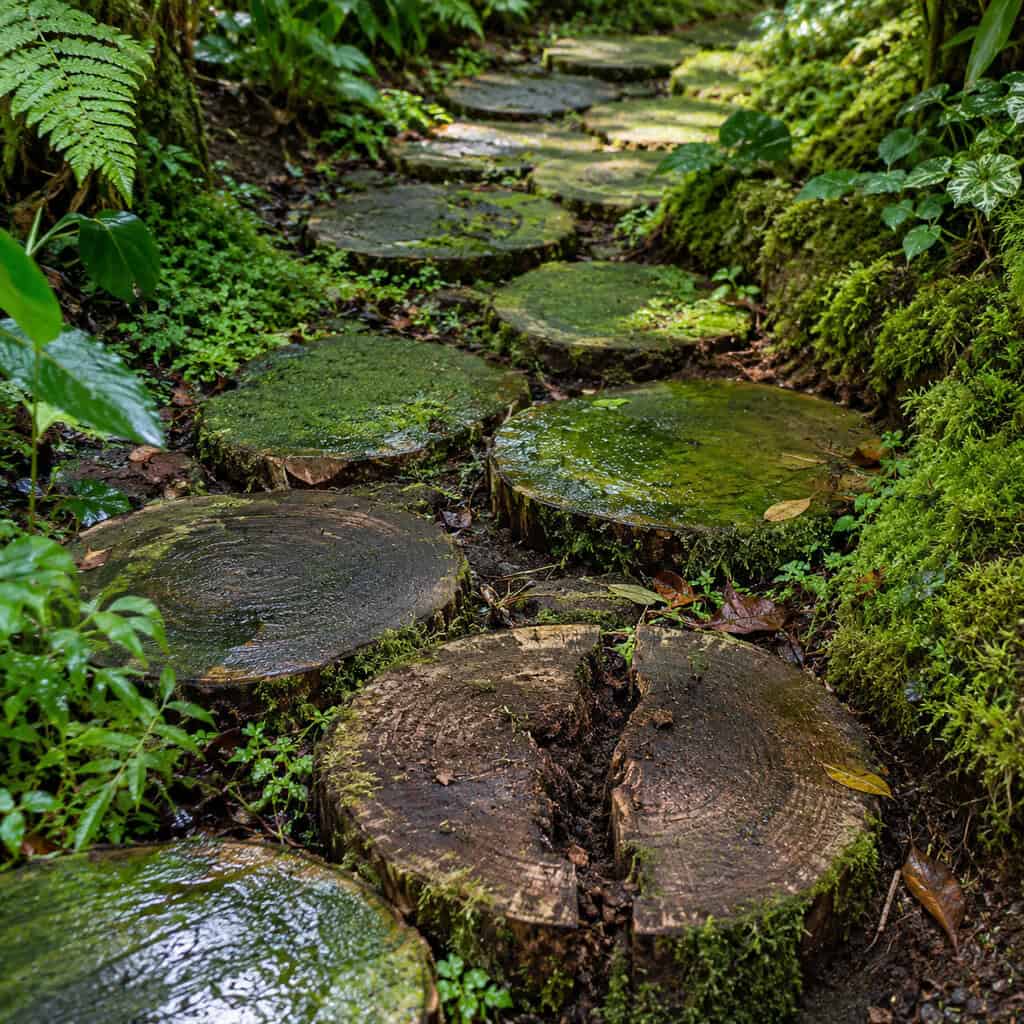
Cross-cut log rounds are a Pinterest staple and an urgent-care appointment.
End grain acts like a bundle of straws — it wicks water straight up into the disc. Algae colonizes the wet face within about six months and becomes slicker than wet tile.
Then the wood softens and checks, and eventually a foot goes through one.
Pros get the same organic, irregular look from fieldstone or sawn bluestone treads set flush with grade. Same shape language, zero rot.
19. Thin Plastic Edging With Spiral Spikes
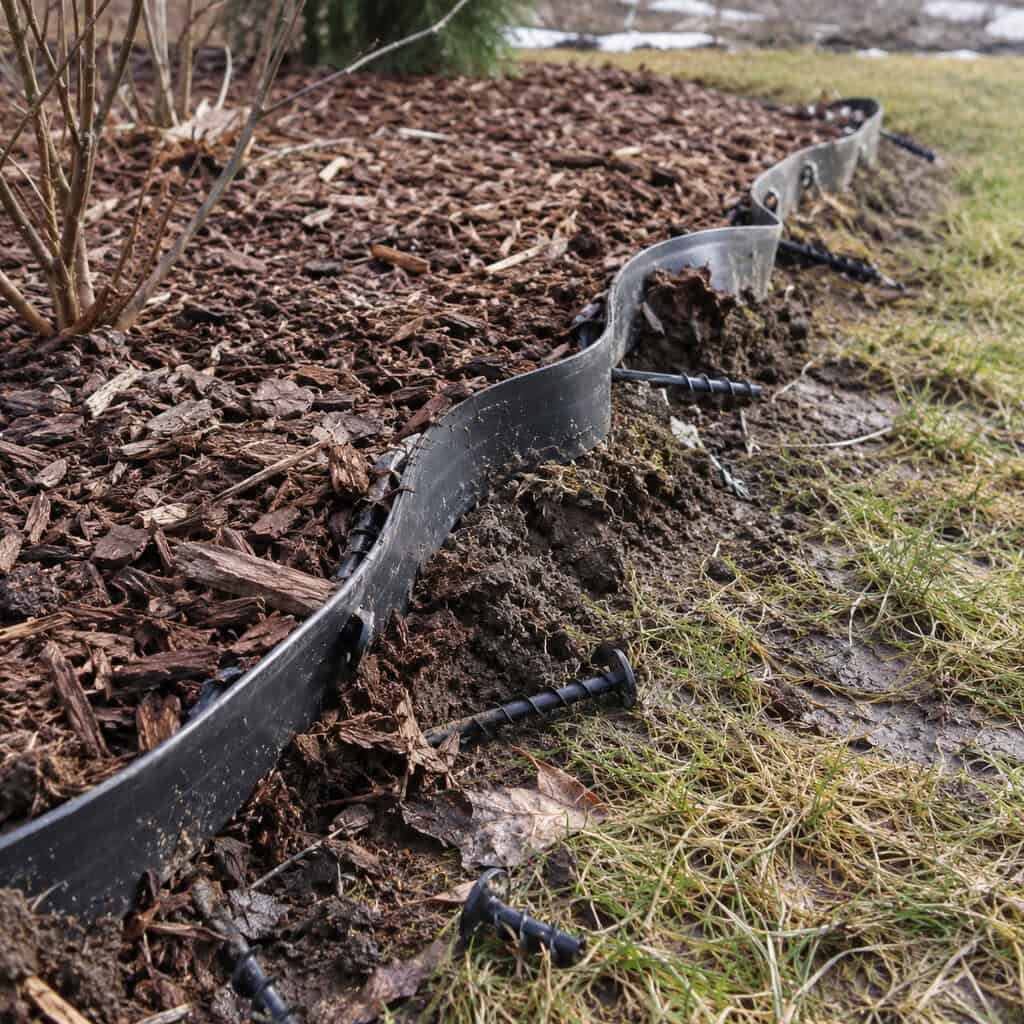
Black roll edging is anchored in topsoil. Topsoil moves.
Frost lifts it over the winter, the spiral spikes back out of the soft ground, and by late March it’s a wavy black snake lying on top of the lawn.
You push it back down. It comes up again next spring.
Pros use steel or aluminum edging driven into compacted base material, or a concrete toe where the perimeter really matters.
20. Salvaged Soft Brick From a Teardown

Reclaimed brick has character nothing new can fake. It also has a grade, and most people never check it.
Common interior wall brick was fired softer and never rated for ground contact. It absorbs water, and the first hard freeze pops the face off in thin sheets.
Look for SW — severe weathering — rated brick, or true clay paving brick, which is fired harder and dimensioned specifically for paving.
21. Travertine and Limestone Where You Salt
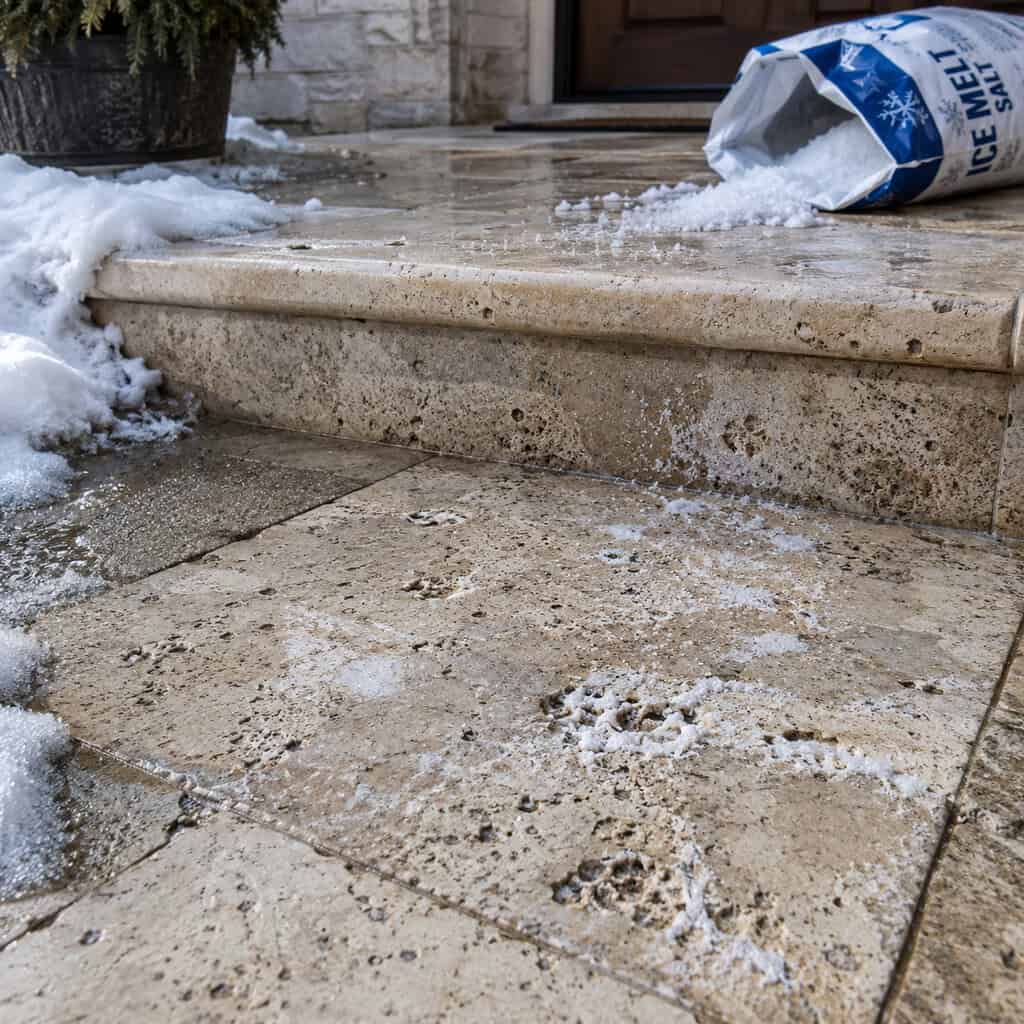
Travertine is a genuinely great pool deck. It stays remarkably cool underfoot, which is why Florida and Arizona builders use it constantly.
It’s also calcium carbonate. Deicing salt doesn’t just damage it mechanically — it dissolves it chemically.
Add water sitting in the natural voids and freezing, and a northern entry walk pits noticeably in two or three winters.
Pros keep travertine around pools and in warm climates. On northern walks that get salted, it’s granite, bluestone or high-density concrete pavers.
22. White Marble Chips
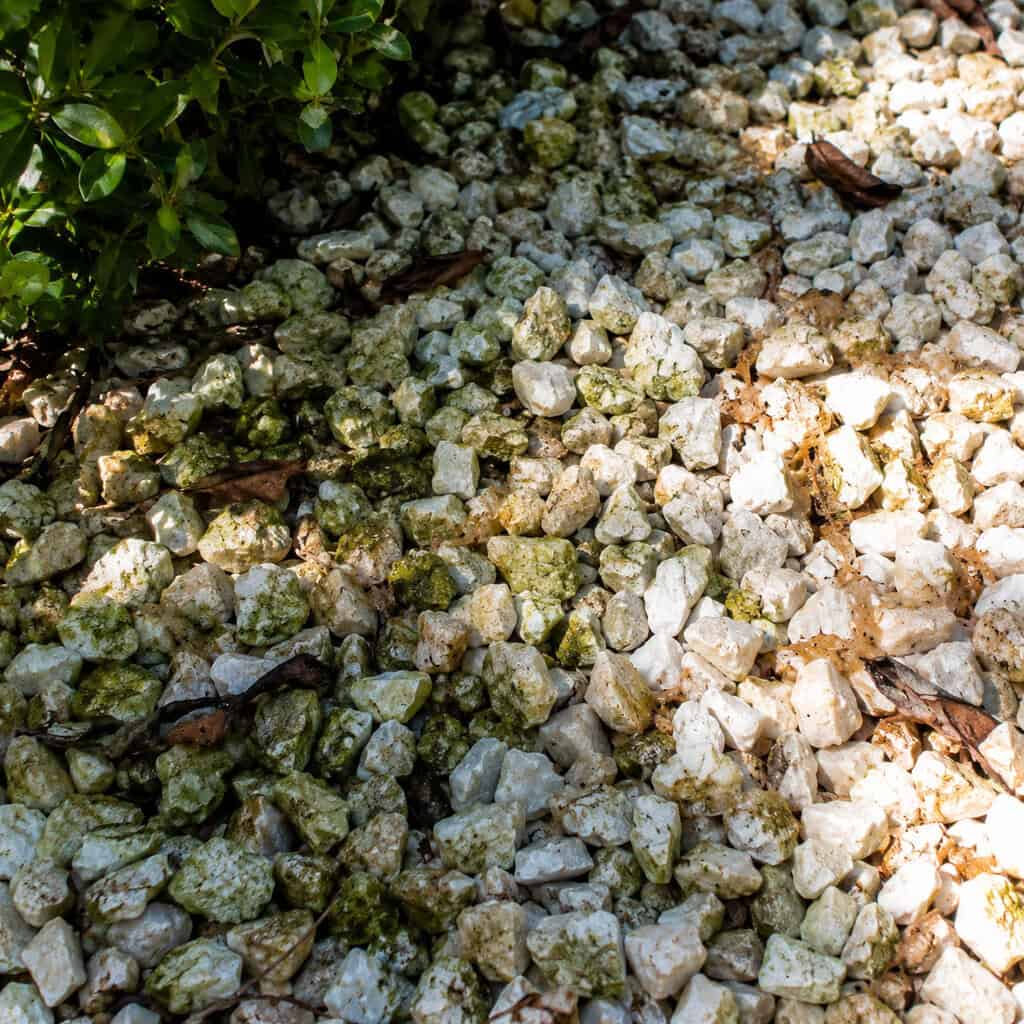
Brilliant white gravel is blinding in direct sun and bounces reflected heat back into whatever you planted beside it.
Marble is soft carbonate stone. It picks up tannin stains from leaves, yellows with iron in the water, and grows algae anywhere shaded.
By summer three it reads as dirty aquarium gravel, and there’s no cleaning it. Only replacing it.
Pros choose a mid-tone angular stone from a local quarry — something that ages into the landscape instead of fighting it.
23. A Pressure-Treated Boardwalk at Ground Level
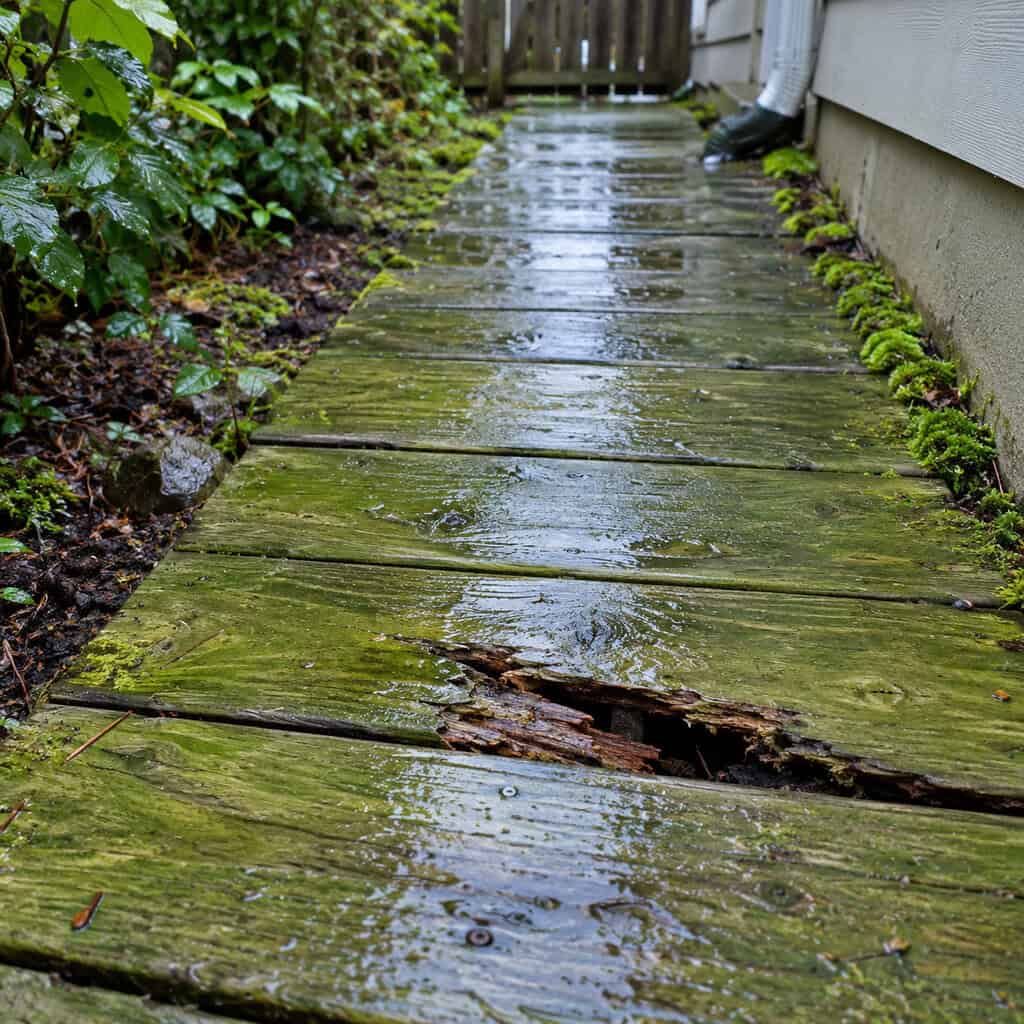
Deck boards laid flat on soil get no airflow underneath.
The underside stays damp permanently, and rot starts from below where you’ll never see it. A board that looks fine from above can be punky through two-thirds of its thickness.
The top side grows algae, which makes it lethal in the rain.
Pros either frame it properly on footings with real ventilation underneath, or skip wood entirely at grade.
24. A Patio Pitched Flat — Or Back Toward the House

This is the most expensive mistake on the list, and it’s invisible until the first serious rain.
A patio is a collection surface. Four hundred square feet of paving sheds hundreds of gallons in a single one-inch storm, and every drop goes wherever you aimed it. Aim it at the house and you’ve built a funnel pointed at your foundation.
What follows is a sequence. Saturated soil against the foundation wall. Hydrostatic pressure. Water through the cold joint or a form-tie hole. A damp basement wall, then efflorescence, then musty air, then mold in finished space.
And the insurance part catches people flat. Standard homeowners policies generally exclude surface water and seepage — gradual water intrusion from poor grading is maintenance, not a covered loss.
The number is simple: 1/8 to 1/4 inch of fall per foot, away from the structure. Across a 16-foot patio that’s 2 to 4 inches of drop, and it’s imperceptible when you’re standing on it. Flat is not level-looking — flat is standing water.
Pitch alone isn’t the whole job, either. The water needs a defined destination — a swale, a drywell, a daylighted drain line — or you’ve just moved the puddle fifteen feet.
Pros make the grading and drainage plan before the first stone is ordered. And if the yard already floods when it rains hard, that gets solved first, not after.
Among the paver complaints Earth, Turf & Wood documents, standing water and drainage failures sit alongside settling as the ones that cost owners the most to undo.
25. Snap-Together Deck Tiles Over an Old Patio
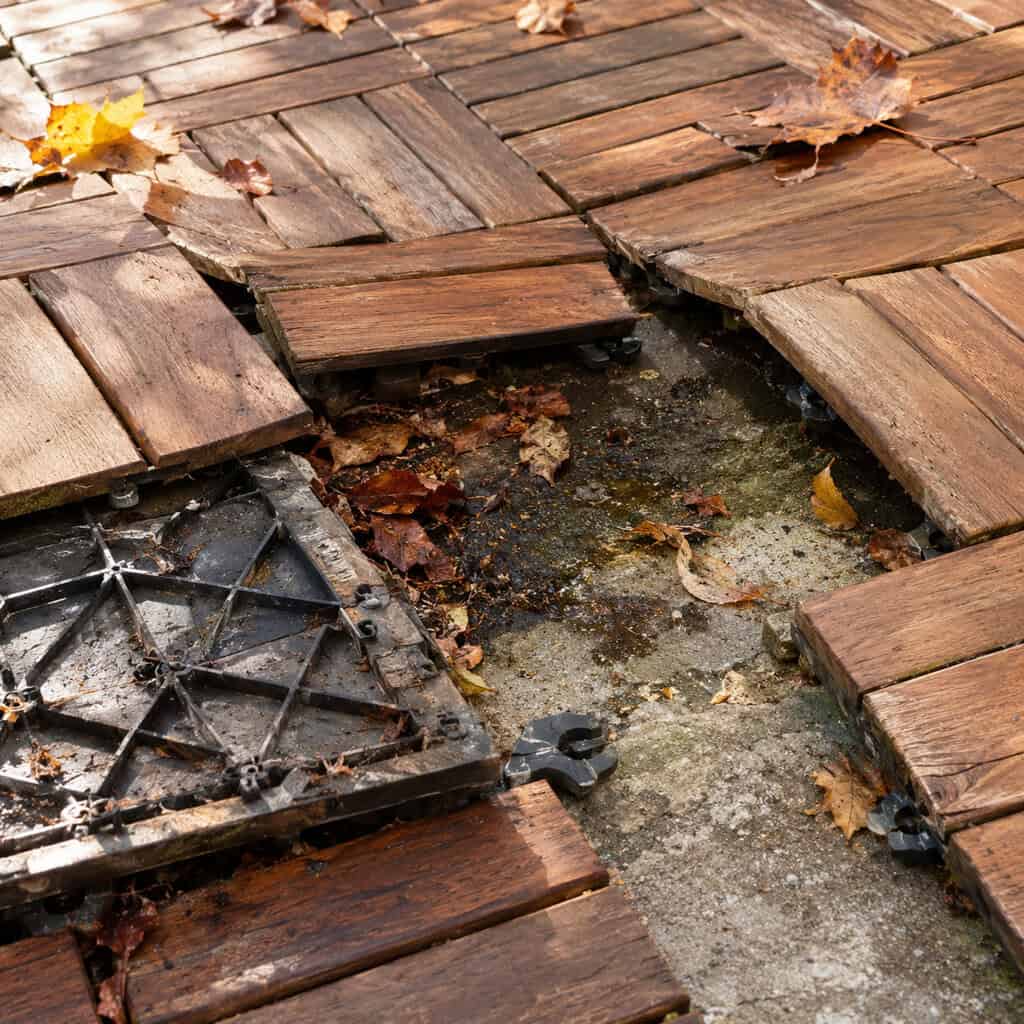
Marketed as a weekend fix for ugly concrete. They are, for about two summers.
The void under the tiles traps leaf litter and moisture, which makes a superb ant and earwig habitat about eighteen inches from your patio door.
The plastic clip bases go brittle under UV and start snapping. Wood tiles cup and the corners lift.
Pros either resurface the concrete properly or lay thin exterior porcelain on adjustable pedestals, which drains, ventilates, and comes back up when you need it to.
26. High-Gloss ‘Wet Look’ Paver Sealer

For roughly one season it looks spectacular — like the patio just caught a rain shower.
Then the film traps moisture rising from the base below and blushes milky white. It peels in traffic lanes. And when it’s actually wet, a gloss film over smooth pavers is close to ice.
Stripping a failed solvent-based sealer is miserable work involving chemical strippers and a lot of regret.
Pros use a penetrating or matte sealer with a grit additive broadcast in — or leave good pavers unsealed and let the color settle naturally.
27. Grass-Block Pavers in the Main Traffic Lane

Open-cell grid pavers are a genuinely smart stormwater product installed in the wrong place constantly.
Grass in those cells is growing in a confined pocket with limited root volume, heavy compaction from traffic, and shade from the grid walls. In a daily walking lane it thins, dies, and leaves a mud-filled plastic waffle.
Permeable systems work — they’re widely recommended for reducing runoff, and Oregon State University Extension covers how porous pavement handles stormwater on residential sites. The trick is matching the product to the actual traffic.
Pros put grid pavers in overflow parking and fire lanes, and fill the cells with angular gravel rather than turf anywhere real traffic lands.
28. A Poured Slab With No Control Joints

Concrete cracks. That isn’t a defect — it’s shrinkage as the slab cures, and it’s unavoidable.
Control joints just decide where the crack happens. Cut or tooled to about a quarter of the slab depth and spaced in reasonably square panels, they give the crack a straight line to follow underneath, where nobody sees it.
Skip them and the slab picks its own path — usually a jagged diagonal across the middle of a brand-new patio.
Cut them within 6 to 18 hours of placement. Wait longer and the concrete has already chosen.
29. The 30-Inch-Wide Front Walk

Builder-standard width, and it fails the only test that matters: two people can’t use it together.
Somebody steps onto the lawn. Every time. Guests arriving, kids coming home, anybody carrying a box with a second person on the other end.
A narrow walk also makes the whole house read smaller from the curb, because walkway width is one of the proportional cues the eye uses to scale a facade.
Pros lay primary walks at 48 inches minimum, with a 60-inch landing at the front door so the storm door can swing while two people stand there.
30. Steps and Stoops With No Frost Footing

In a cold climate, this one announces itself with a gap.
The house sits on footings below the frost line and doesn’t move. A stoop poured on grade sits in the active frost zone and rides up and down several inches every year. Two structures, two different movements, bolted to nothing.
Year one you get a hairline at the joint. Year four it’s a finger-width gap you can see from the driveway, and the riser heights have gone out of true.
That last part is the real danger. A set of steps where one riser is now an inch taller than the others is exactly how people fall — the foot expects a rhythm the stairs no longer have.
Frost depth varies a lot by region: roughly 12 inches across the mid-Atlantic, 42 to 48 inches through Minnesota and North Dakota, deeper in parts of Maine. Local code sets the number, and the footing goes below it.
The alternative pros use is going the other way entirely — dry-laid segmental step units on a deep compacted base, built as a free-floating assembly. They’ll move a little, but they move as one piece, and they can be re-leveled in a day instead of demolished.
Either engineer against frost or design for it. Pouring on grade and hoping is neither.
31. Unstabilized Decomposed Granite
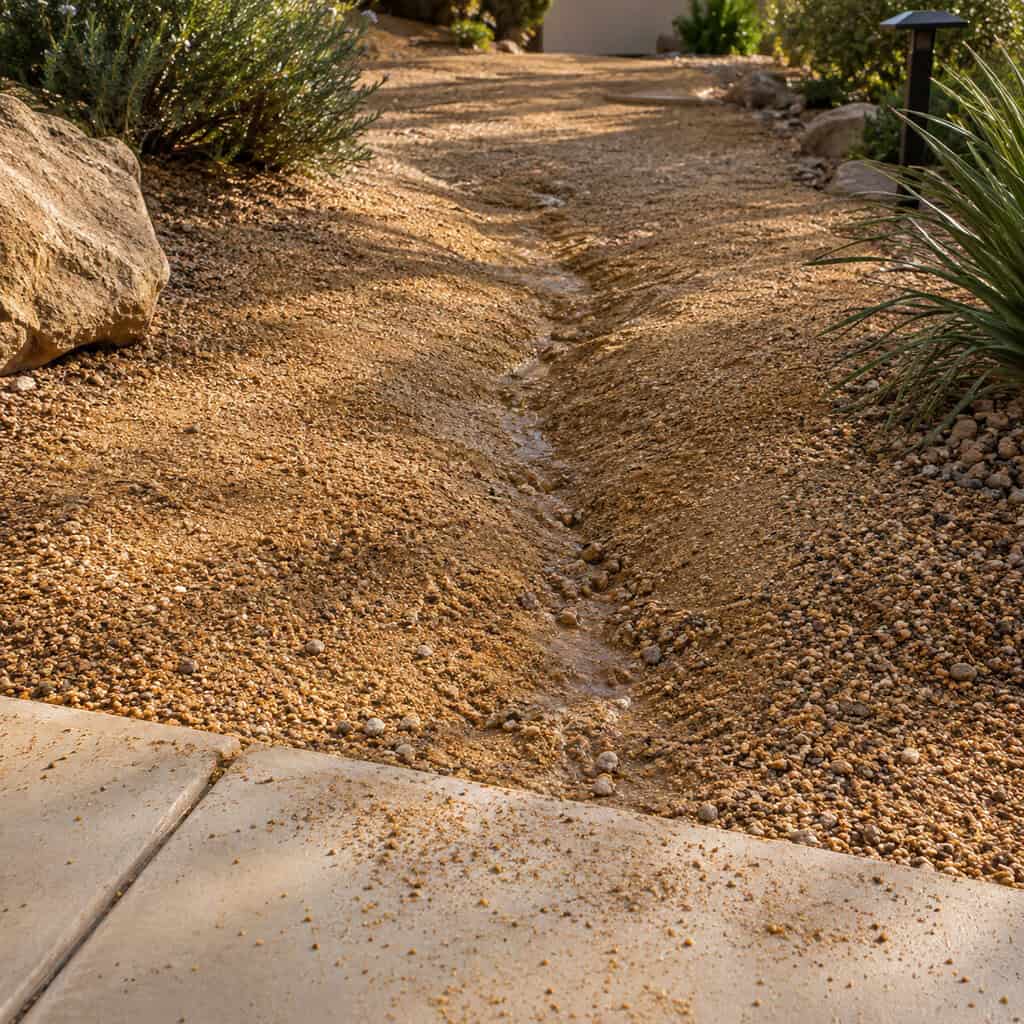
Loose DG is a beautiful golden surface that behaves like damp flour.
On any real slope it gullies after a storm. On flat ground it grinds into fine grit that rides shoes into the house and packs into dog paws.
Pros use a stabilized DG blend — the same material with a binder mixed in — compacted in lifts and held tight by a hard edge on both sides.
Same color. Stays where you put it.
32. A Patio Poured Over a Mature Tree’s Roots
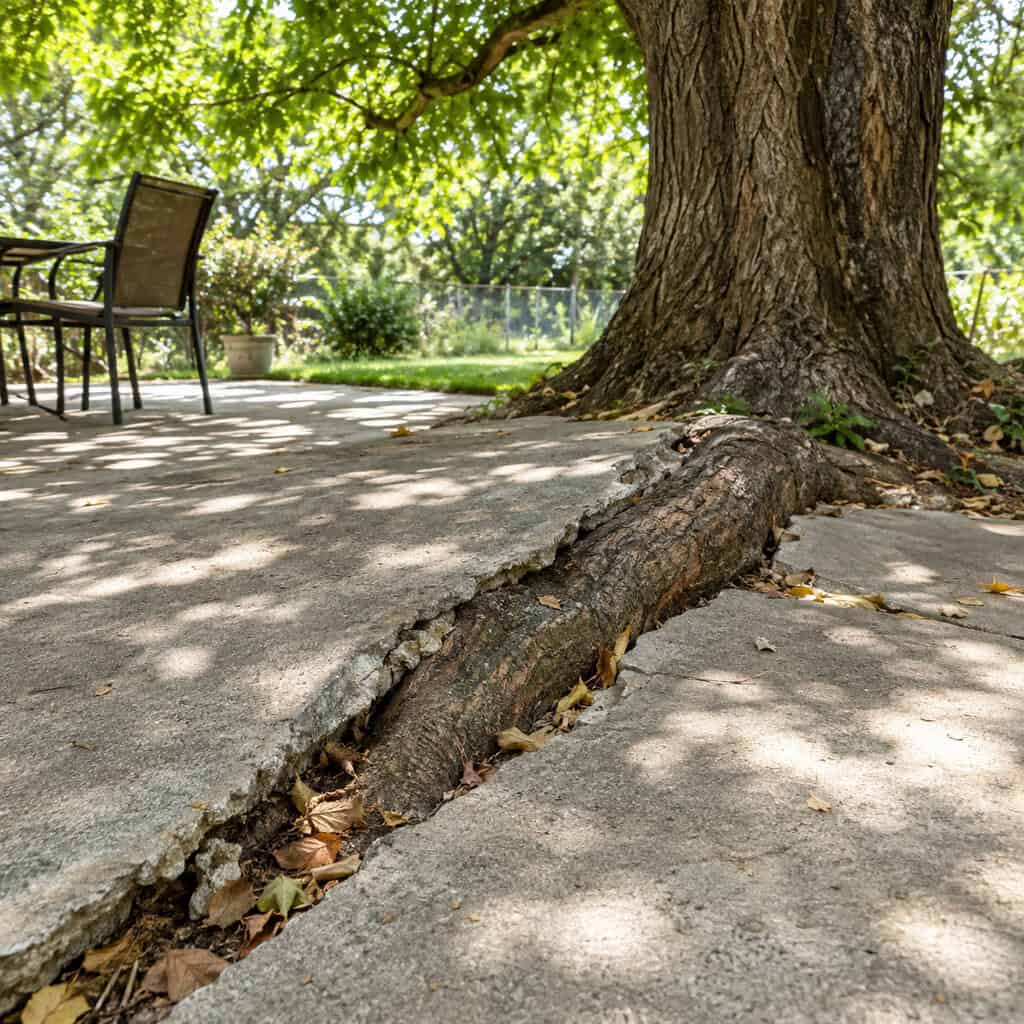
Paving the root zone of an established tree loses twice.
The roots you cut during excavation are gone, which destabilizes the tree and can start a decline that shows up three or four years later as thinning canopy. The roots you leave get sealed under an impermeable slab that cuts off the gas exchange fine roots depend on.
And the survivors do what roots do — they thicken. A root adding a quarter inch of diameter per year under a 4-inch slab generates enough force to crack it, and root pressure is a well-documented cause of patio cracking, as Dalinghaus Construction notes among the primary reasons slabs fail.
Most of a tree’s absorbing roots sit in the top 12 to 18 inches of soil and spread well past the drip line — often two to three times the canopy radius. The critical root zone is far wider than people assume.
Pros keep hard surfaces outside it. When the layout won’t allow that, they build a floating deck on helical piers threaded between major roots, or an open-joint permeable surface over a clean angular base that lets air, water and movement through.
Worth knowing before you plant anything near a future patio, too — what a sapling becomes in five years is rarely what the tag suggested.
33. The 10-by-12 Patio

The most common regret of all, and the only one you can’t sand, seal, lift or repair your way out of.
A dining chair pulls out about 3 feet behind it. A six-person table plus pulled-out chairs needs roughly 12 to 14 feet of clear space in both directions. Put that on a 10-by-12 slab and every chair’s back legs are in the grass.
Add a grill, a side table, and a path to the door, and the number climbs again.
Pros chalk the real furniture footprint on the ground before anything gets ordered. Set the actual table out there. Pull the chairs out. Walk around them.
The patio was never too small for the stone. It was too small for the people.
34. Pea Gravel Used as the Paver Base Itself
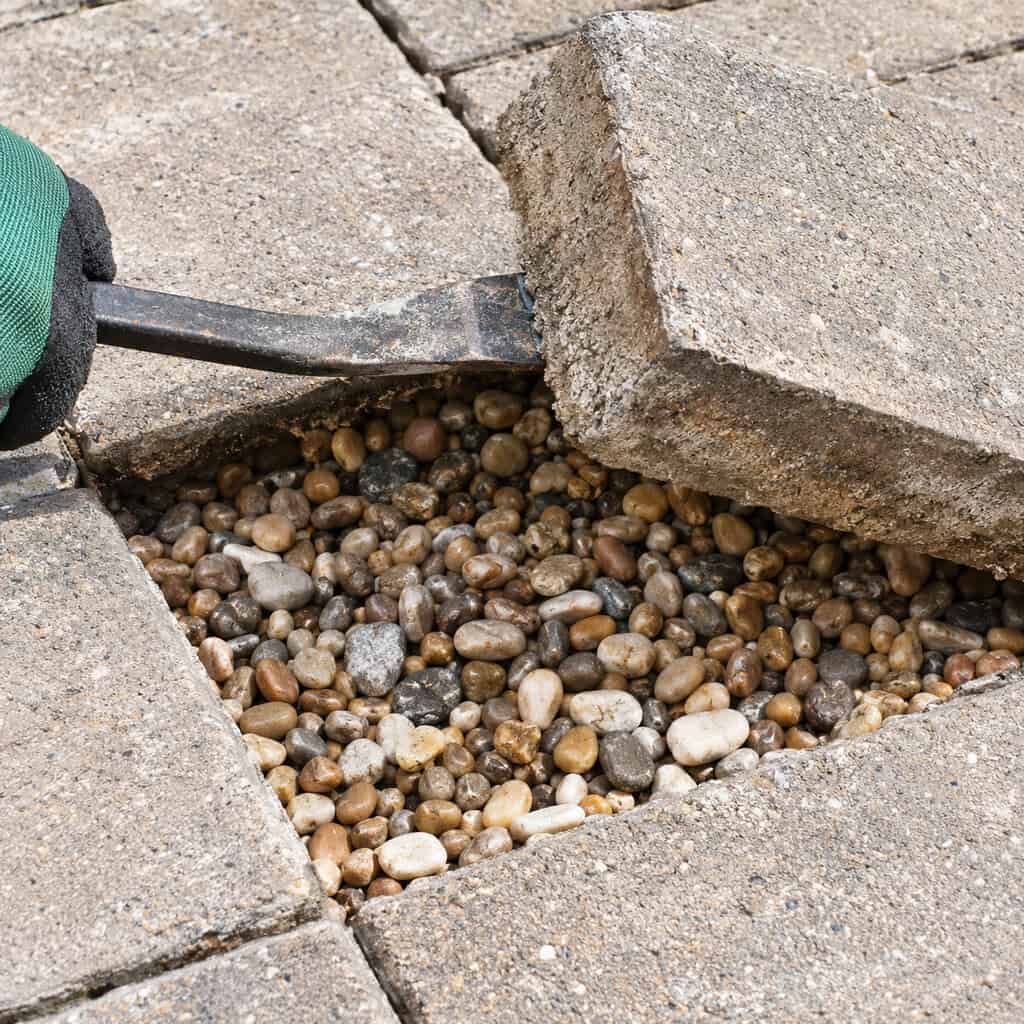
Depth isn’t the only way to get a base wrong. Aggregate shape matters just as much.
Round stone cannot interlock, no matter how long you run the compactor over it. It just rearranges. Pavers set on it rock from the first season and keep rocking.
The base needs well-graded angular crushed stone with fines — 3/4-inch minus, dense-grade aggregate, call it what your local quarry calls it. The sharp faces wedge and the fines fill the voids, and the whole lift locks into something you can’t scuff loose with a boot.
If you can shovel the compacted base easily, it isn’t compacted. Or it isn’t the right stone.
35. A Downspout Discharging Straight Onto the Patio
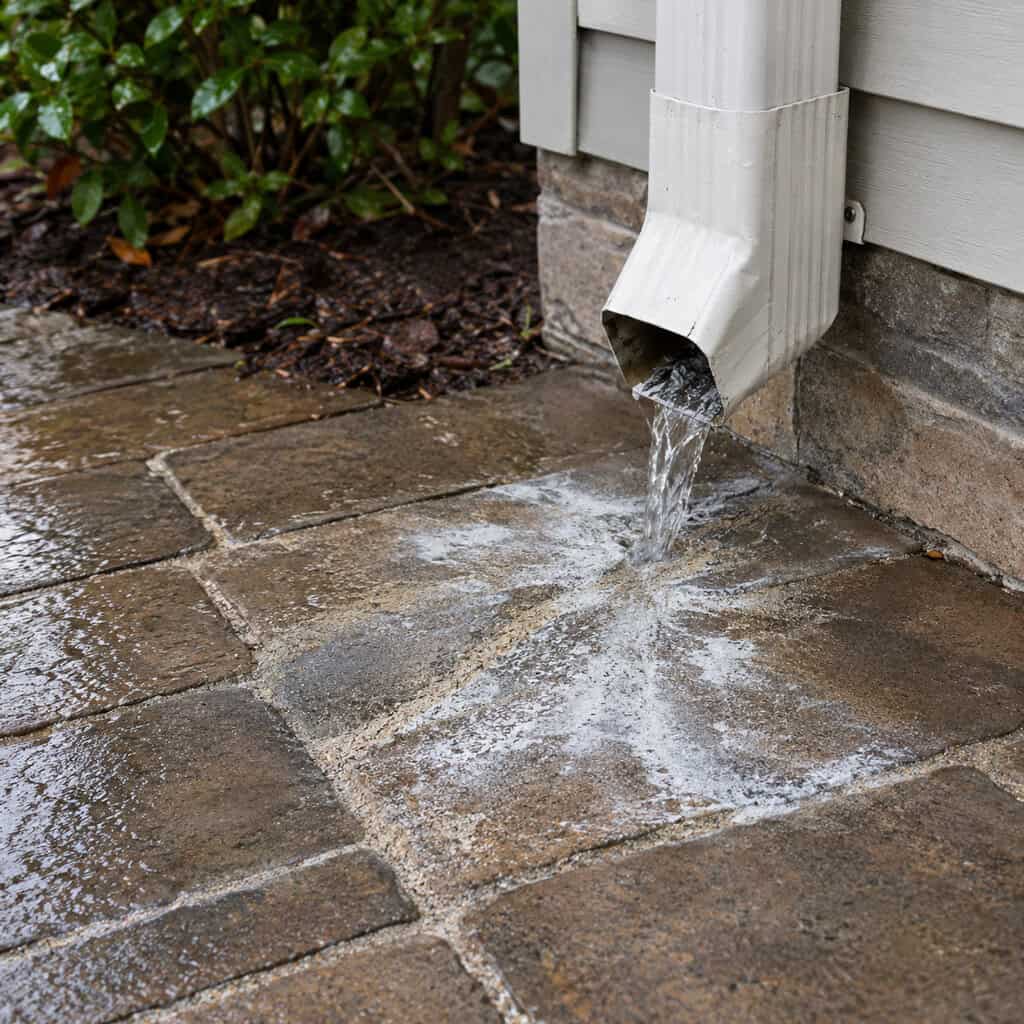
A single downspout can dump hundreds of gallons from one storm onto a few square feet of paving.
That concentrated flow scours joint sand out in a fan pattern, pulls salts up through the pavers and leaves white efflorescence blooms every spring, and in winter builds a sheet of ice exactly where people step.
Pros run the downspout under the patio in solid pipe during construction and daylight it past the edge — a two-hour job during the install, a demolition job after.
Any patio plan that doesn’t account for roof water isn’t a plan.
36. Cast-at-Home Faux Stone Mold Kits

The kit promises a flagstone patio for the cost of a few bags of concrete mix. The first pour is genuinely fun.
Then reality: hand-mixed concrete rarely hits consistent strength, the integral color pigment fades hard under UV, and the castings come out thin — the same thickness problem as the big-box patio stone, with less quality control.
By year three they’re chalky, uneven in color, and chipping at the edges.
If the budget is tight, pros would rather see a well-built crushed stone patio with a crisp steel edge than a large area of weak homemade concrete. One of those ages well.
Nearly every regret on this list traces back to the same root: the invisible parts got cut so the visible parts could get bigger.
Base depth, drainage pitch, edge restraint, footings below frost. Nobody compliments you on any of them. They’re the only reason the compliments keep coming in year ten.
Spend the money underground. The stone is the easy part.