


There was no seed rack humming under fluorescent lights back then, no plastic clamshell of nursery starts, no bottle of concentrated feed, no bag of mulch priced higher than the plant it’s meant to cover.
What she had was a wire ring propped behind the garage, a rinsed coffee can, and a stub of pencil.
Yet somehow that garden carried a household clear through February, on a budget that would barely register today. Call it thrift if you want, but most of it was just sound math — math that still checks out now.
A handful of her habits do need a footnote for modern life. Fresh manure has no business near your lettuce bed, the dish soap under your sink isn’t the soap she used, and a few of her go-to moves are now regulated in ways she never had to consider.
So here’s the full list — all 37 of grandma’s penny-pinching garden tricks — weighed against what we know now, with the modern fix built right in.
1. Keeping Every Tool Sharp, Oiled, and Bone-Dry in Storage

Beside the shed door sat a five-gallon bucket of sand laced with a quart of spent motor oil, and every hoe, trowel, and spade got dunked in it on the way back inside.
Cleaned and oiled in one motion, every time, without thinking about it.
A hoe with an actual edge slices weeds at the root instead of dragging them. Ten passes with a mill file, twice a season, and the same tool does twice the work with half the effort.
Hers lasted fifty years. A $20 replacement bought three times over costs more than the $60 tool nobody wanted to pay for.
2. Letting a Cover Crop Blanket the Beds Instead of Leaving Them Bare
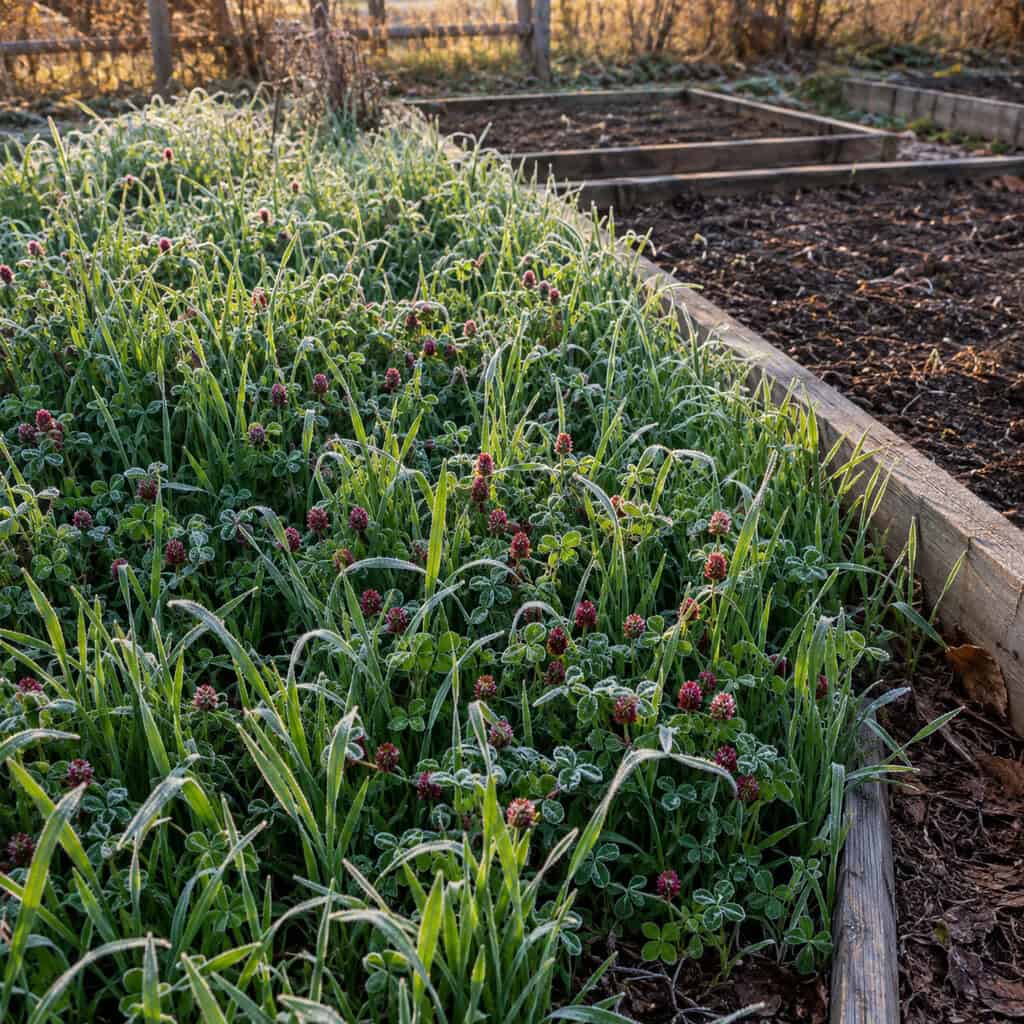
Uncovered soil sitting through December is soil that’s already halfway to the ditch.
A handful of cereal rye, oats, or crimson clover broadcast over the emptied beds in early fall germinates in the cooling weather and holds the ground all winter. In spring you cut it down and turn it under as green manure.
Clover does something better still — it fixes nitrogen out of the air into nodules on its roots. A free fertilizer factory running through the off-season.
Oats winter-kill in cold zones, which makes them the easiest for a beginner: they die back into a mulch mat and you plant straight through. Rye is tougher and needs cutting three weeks before you sow anything small-seeded.
3. Turning Scrap Fencing Into Tomato Cages That Actually Hold Up
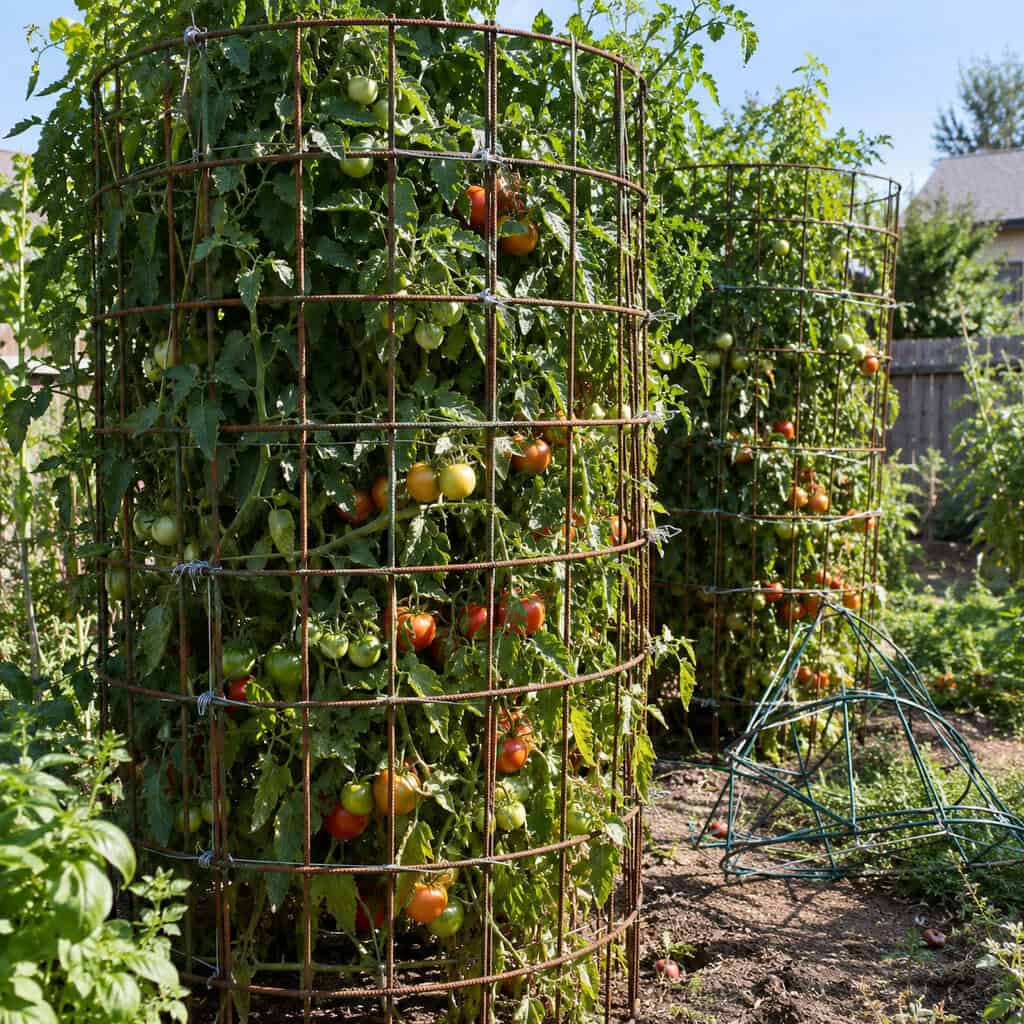
Buy the flimsy cone cages sold three for $12 and watch them buckle the first time a full-grown indeterminate tomato meets a thunderstorm — everyone knows it happens, and everyone buys them anyway.
She used a length of concrete reinforcing mesh or salvaged field fence, bent into a cylinder about 20 inches across and tied with wire. Six-inch openings, so a hand fits through to pick.
They last thirty years and stack flat against the garage wall in winter.
Grandpa’s version of the same idea was a pea trellis built from brush — the prunings off the apple tree stuck upright in the row, exactly what English gardeners called pea sticks. Free, and the peas didn’t know the difference.
4. Hand-Picking Bugs Into a Can of Soapy Water
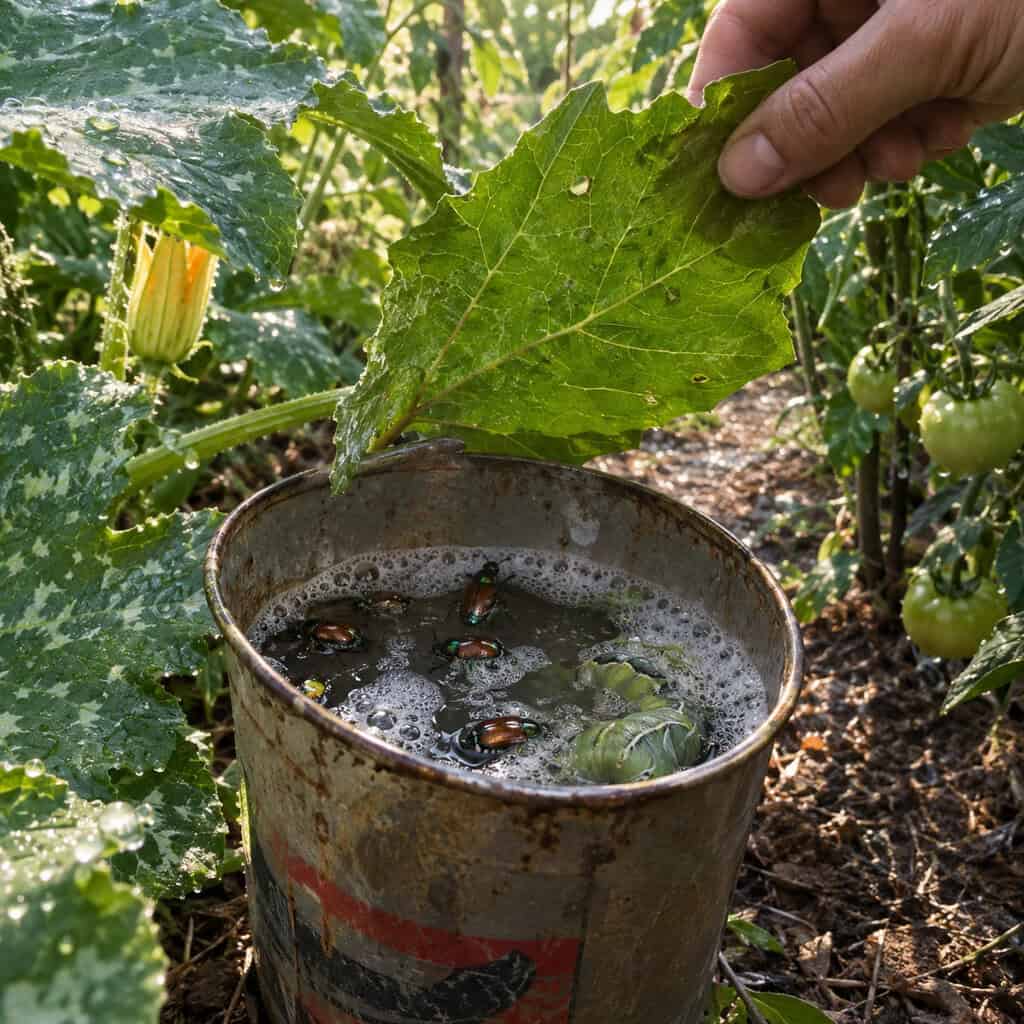
She’d walk the rows at first light, coffee can swinging, flicking cold-stiff beetles off the leaves and into water they’d never climb back out of.
This was integrated pest management before it had a name, and it costs nothing.
Tomato hornworms betray themselves with black pellet droppings on the leaves below — look directly above the mess, and you’ll find a caterpillar the size of your thumb. Pull it off and drop it in. But if it’s covered in white rice-like cocoons, leave it on the plant; those are parasitic wasps hatching, and they’ll go work on the rest of the hornworms for you.
Japanese beetles cluster on roses, grapes, and bean leaves in the July morning. Hold the can underneath and tap the leaf — they drop instead of flying when it’s cool. Never crush them on the plant, since the damaged beetles release an aggregation scent that calls in more.
Squash bugs are the stubborn ones. Check the undersides of squash leaves for bronze egg clusters along the leaf veins and scrape them off with a fingernail or a strip of duct tape. Lay a board flat on the soil overnight and the adults will hide under it — flip it at sunrise and sweep them in.
Cucumber beetles, Colorado potato beetles, and their fat orange larvae all go the same way. A drop of dish soap breaks the surface tension so nothing floats out.
Fifteen minutes a morning through the worst three weeks of summer. No spray drift, no re-entry interval, and nothing that harms the bees working the squash blossoms six inches away. If you want to know which of the insects out there are on your side, the good bug versus bad bug rundown sorts it out.
5. Letting Corn and Sunflower Stalks Double as Bean Poles

The order of operations mattered: corn or sunflowers went in first, and once they stood knee-high, pole beans were sown at the base to climb whatever was already there.
Farm papers were recommending this back in the 1880s, praising a thick sunflower stem as sturdier than anything you could buy. They weren’t wrong — a mammoth sunflower stalk holds a full bean vine without a wobble.
Give the corn a two-week head start or the beans will strangle it. And use pole beans, not bush.
The stalks stay standing through fall, then break down in the compost pile. A trellis that grows itself and then feeds the soil.
6. Repurposing Storm Windows Into a Cold Frame
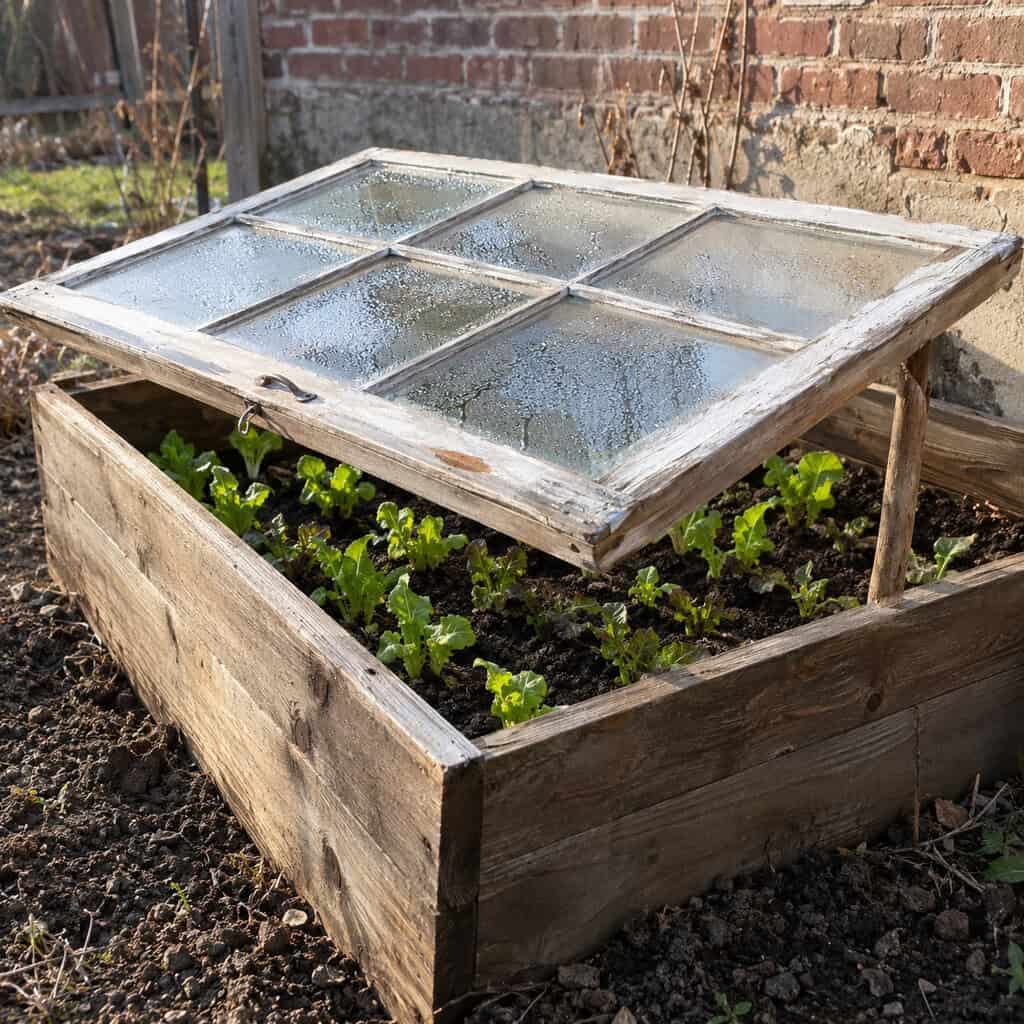
Every house had wood storm sashes, and every house eventually retired a few. One sash, four boards nailed into a slanted box, a shovel of hot manure underneath for bottom heat.
That bought six weeks on each end of the season.
Build the back wall higher than the front so the glass sheds rain and catches low winter sun. Face it south. Prop the lid open a few inches on any day above 50°F or you’ll steam everything inside.
The modern salvage is a glass shower door from a bathroom remodel — free on most curbs in spring, and it doubles as a hardening-off bench for seedlings in April.
7. Brewing Comfrey or Weed Tea Instead of Buying Bottled Feed

Take a five-gallon bucket, drop in a load of comfrey leaves or nettles or whatever had just come up out of the weeding, cover with water, and set the lid on — then forget it behind the shed for three weeks.
What came out was black, nutritious, and genuinely foul-smelling.
Comfrey’s deep taproot mines potassium and calcium from subsoil no vegetable can reach, which is why it was grown deliberately in old cottage gardens. Nettle tea leans nitrogen. Ordinary pulled weeds — before they set seed — give you a mixed feed made from plants you had to remove anyway.
Dilute it to the color of weak tea before it touches a plant, and pour it on the soil rather than the foliage. Put the bucket well downwind of the porch.
8. Laying Straw Down So the Sprinkler Stays Off
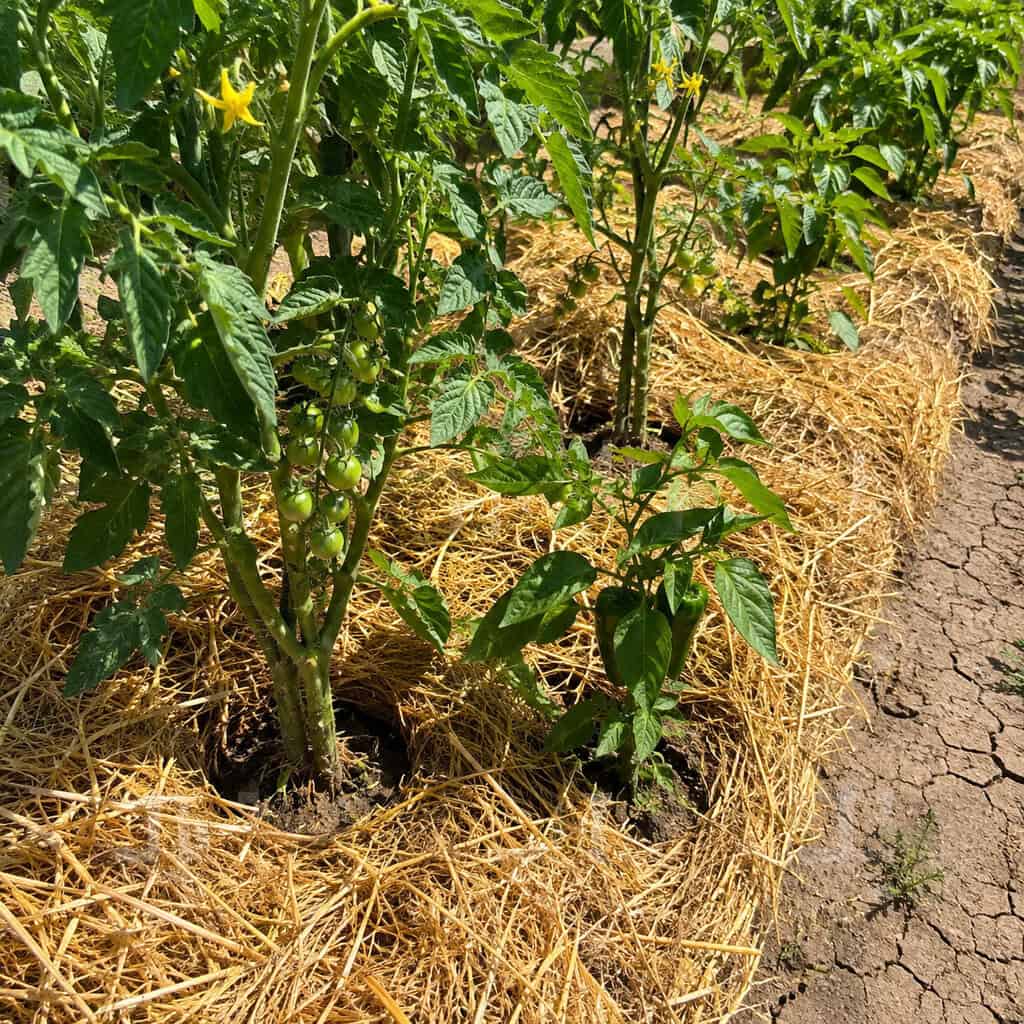
Hauling water was real work, so mulch became the shortcut: two or three inches of straw over the soil cut down how often she had to make the trip with a can.
It still does. Mulched beds hold moisture through heat that leaves bare soil cracked, and the weeds that would have needed pulling or spraying never germinate under it.
Straw, not hay. Hay is full of seed heads and you’ll be weeding grass all season.
Keep it pulled back an inch from tomato and pepper stems so the crowns stay dry.
9. Rooting Forsythia and Hydrangea From Nothing but Cuttings
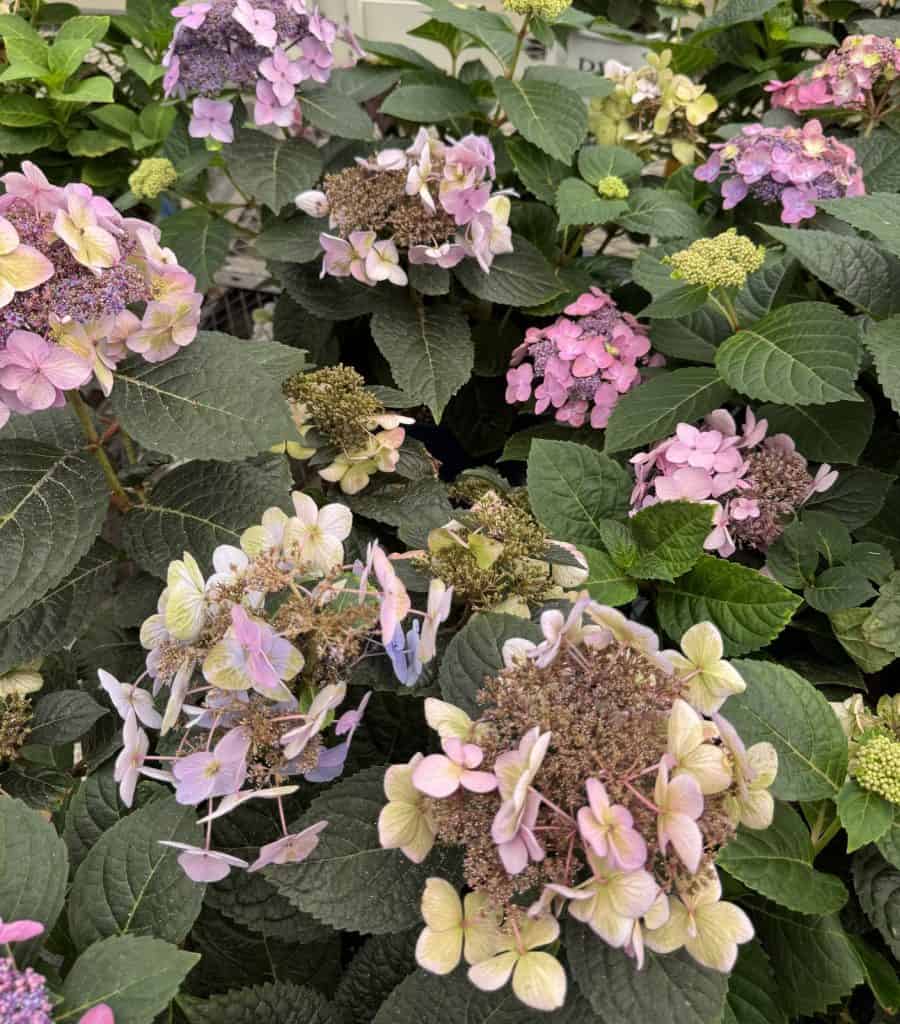
Once the leaves dropped in late fall, she’d snip pencil-thick lengths of that year’s growth into eight-inch pieces, bundle them, and heel them into a sand trench behind the garage.
By spring, roots.
Hardwood cuttings don’t need a mist bench, bottom heat, or any equipment at all — the dormant wood has stored enough energy to root on its own. Iowa State University Extension lists forsythia, hydrangea, dogwood, elderberry, blueberry, and viburnum among the reliable ones.
Cut the bottom just below a node and the top just above one, so you don’t plant it upside down in March.
A $40 shrub becomes a hedge for the price of a Saturday. One legal note: patented cultivars — anything tagged “PP#” or “asexual propagation prohibited” — can’t be propagated, even for yourself.
10. Stockpiling Raked Leaves Until They Become Leaf Mold
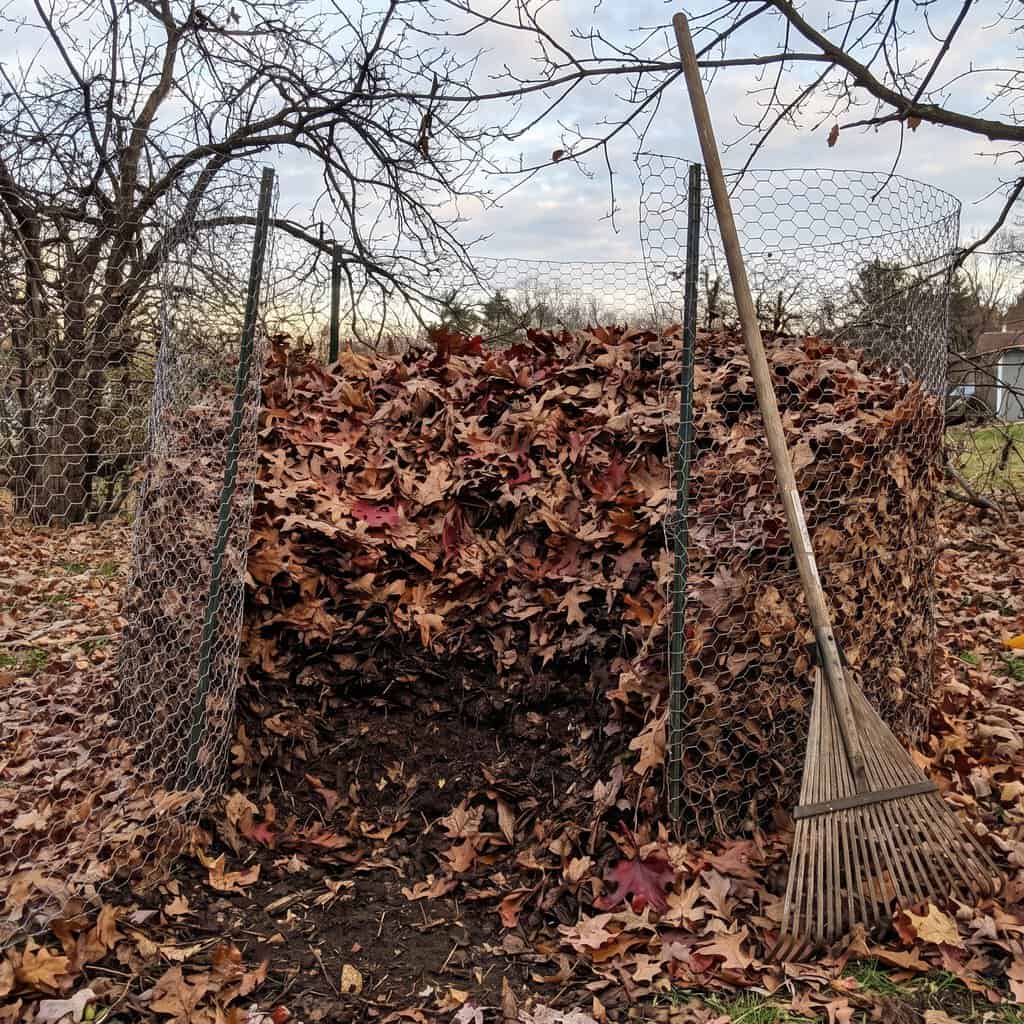
This wasn’t compost — it was a standalone chicken-wire pen, packed with leaves alone and left untouched for a year.
What comes out is leaf mold — dark, crumbly, spongy stuff that holds water like a sponge and beats every bag of “garden soil” sold at the big box.
The comedy of the modern version is hard to miss. People pay for bags, set them at the curb for pickup, then drive back in May to buy mulch.
Run the mower over the pile first. Shredded leaves break down in about twelve months instead of two years, and they won’t mat into a wet shingle layer.
11. Tucking Flowers Right In Among the Vegetable Rows
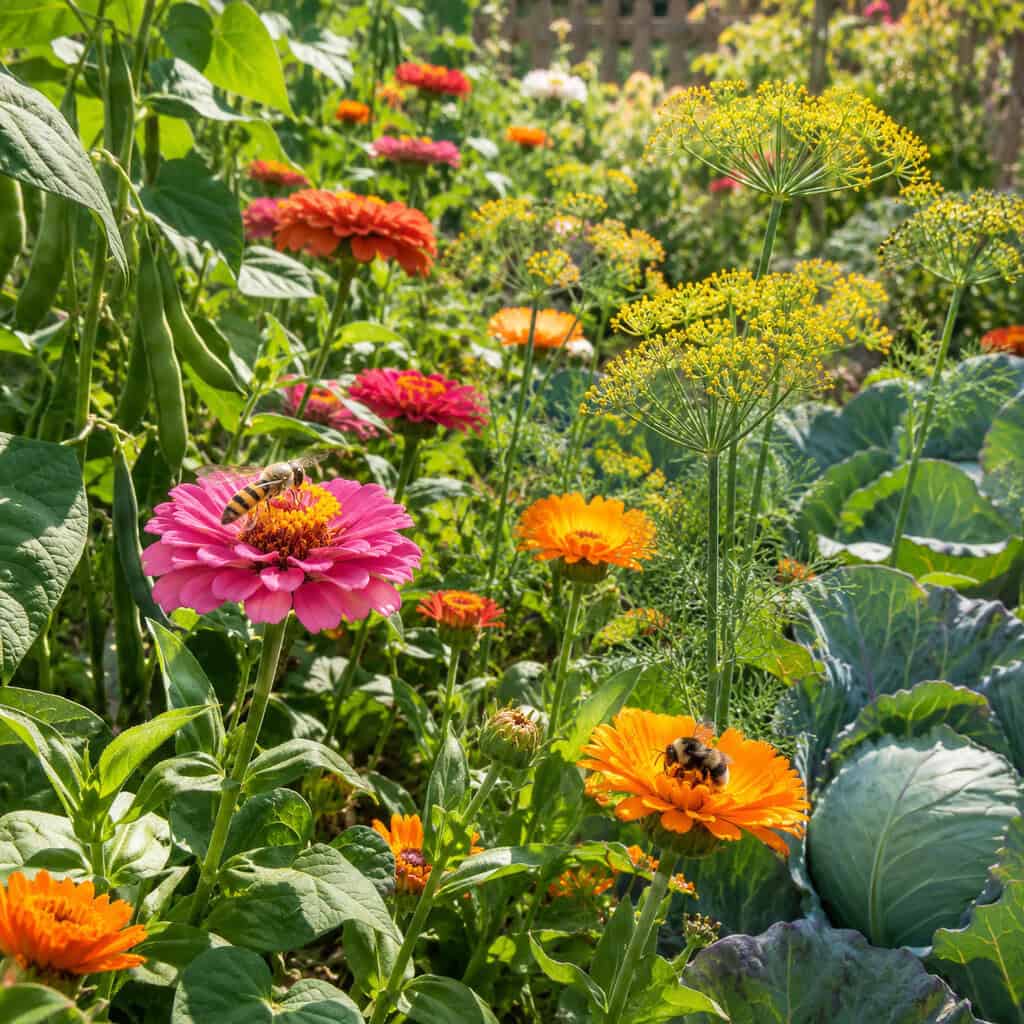
Zinnias anchored the end of the bean row, calendula wedged itself between cabbages, and dill and cilantro were left standing to bolt on purpose — it read as decoration, but it was doing real work.
Flowering plants in a vegetable bed pull in the pollinators that set squash, cucumber, and melon fruit — and more importantly, they feed the predators. Adult hoverflies, lacewings, and tiny parasitic wasps live on nectar and pollen, and their larvae are the things eating your aphids. Umbel flowers — dill, fennel, cilantro, yarrow, Queen Anne’s lace — have shallow florets that short-tongued beneficial wasps can actually reach. Sweet alyssum is the cheap workhorse for the same reason.
Now the myth-check, because this one gets repeated endlessly.
Marigolds do not repel pests from neighboring plants by smell. What French marigolds genuinely do is suppress root-knot nematodes — but only when grown as a dense solid cover crop for a full season and then tilled into the soil. A border of six marigolds along the tomato row accomplishes essentially nothing against nematodes.
Plant them anyway if you like them. Just plant them for what they actually deliver: nectar, pollen, and a bed that’s busy with insects working for free. If you want a broader plan, the pollinator garden guide gets into which blooms carry which season.
Let a few herbs flower instead of pinching every bud. Leave the last of the broccoli to bolt yellow. The bugs that show up to those flowers are the ones you’d otherwise be buying spray to replace.
12. Making a Safe Soap Spray for Aphids (and Fixing the Old Recipe)

Grandma shaved a bit of bar soap into a bucket of water and doused the rose canes with it, and the underlying science holds up: the fatty acid salts strip the waxy coating off soft-bodied insects and they dehydrate.
The modern version needs an honest correction.
What she used was true soap: potassium or sodium salts of fatty acids, the kind of thing Fels-Naptha or a plain castile bar still is. What sits under most kitchen sinks now is a synthetic degreasing detergent engineered to strip grease off a skillet, and it will strip the cuticle off a leaf just as efficiently. Scorched, bronzed, curled foliage two days later.
If you want the reliable version, buy a bottle of actual insecticidal soap — it’s around $10, lasts years, and is standardized. If you want the free version, use pure castile soap at roughly one to two teaspoons per quart of water, and no more.
Then follow the rules that keep it from backfiring:
- Patch-test one leaf and wait 48 hours before spraying the whole plant.
- Spray in early morning or evening, never in direct sun or above 90°F.
- Wet the undersides of leaves — that’s where aphids and whiteflies live.
- Rinse tender plants with plain water a few hours later.
Soap only kills on contact, so it does nothing after it dries and you’ll need to repeat every five to seven days. Ferns, nasturtiums, sweet peas, and anything with a waxy blue bloom on the leaves are the usual burn victims — test those twice. And never add oil, bleach, or degreaser to “boost” it.
13. Sheet-Smothering Weeds With Paper and Cardboard Under Mulch
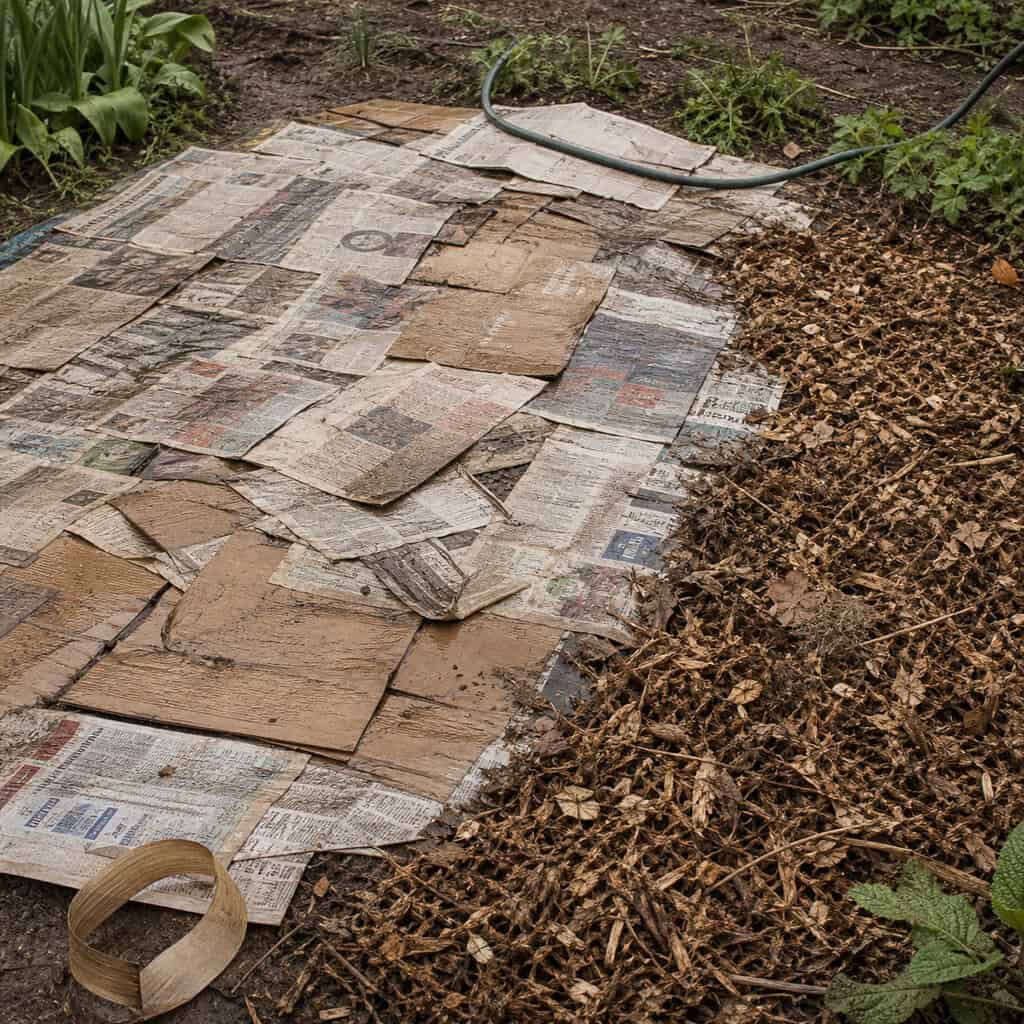
Six soaked sheets of newspaper, overlapped across the bed and topped with a couple inches of straw or shredded leaves, did the job — and flattened cardboard works the same way in a single layer.
Weeds underneath starve in the dark. By the following spring the paper is gone into the soil and the worms have moved in under it.
Pull the packing tape and staples off cardboard first — that plastic stays forever. Skip glossy inserts and coated ad circulars.
Standard black newsprint ink has been soy- or carbon-based for decades, so the old worry about lead and heavy metals no longer applies to the news pages.
14. Soaking the Roots Deeply Instead of Misting the Leaves
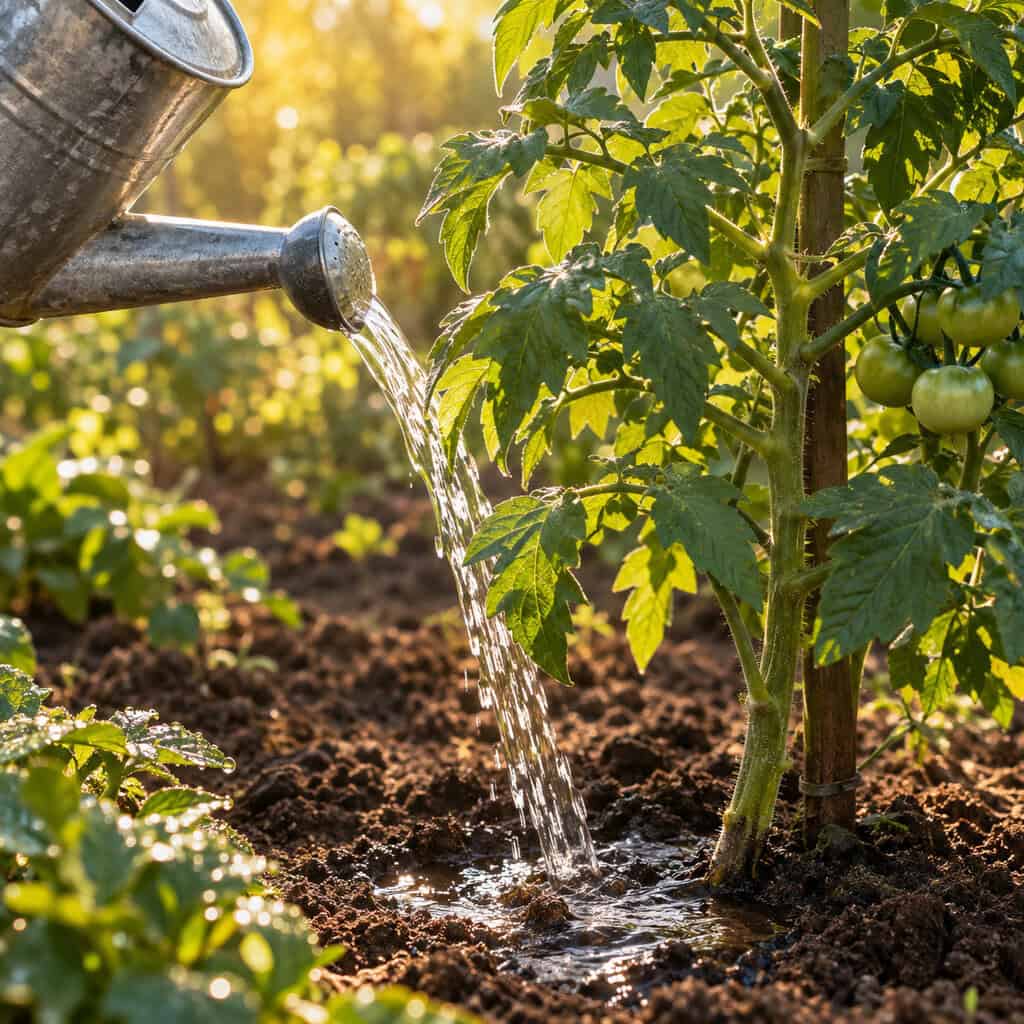
Back when water meant a well and a hand pump, nobody stood around lightly misting leaves for the fun of it.
She soaked the ground thoroughly twice a week and left it alone in between. Roots chase moisture downward, so deep infrequent watering builds a deep root system that can ride out a dry week on its own.
A daily sprinkle does the opposite — shallow roots, constant dependence, and wet foliage overnight that invites early blight and powdery mildew.
Water before 9 a.m., at the base, about an inch a week including rain. A homemade soaker hose from an old garden hose does the same job as the watering can without the trips.
15. Choosing Crops That Actually Earned Their Space
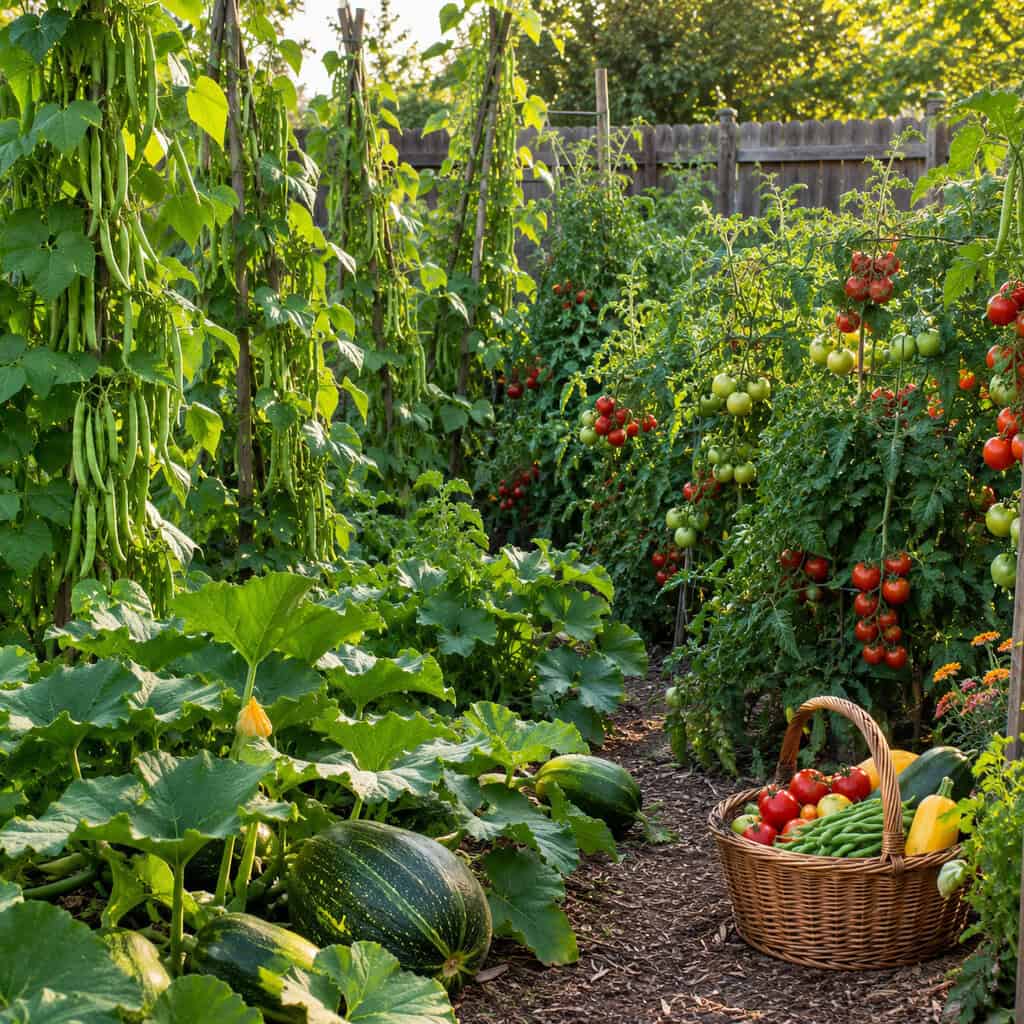
Before any technique came the crop list, and the crop list was where the real frugality started.
She grew pole beans, tomatoes, winter squash, potatoes, and greens — things that yield heavily per square foot, cost real money at the store, and either store or can. Not a row of twelve novelties that nobody in the house liked.
One pole bean plant produces for two months. One head of iceberg lettuce produces once, and costs $2 at the store.
Herbs are the modern version of the same math. A packet of basil seed runs $2; a plastic clamshell of cut basil runs $3.50 and lasts four days. Grow the expensive things.
16. Regrowing Vegetables Straight From the Grocery Bag

Sprouted pantry potatoes got cut into chunks and planted; a garlic head that split into a dozen cloves went into the ground in October and returned as a dozen heads in July. Onion sets, shallots, ginger, celery bottoms, and sweet potato slips off a forgotten tuber all grew the same way.
Two honest caveats apply. Grocery potatoes and garlic can carry disease that certified seed stock is screened for, and supermarket potatoes are often treated with a sprout inhibitor that leaves them sulking in the ground.
Treat it as a bonus round, not a replacement for certified seed potatoes when you’re planting a real row. There’s a whole category of grocery-store food that regrows if you’re curious how far it goes.
17. Timing Purchases Around Bare-Root Stock and Clearance Racks
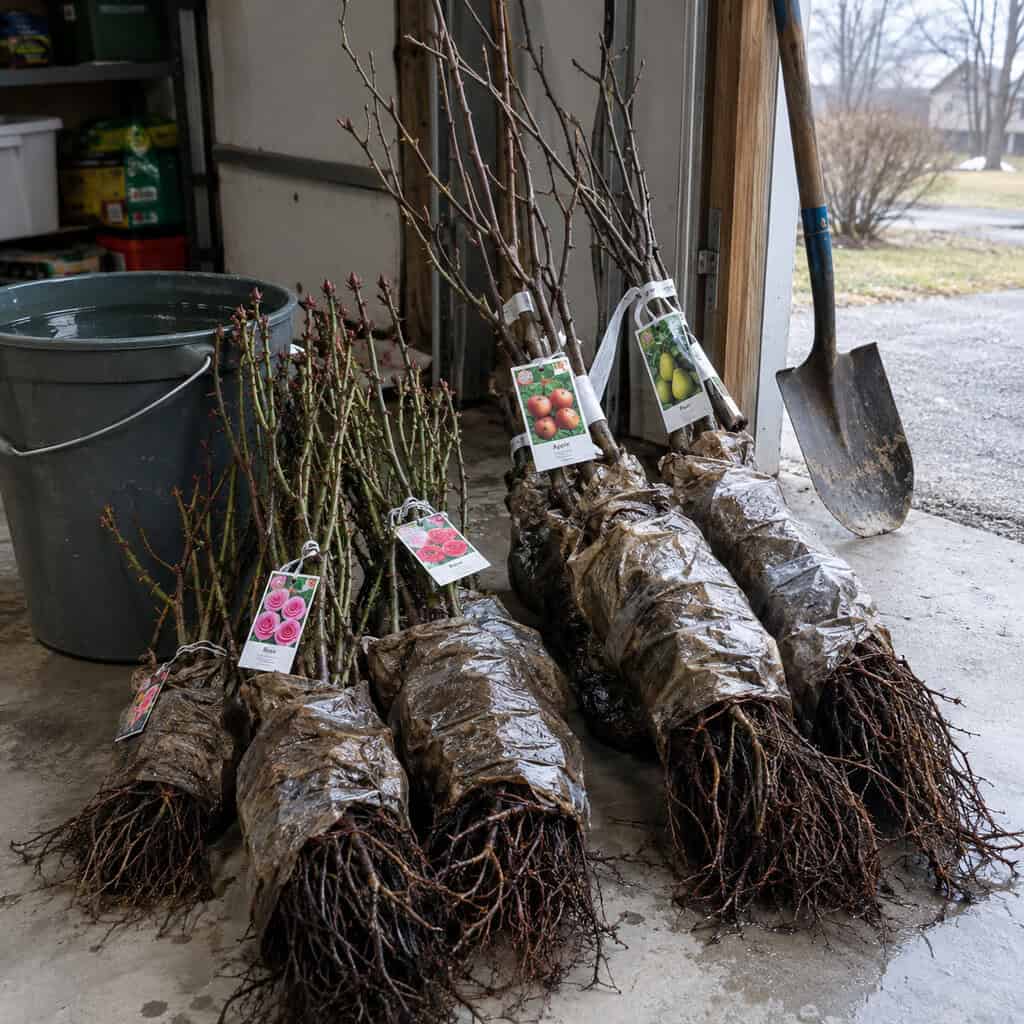
The seed catalog showed up in January, and what she ordered from it arrived in March as bare sticks wrapped in damp packing.
A bare-root rose or fruit tree costs a third to half of the same plant potted in five gallons of soil, and it establishes faster because the roots were never circled inside a container. Soak them overnight and get them in the ground while they’re dormant.
The other half of the habit was patience. Nurseries cut perennials and shrubs 50 to 75% in late summer because they don’t want to overwinter the inventory.
The plants look terrible. They’re fine. Water them in well and they’ll spend fall making roots while you’re not watching.
18. Keeping Her Own Seed Instead of Buying It Fresh Every Spring

Rebuying seed each year would have struck her as strange — instead, a few of the best tomatoes never made it to the table, getting squeezed into a jar, fermented a few days, rinsed, and dried on a windowsill plate.
The catch is modern. Seed saved from an F1 hybrid won’t come back true, so the tomato you loved turns into something smaller and stranger next July.
Stick to open-pollinated and heirloom varieties. Beans, peas, lettuce, tomatoes, and peppers are the easy starting five — they self-pollinate, so they stay honest. Squash and cucumbers cross with abandon and will humble you.
The University of Minnesota Extension lays out which crops forgive a beginner and which ones need isolation distance. Dry the seed thoroughly, label it, and keep it cool in a paper envelope inside a sealed jar.
19. The Bearded Iris That Came From Over the Fence
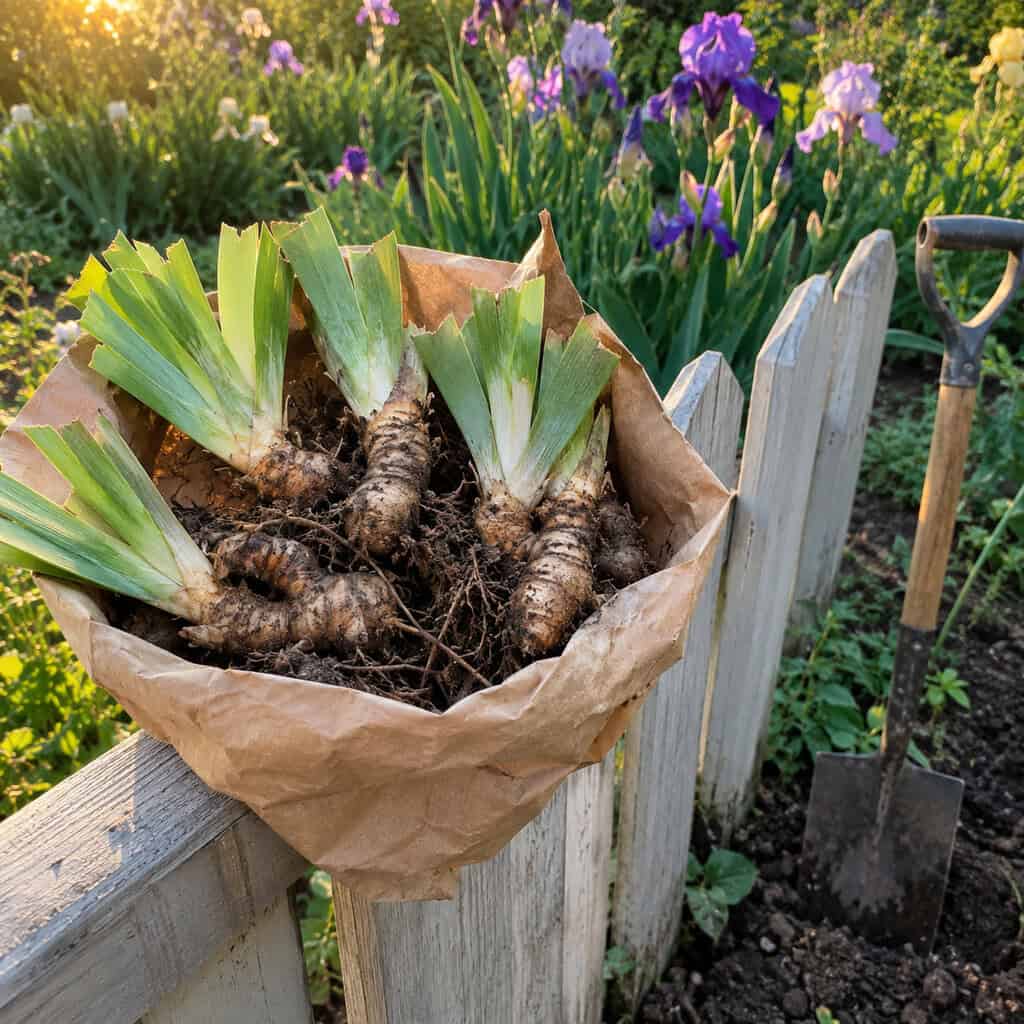
A clump of bearded iris in a grocery sack, handed over the fence in July because hers had gotten crowded and needed dividing anyway — that’s how half the plants in an old neighborhood got where they are.
Perennials want dividing every three to five years — iris, daylilies, hosta, peonies, phlox, ornamental grasses. The division isn’t a favor to the neighbor. It’s maintenance that happens to produce free plants, and those plants became a kind of local currency. Two fans of iris for a start of rhubarb.
Pass-along plants carry names that aren’t on any tag. Aunt Ruby’s peony. The orange daylily from the old Hansen place.
Some of the iris blooming in yards this spring are literal divisions of divisions of divisions — the same plant, still going, passed hand to hand across seventy years. You can’t buy that at any price, and it was always free.
20. Luring Slugs Into Beer Cans and Board Traps

Sink a tuna can flush with the soil, fill it an inch deep with cheap beer, and slugs come for the yeast, fall in, and don’t leave — just empty and refill it every couple of days, especially after rain.
The board trap is even simpler: lay a scrap of one-by-six flat on damp soil near the hostas or the lettuce. Slugs crawl underneath at daybreak to hide from the sun. Flip it midmorning and scrape them into soapy water. Overturned grapefruit halves and old shingles work the same way.
What makes this worth keeping isn’t only the price. Metaldehyde slug bait is genuinely dangerous to dogs — it’s neurotoxic, it’s often formulated in a bran pellet that dogs find appealing, and a curious lab that eats a scattered handful is an emergency vet visit. Iron phosphate baits are the safer commercial option, but a beer trap costs less and poses no risk at all.
There’s a newer trick worth adding. Research summarized by Oregon State University Extension found that caffeine solutions drive slugs out of treated soil and can kill them outright — so used coffee grounds worked lightly into a bed do double duty.
Water in the morning rather than at dusk, too. A bed that’s dry by nightfall is a bed slugs would rather skip.
21. Overwintering Geraniums and Dahlias in the Cellar Instead of Rebuying

Rather than buy the same red geraniums every May, she cut them back hard in October, knocked most of the soil off, and hung them upside down in the cellar — or potted them small and let them sit nearly dry on a basement shelf until March, when they came up to the light, got watered, and pushed new growth.
Dahlia and canna tubers got lifted after the first frost blackened the tops, dried a few days, and packed into a crate of barely damp peat or sawdust at 40 to 50°F. Check them in January and spritz if they’re shriveling.
Four flats of annuals now runs $60. A single dahlia tuber runs $12 and becomes a clump you divide into five.
22. Mailing a Soil Sample to the County Agent Before Buying Anything

This is the least romantic entry on the whole list, and also the one that quietly saves the most money.
Cooperative Extension soil testing spread through the 1940s, and a box of dirt mailed to the county agent came back with numbers: pH, phosphorus, potassium, organic matter, and a recommendation. Most states still run the same service for $10 to $20.
Everything you buy without that test is a guess. Lime you didn’t need. Phosphorus already sitting there at excessive levels. A general-purpose fertilizer that ignores the one thing actually short.
This is also where the kitchen hacks come apart. Crushed eggshells do contain calcium carbonate, but they break down so slowly that N.C. Cooperative Extension puts the practical benefit at essentially nothing for the current season — and most soils already hold plenty of calcium. Blossom end rot is a water-uptake problem, not a calcium shortage.
Epsom salt is the same story. Unless a test shows a magnesium deficiency, you’re adding something the soil doesn’t need.
Test every three or four years. It’s the cheapest way to stop buying things.
23. Canning and Putting Up the August Overflow

Picture the kitchen at 95 degrees in mid-August, windows fogged, jars rattling in the canner — nobody stood over that pot for enjoyment.
They did it because a garden that rots on the vine in September saves nothing in February.
Quarts of tomatoes, dilly beans, bread-and-butter pickles, applesauce, and the crocks of sauerkraut in the basement — that’s where the savings actually lived. A row of tomatoes is a summer luxury; forty quarts of them is a grocery bill that doesn’t happen.
Modern food safety isn’t optional here. Use tested recipes from the National Center for Home Food Preservation or your state extension, published after 1994. High-acid foods — tomatoes with added acid, pickles, fruit — can go in a boiling water bath. Low-acid vegetables, green beans, corn, and anything with meat require a pressure canner, full stop, because botulism spores survive boiling.
The freezer handles the rest. Blanch, cool fast, bag flat.
24. Logging Frost Dates and Failures on the Kitchen Calendar

Last frost, May 12. Peas in March 28, up April 10. Squash bugs bad again — move them next year. Lettuce bolted the week it hit 85 — all penciled on the back of the feed store calendar hanging in the kitchen.
Those notes meant she never paid twice for the same mistake. She knew which tomato actually produced in her yard, which corner stayed wet in June, and exactly when it was safe to set out peppers — not the county average, her yard.
The cheapest garden tool ever made is still a pencil.
25. Sprouting Seedlings in Egg Cartons on the Windowsill
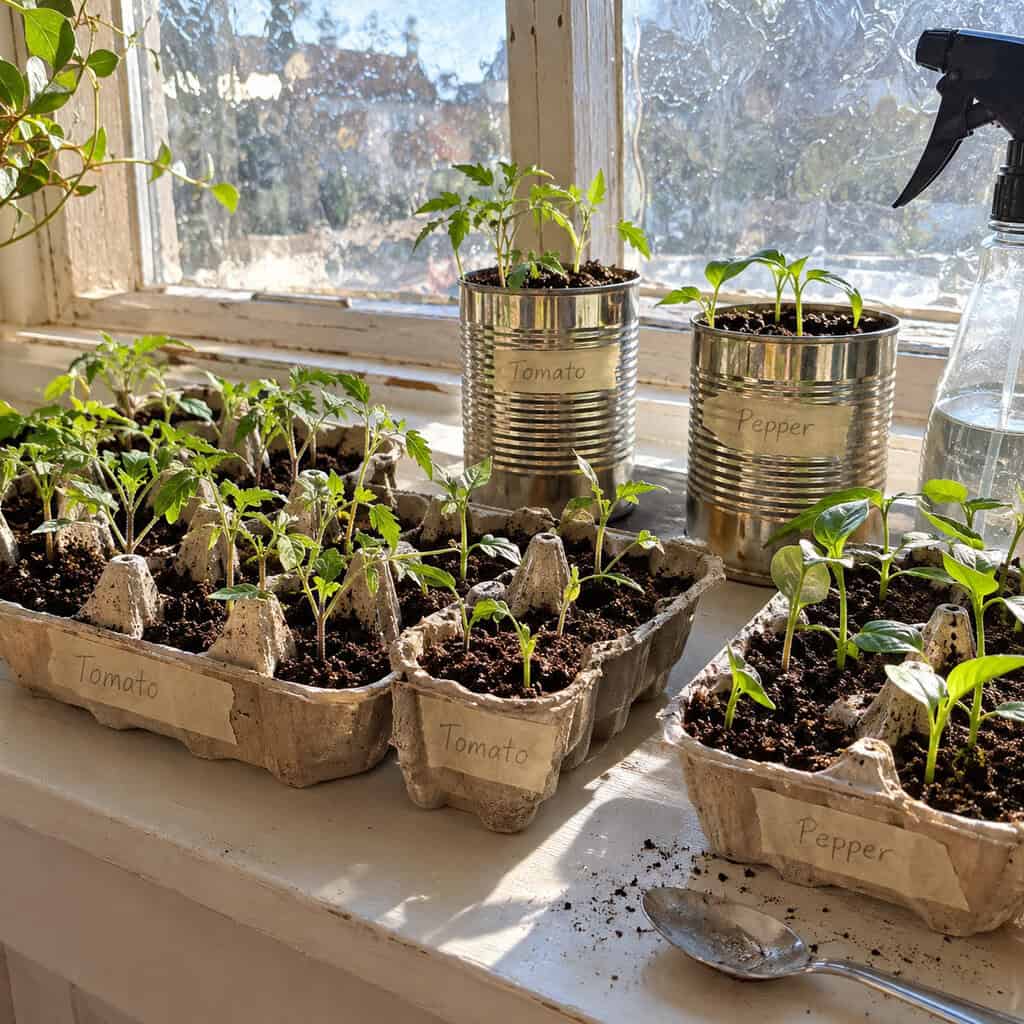
By 1943 there were roughly 20 million victory gardens across the country, and almost none of them started from bought transplants — people started flats in egg cartons, tin cans, and newspaper rolled around a jar instead.
A single tomato seedling at the garden center now runs $4 or $5. A packet of 30 seeds runs $3.
Do the math once and you’ll never buy a six-pack again.
Egg cartons dry out fast and the cells are shallow, so treat them as a two-week stop before you move seedlings into a deeper container. Give them the brightest south window you have, or a $20 shop light hung two inches above the leaves — windowsill-only seedlings stretch and flop.
26. Protecting Seedlings With Upturned Jars and Open-Ended Cans
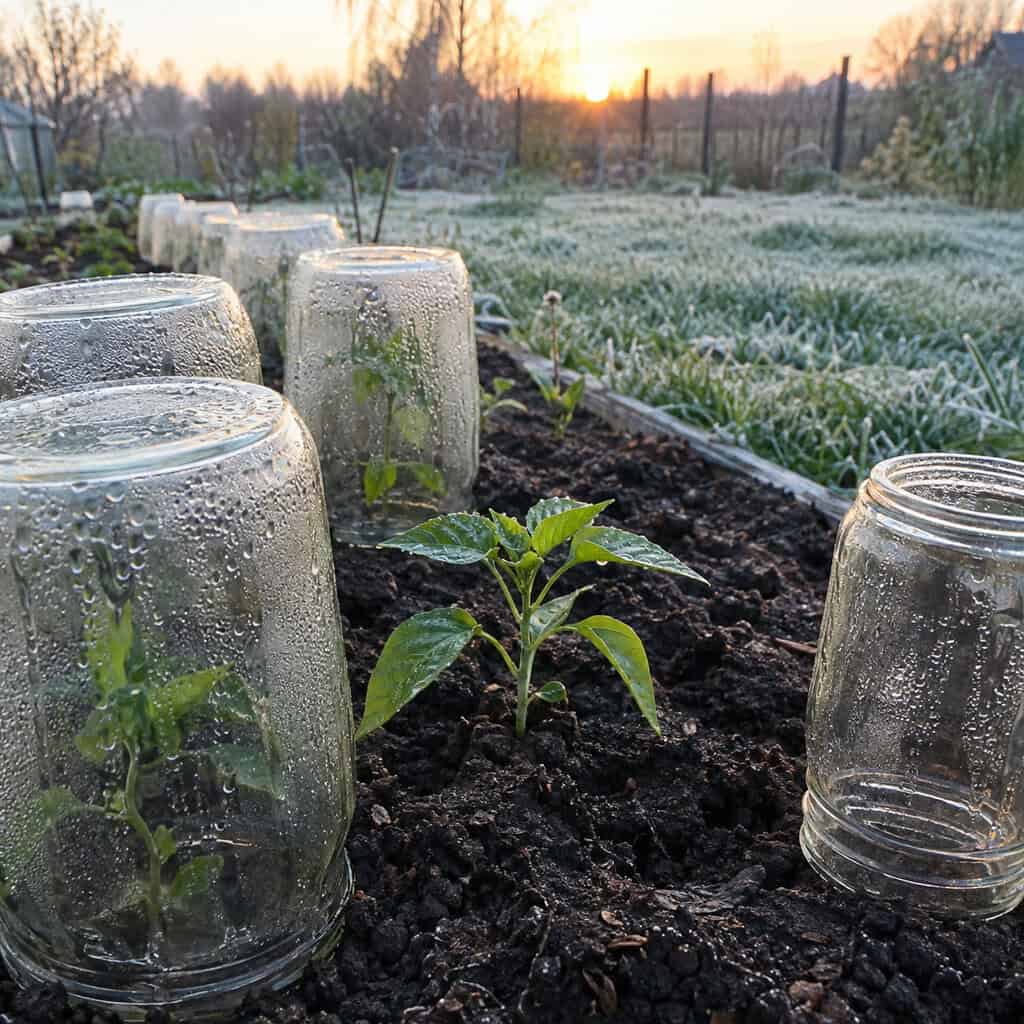
A quart canning jar turned upside down over a pepper seedling handled a cold May night, and a coffee can with both ends knocked out and pushed into the soil made a cutworm collar — free cloches, decades before anyone sold a plastic one.
The danger is real and immediate: a clear jar in morning sun becomes an oven, and a seedling can cook by nine a.m. Lift them at sunrise, every single time, or prop them with a stick.
Gallon milk jugs with the bottoms cut off are the forgiving version — the cap comes off during the day for ventilation and goes back on at dusk.
27. Squeezing Two or Three Harvests Out of One Row
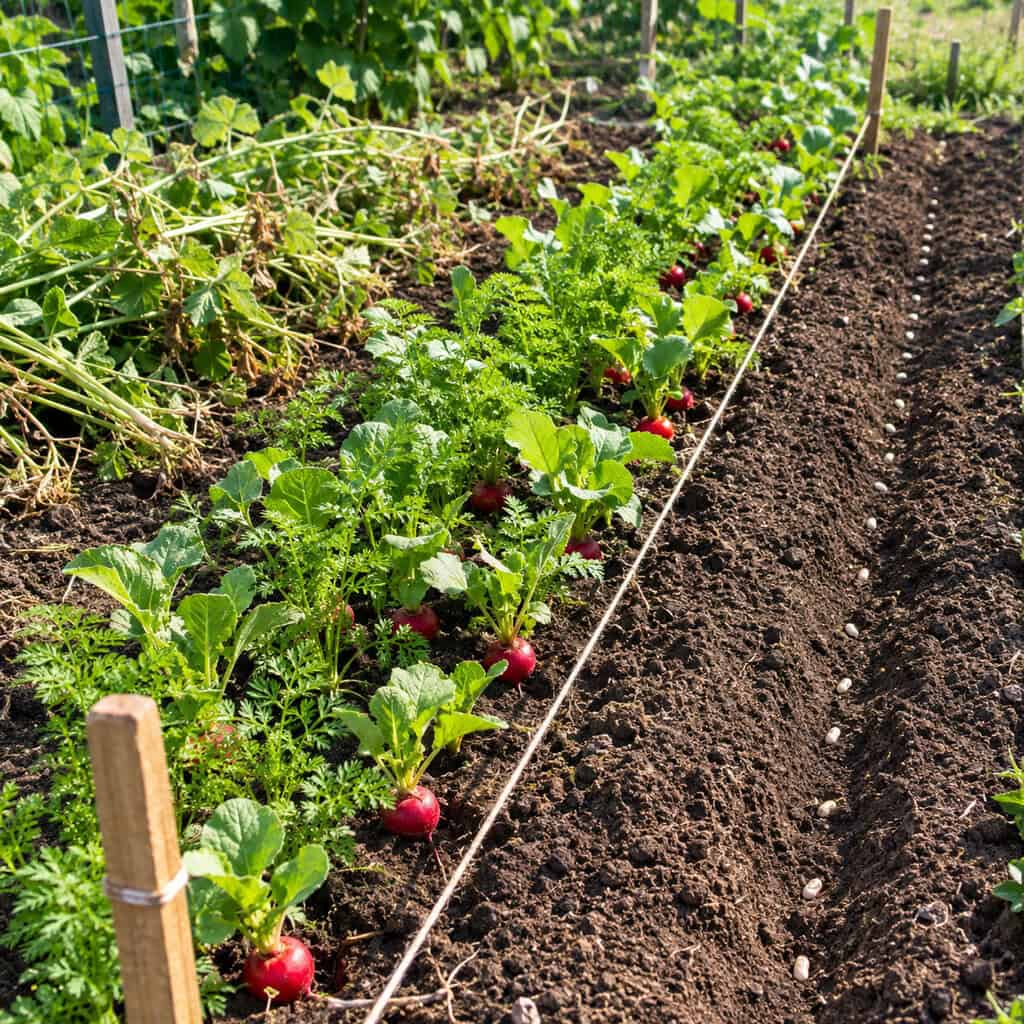
Radishes sown between the carrot seed came out in 25 days, well before the carrots needed the room, and the pulling loosened the soil around them; peas came out in early July and bush beans went into that same ground the same afternoon.
That’s succession sowing and interplanting, and it’s what Depression-era gardeners did with a small dug plot and no money for more seed. Lettuce sown every two weeks instead of all at once. Spinach under the tomato cages before the vines shade the ground.
Same seed packet, same square footage, two or three times the harvest. Feed the bed a shovel of compost between crops and it’ll keep up.
28. Sharing One Tiller Around the Whole Block
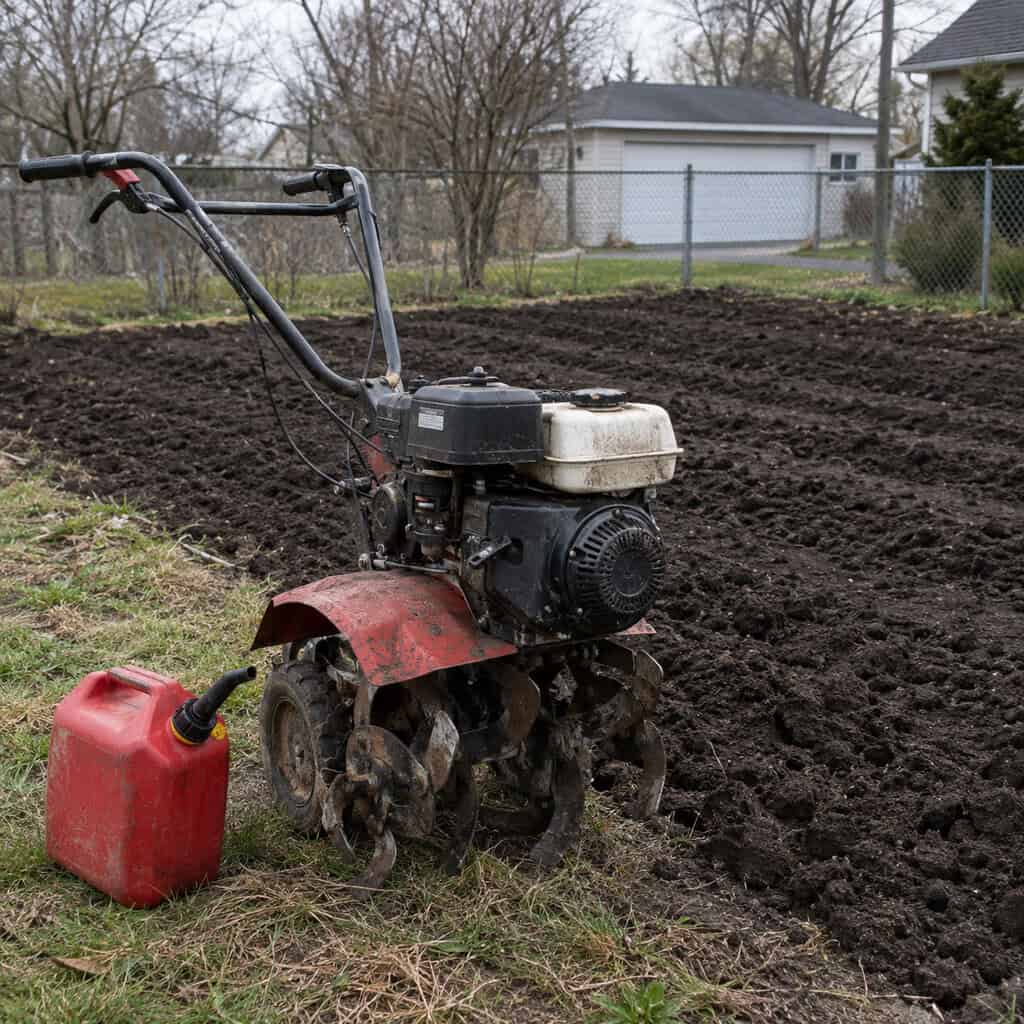
There was exactly one rear-tine tiller on the block, and every April it made the rounds from garage to garage — bring it back with a full tank of gas, and that was the entire arrangement.
A machine you use for four hours a year is a terrible thing to own. It costs $800, takes up floor space for 361 days, and the carburetor gums up between uses.
Rental is the obvious substitute at $60 to $90 a day. But the better modern version is a tool library — hundreds of public library systems now lend out tillers, chippers, post-hole diggers, and pressure washers on a library card.
Check what your county extension office or public library actually offers before you buy anything with an engine. Then be the neighbor who lends.
29. Hauling Home Aged Manure From a Neighbor’s Barn
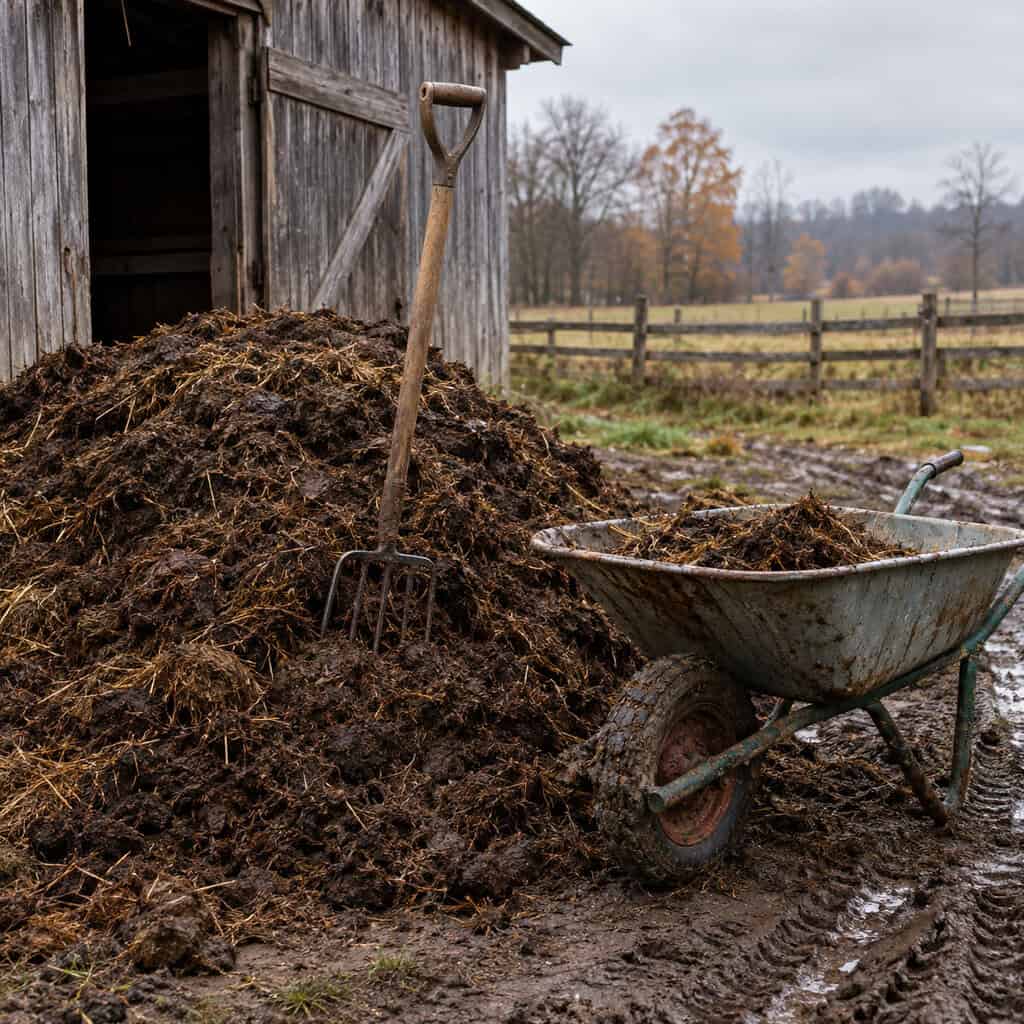
Somebody down the road always had horses and wanted the pile gone just as badly as she wanted it — that’s still true today; call a small boarding stable and you’ll usually be told to back the truck up and help yourself.
Age matters more than source. Fresh manure is high enough in ammonia to burn roots, and it can carry pathogens you don’t want near food.
Compost it at least six months, or spread it on empty beds in fall and plant in spring. The standard food-safety guidance is 120 days between raw manure and harvest for crops touching the soil.
Skip anything from a pasture recently sprayed with persistent broadleaf herbicides — aminopyralid survives the animal, survives the compost pile, and will curl your tomato leaves into corkscrews.
30. Catching Roof Runoff in a Barrel Under the Downspout
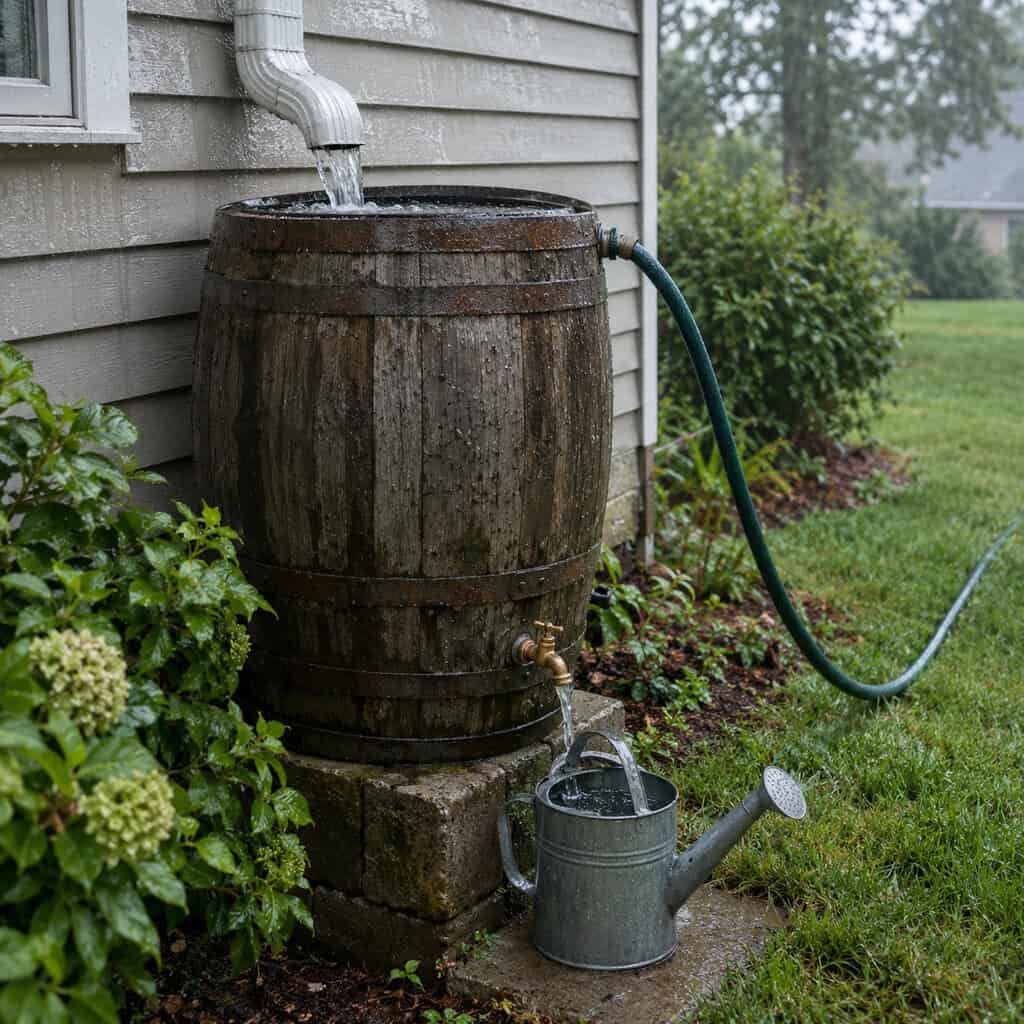
An inch of rain on a 1,000-square-foot roof sheds roughly 600 gallons, and she caught a fraction of that in a wooden barrel that watered the whole vegetable patch through a dry June without touching the meter.
Two things to settle before you set one out.
First, check your state and municipality. Colorado capped residential rainwater collection at two barrels by statute, and a handful of western states regulate it in some form. Most of the country doesn’t care at all, but look before you buy.
Second, use barrel water on the soil, not on the leaves of anything you’ll eat raw. Roof runoff carries whatever’s on the shingles — bird droppings, grit, asphalt granules. Drip it at the base of tomatoes and squash and you’ll never think about it again. Skip it on spinach and lettuce heads.
Siting matters more than most people expect. Set the barrel on a level base of concrete blocks or pavers, not on soft dirt — a full 55-gallon drum weighs over 450 pounds, and one that tips sideways can crack a foundation parge coat or take out a hose bib.
Then deal with the overflow before the first real storm, because this is where the savings turn into a repair bill:
- Run an overflow hose from the top of the barrel out at least six feet from the house.
- Keep the soil around the foundation sloped away — about six inches of fall over the first ten feet.
- Screen the inlet so leaves and mosquitoes stay out.
- Drain and flip the barrel before hard freeze, or the ice will split the seams.
A barrel that dumps its overflow straight into the dirt against the wall is just a very slow basement leak. Route it, and you get free irrigation with none of the regret.
31. Leaving Grass Clippings Right Where the Mower Dropped Them
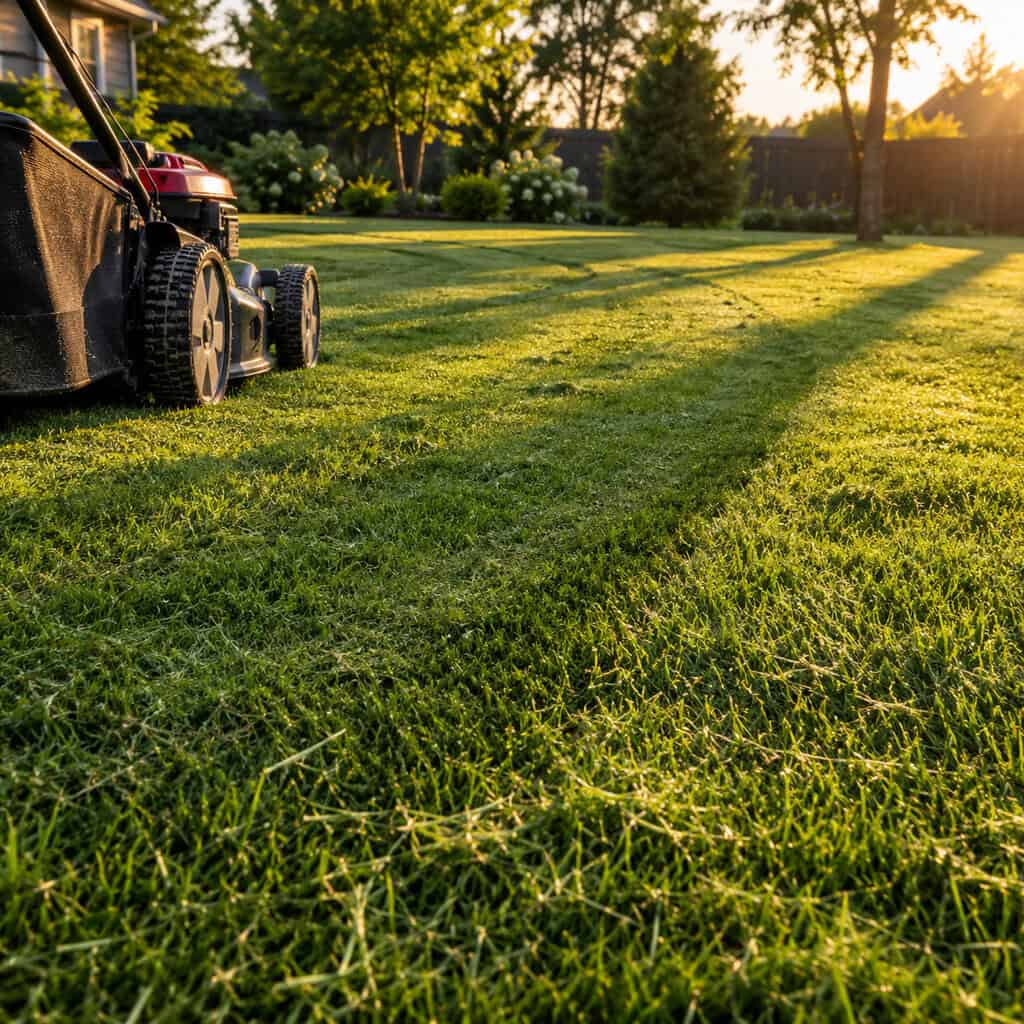
Before the bagging mower took over in the 1960s and ’70s, clippings simply fell and stayed — nobody even thought of it as a technique, yet it was quietly the best free fertilizer application on the whole property.
Clippings are roughly 4% nitrogen by dry weight, and returning them supplies something like a quarter of a lawn’s annual nitrogen need. That’s a whole fertilizer bag you don’t buy, every year, forever.
The thatch worry is a myth that refuses to die. Thatch is built from roots, stems, and stolons — the tough, lignin-heavy tissue — not from leaf blades, which are mostly water and break down within a couple of weeks. Overwatering and over-fertilizing cause thatch. Clippings don’t.
A few rules make it work instead of making a mess:
- Mow when the grass is dry, not soaked with dew.
- Take off no more than a third of the blade height at a time.
- Keep the blade sharp so it cuts rather than tears.
- Mow more often in the spring flush instead of letting it get shaggy.
If you let it get ahead of you, cut high first and then cut again two days later — the same approach that works for grass that’s gotten too long.
Dry clippings also make a fine vegetable mulch, but keep the layer under an inch and let them dry a day first. Thick piles of green clippings mat, turn slimy, and go anaerobic. Never use clippings from a lawn treated with a broadleaf herbicide around tomatoes or beans — the residue carries.
32. Stashing Onions in Old Stockings and Potatoes in Sand

Growing the harvest was the easy part; storing it was where the garden actually paid off. Onions went into old stockings knotted between each bulb and hung in the stairwell for airflow on every side, snipped off one at a time from the bottom, while potatoes went into a wooden crate layered with barely damp sand or sawdust in the coolest corner of the cellar.
The rules haven’t changed:
- Potatoes: cool, dark, and humid — never the refrigerator, which turns the starch to sugar.
- Onions and garlic: cool, dark, and dry, with air circulation.
- Winter squash: warm and dry, around 55°F, in a single layer not touching.
- Keep apples away from everything — the ethylene they give off sprouts potatoes and softens the rest.
Cure onions and squash for a week or two before they go into storage. An unheated basement corner, a closet on an outside wall, or an attached garage that stays above freezing all stand in fine for a root cellar.
33. Scattering Stove Ash Thin Instead of Dumping It in a Pile
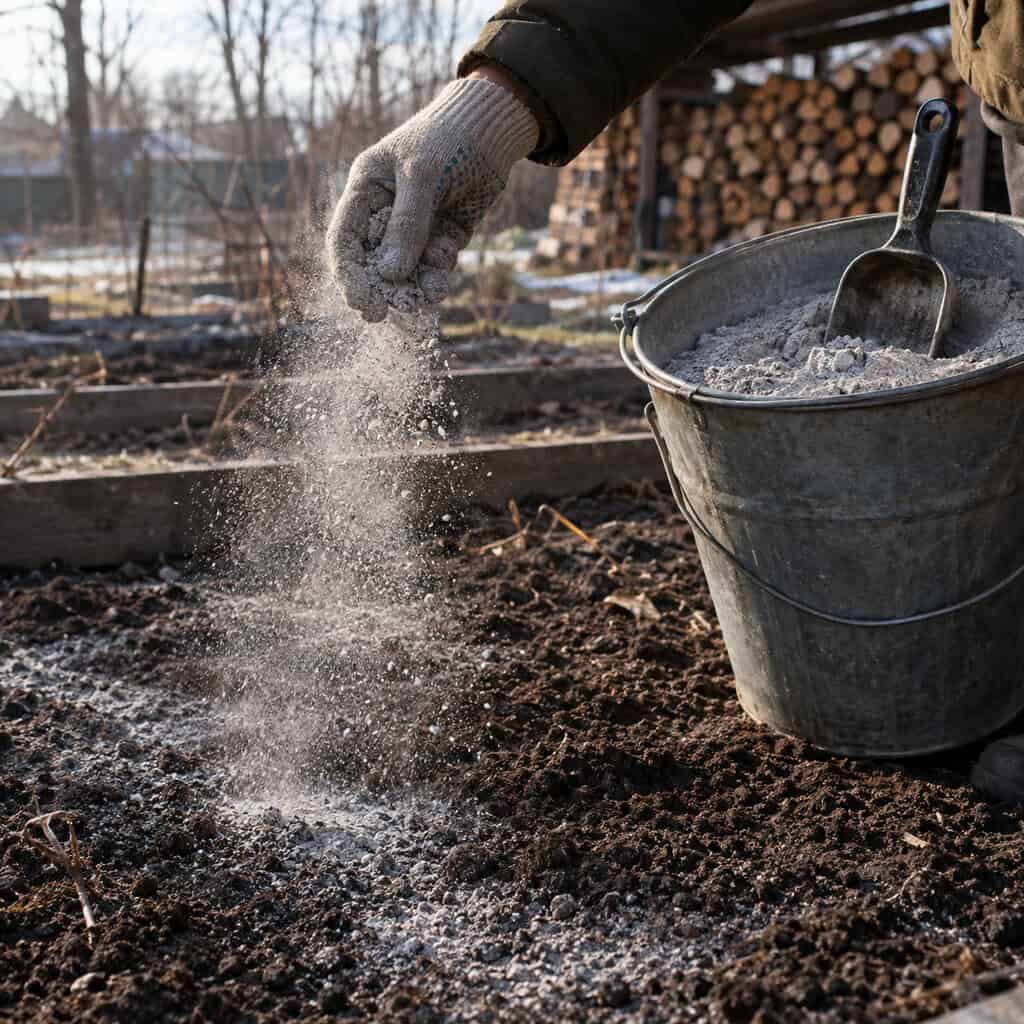
Ash from the wood stove went out over the garden in a thin, even scatter — never in a pile, never in the same spot twice.
It’s real potassium, plus calcium, and it raises soil pH at roughly half the strength of agricultural lime.
That liming effect is exactly the problem. On soil that’s already alkaline, ash makes it worse and locks up iron and manganese. Around blueberries, azaleas, rhododendrons, and potatoes, it’s actively harmful — blueberries want a pH near 4.5 and potatoes get scabby in sweet soil.
Test first. Then apply no more than about 20 pounds per 1,000 square feet in a year.
Only ash from clean, untreated wood. Never from charcoal briquettes, painted lumber, pressure-treated boards, or a burn pile that swallowed trash.
34. Moving the Rows Around Every Single Season
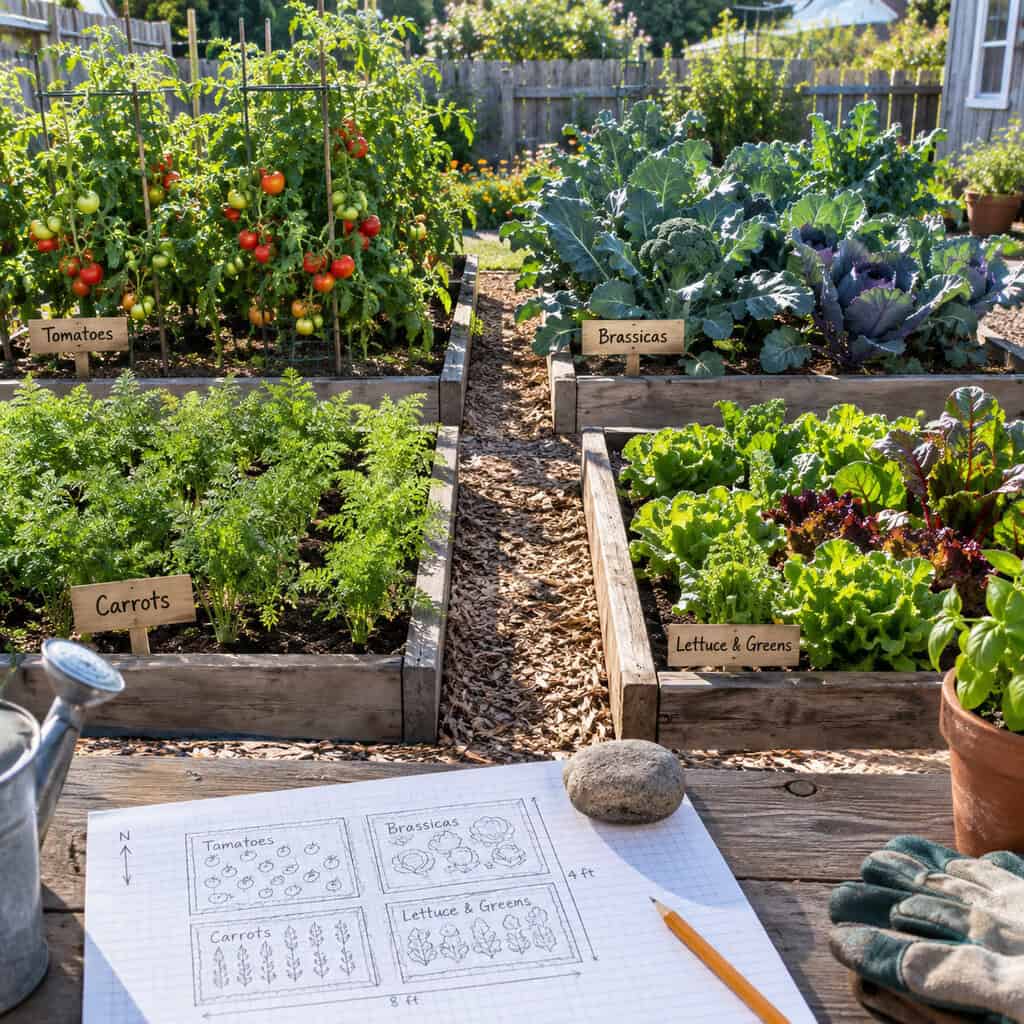
Nothing stayed put — tomatoes moved, and so did the squash, the cabbage, and the potatoes.
Soilborne disease and overwintering pests build up where the same family sits year after year — early blight, verticillium wilt, squash vine borer, Colorado potato beetle. Move the host and the cycle breaks.
Group by family, not by crop. Tomatoes, peppers, eggplant, and potatoes are all nightshades and count as one group. Three or four years before a family returns to the same ground.
Costs nothing but a sketch on paper in February.
35. Planting a Shade Tree Where the Afternoon Sun Hit Hardest

Nobody put a maple on the southwest corner for looks — they planted it because the kitchen turned unbearable at four in the afternoon and there was no air conditioning to fall back on.
West-facing walls and windows take the worst of the low late-day sun. A mature deciduous tree shading that side can cut cooling costs meaningfully — and because it drops its leaves, the same wall gets full sun back in January when you want it.
Plant it 15 to 20 feet out from the wall, not closer. Roots need room, limbs need clearance, and you don’t want a storm dropping one on the roof.
The catch is patience. A tree planted now shades the house in twelve years, which is exactly why the ones doing the work today were planted by somebody who never expected to get the full benefit.
36. Turning Kitchen and Yard Scraps Into a Compost Pile Out Back
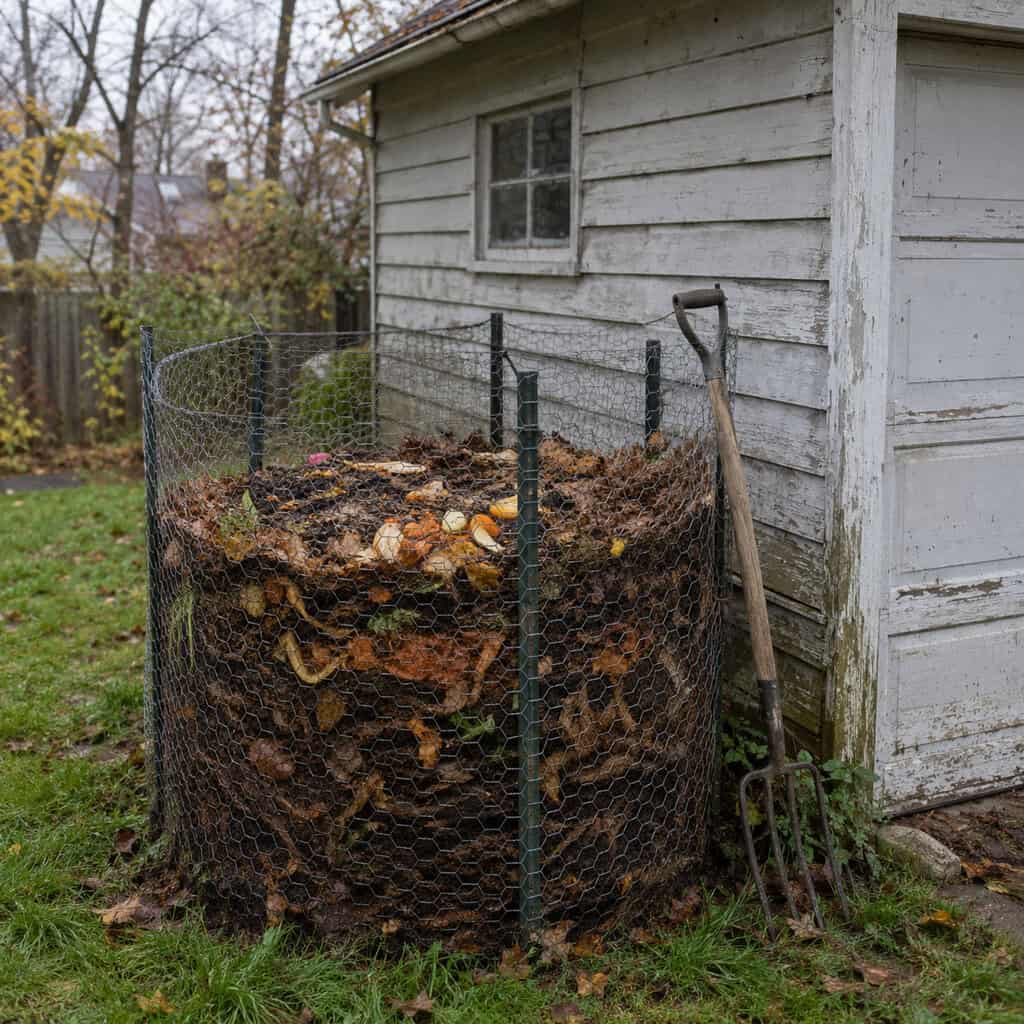
Four pallets, a ring of chicken wire, or just a heap — whatever the shape, potato peels, coffee grounds, eggshells, bolted lettuce, and frost-killed squash vines all went in, and nothing that could rot ever left the property.
That one pile replaced what now comes in plastic bags: soil conditioner, mulch, potting mix amendment, and most of the fertilizer. A cubic yard of finished compost runs $40 or more delivered. Hers cost the walk from the kitchen door.
Layer browns and greens roughly two to one, keep it about as damp as a wrung sponge, and turn it when you remember. It’ll finish either way. If you want the full mechanics, the beginner’s guide to composting covers ratios and troubleshooting.