

Drive through almost any neighborhood built before the mid-2000s and you don’t even need to look at the houses to guess their age.
The yards give it away first. A cluster of green orbs pressed against brick. A halo of red mulch ringing a pear tree. A lonely circle of flowers stranded in the middle of a lawn like nobody ever visits it.
None of it is ugly, exactly — it just looks like a choice someone made once, long ago, and simply never revisited.
The odd part is that money has almost nothing to do with it. Many of the elements that age a yard the fastest were pricey when installed — the fountain, the vinyl fencing, the pool deck. And most of the cures cost less than a single weekend spent spreading mulch.
Here are 29 things people do to their yards that quietly pack on twenty years of dated style.
1. Turning the Entire Backyard Into Hard Surface

The rise of “outdoor living” convinced plenty of homeowners to swap their whole backyard for pavement.
Designers now call out majority-hardscape yards as the trend on its way toward extinction. A patio built for a party you host twice a year feels cold and uninviting the other 363 days, and stamped concrete pretending to be brick or slate is the most dated version of all — the pattern visibly repeats every four feet, and the color coat wears thin first along the path everyone actually walks.
Drainage sends its own bill. Every square foot of impermeable surface sheds roughly 0.6 gallons per inch of rain, and that water has to land somewhere. Usually it pools in the low corner of the lot or drains straight back toward the foundation, which is exactly how a nice patio turns into a yard that floods every time it rains.
Tearing everything out isn’t always necessary. Here’s the real choice most homeowners face:
| Resurface | Partial Tear-Out | |
|---|---|---|
| Typical cost | $4-$9 per sq ft | $8-$20 per sq ft |
| Best when | Slab is sound, looks dated | Cracked, heaved, or drains wrong |
| Fixes drainage | No | Yes |
| Timeline | 2-3 days | 1-2 weeks |
| Result | Same footprint, better finish | Smaller patio, planted edges |
When the slab itself is structurally fine and just looks tired, resurfacing with large-format pavers over a bond coat is the budget-friendly fix. If it’s cracked or pitched toward the house instead, remove the outer three or four feet and replace them with permeable pavers or a gravel-and-plant border so water can soak in rather than run off.
Aim for something close to a third hardscape and two-thirds planted, soft space. That balance is what separates an actual patio from a glorified parking pad.
2. Boxing In the Deck With Plastic Lattice
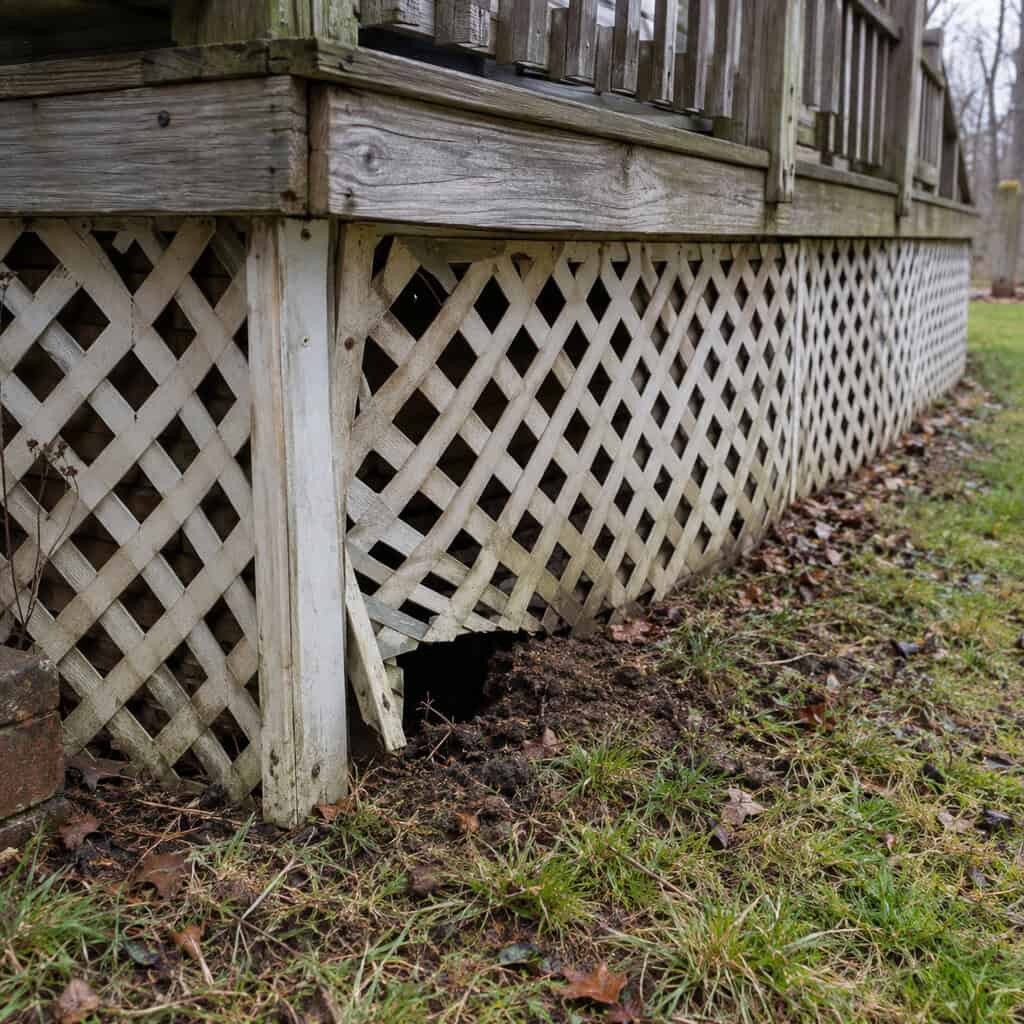
Criss-crossed plastic panels used to be the go-to way to conceal deck framing, and they tend to fail in the same order every time.
First comes the yellowing. Then it sags between the nailers. Then something takes up residence underneath — skunks, groundhogs, feral cats — because lattice functions more like a doorway than an actual barrier.
Horizontal slat skirting in a dark stain looks current and still lets air circulate. Dark metal screen panels accomplish the same thing with even less upkeep.
3. Beds Filled With Red Lava Rock or White Marble Chips
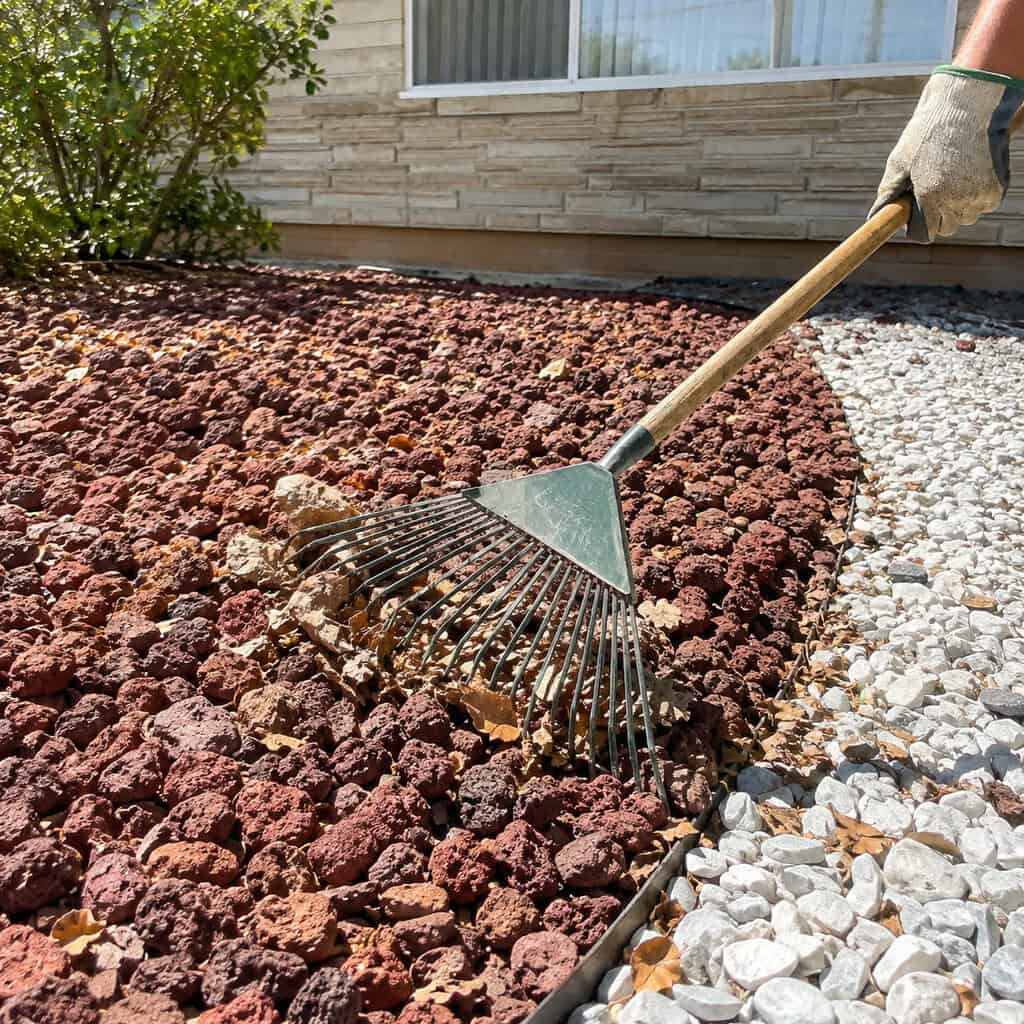
Colored decorative rock promised low maintenance back in the ranch-house era, and it delivered on almost none of it.
Lava rock heats up like a griddle. Marble chips stay glaringly white for maybe two years before dulling and snagging every leaf that blows by. Both types eventually work their way into the soil, so removing them later means sifting dirt by hand.
If you’ve ever tried to get old gravel out of a lawn, you already understand why these beds outlast the people who put them in.
4. A Chain-Link Fence Framing the Front Yard

Galvanized chain-link was the budget fence of the postwar boom, and out front it can date a house to a very specific decade of subdivision construction.
The typical fix only compounds the problem. Weaving plastic privacy slats through the mesh layers on a second dated look, and those slats start snapping off within about five years.
Black vinyl-coated mesh visually fades into the background until you barely register the fence is there. A hedge planted a foot in front does the same disappearing act for less money.
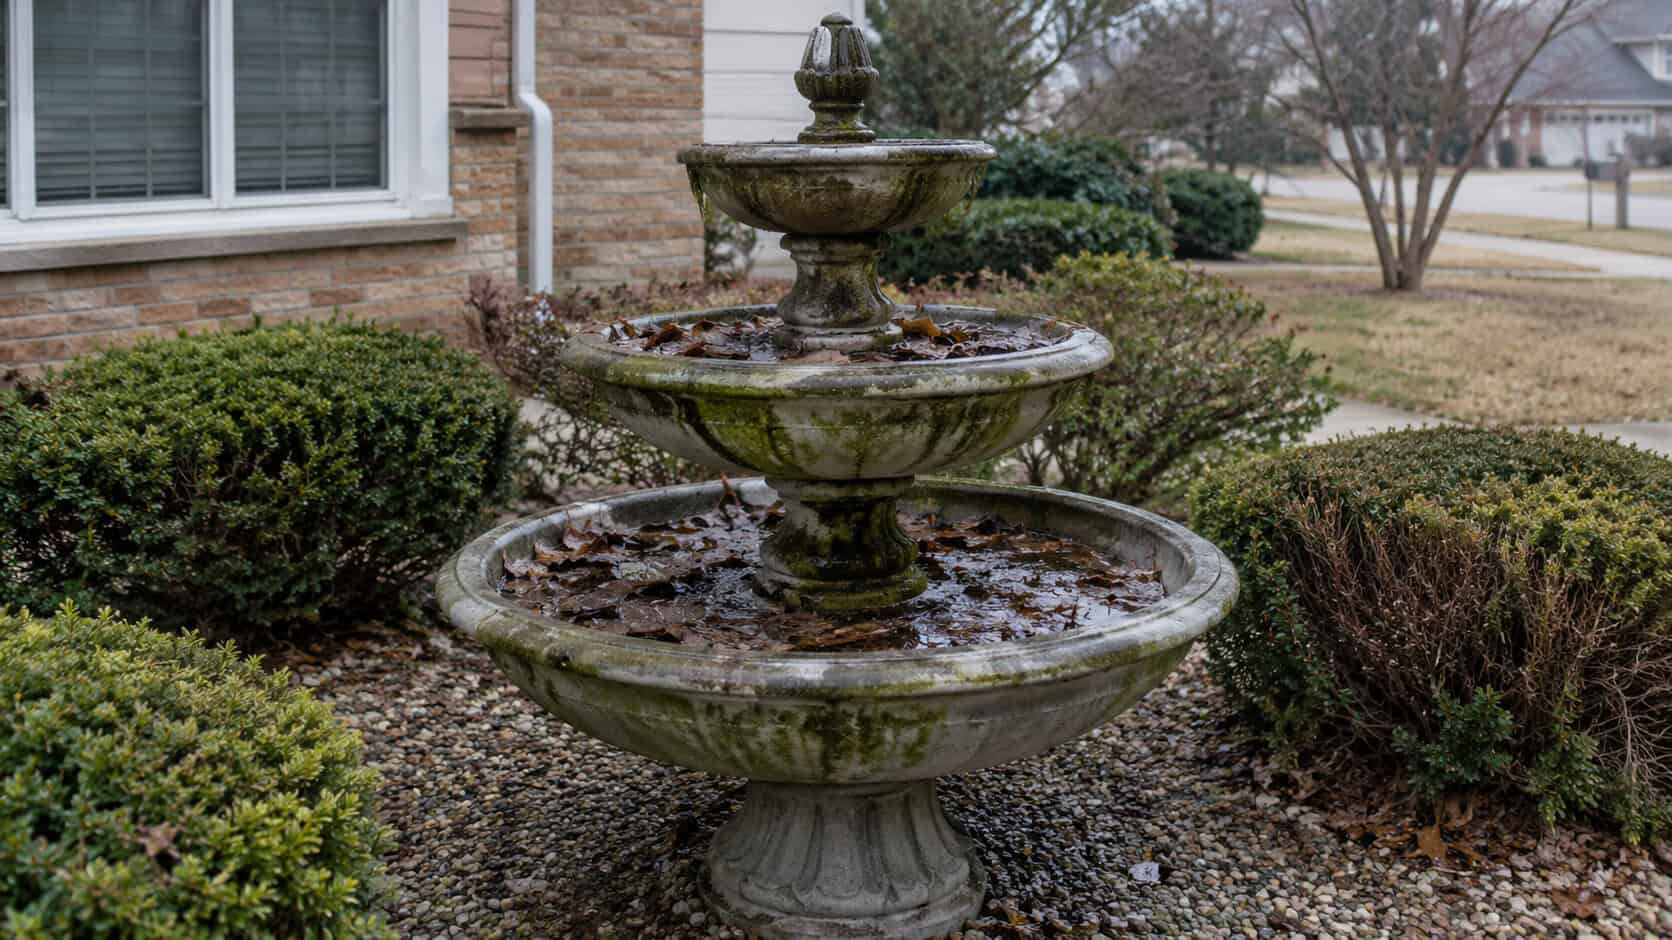
5. A Tiered Concrete Fountain Out Front
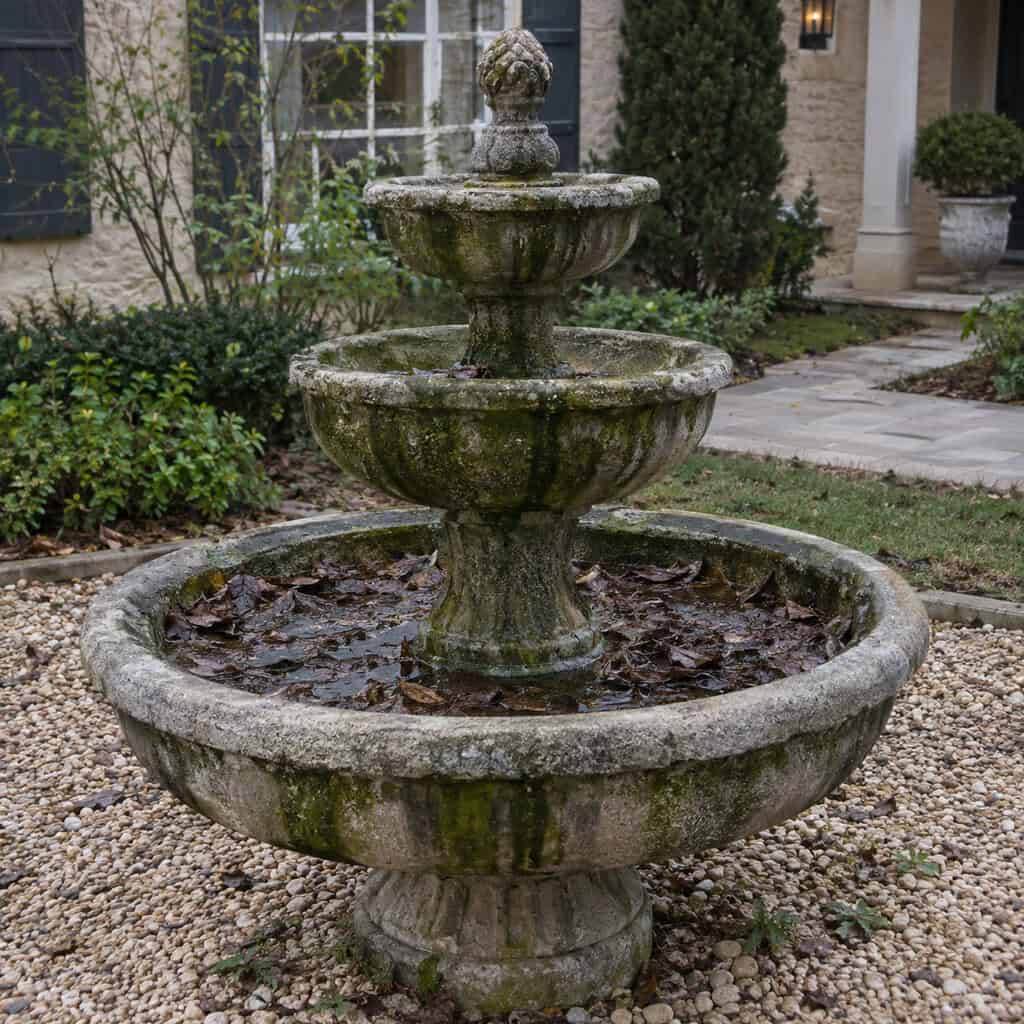
The three-tier cast-concrete fountain was the showpiece of the Tuscan-everything era, and it never came cheap.
Age compounds the problem further. Most sit switched off today, stained green along the waterline, holding a slurry of dead leaves and one drowned tennis ball. A feature installed to broadcast luxury ends up broadcasting neglect instead.
Run it or remove it entirely. A dry, dormant fountain looks worse than having none at all.
6. Keeping the Swing Set No One’s Touched in a Decade

The cedar fort with its canvas canopy bleached from green to bone. The rusty A-frame that squeaks with every push. The hoop with a net shredded to ribbons.
This is the rare dated feature people leave up on purpose, and every neighbor knows exactly which house has one.
The grass underneath never recovered. The slide’s grown a wasp nest. The kid it was built for just turned 24.
Take it down whenever you’re ready. A yard ought to reflect the life you’re living now, not the one from 2006.
7. Circling the Mailbox Post With Annuals
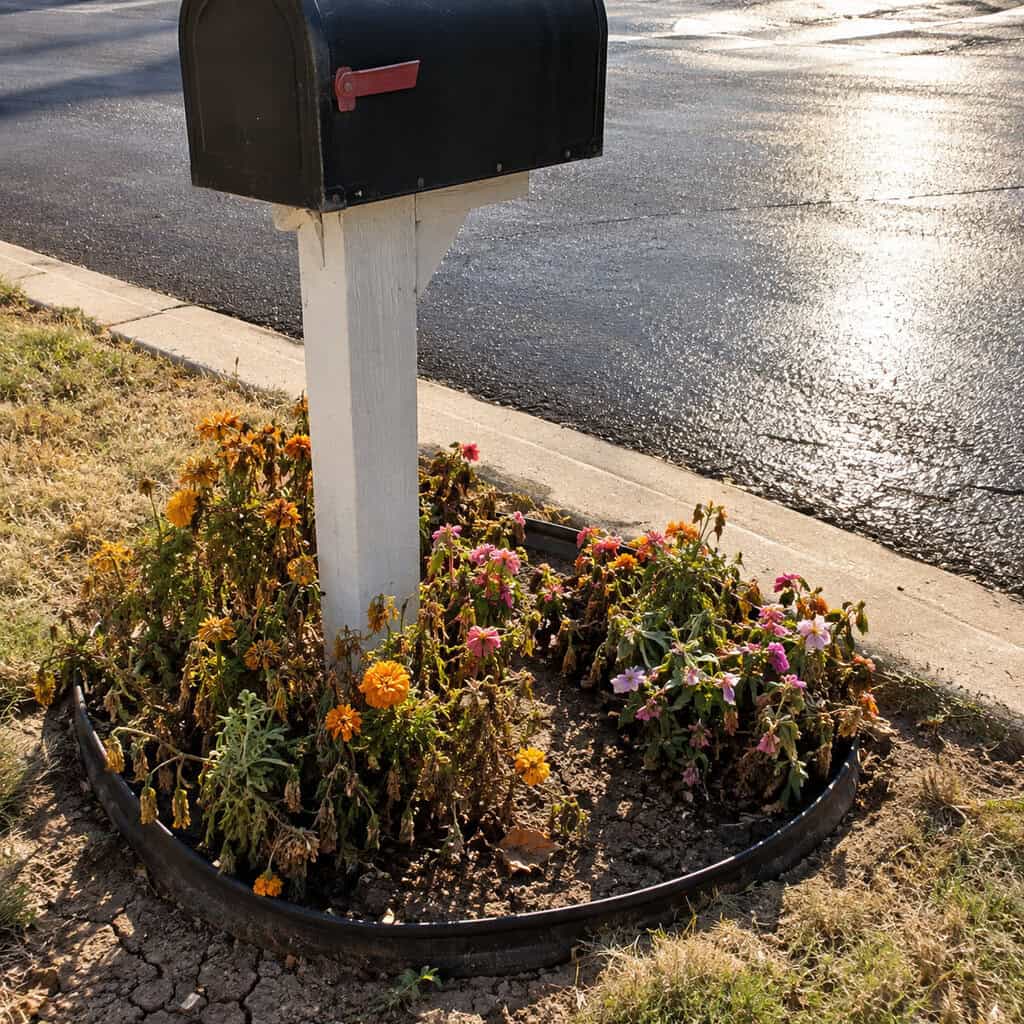
Marigolds and impatiens ringing the post, bordered by a coil of black plastic edging — it’s the miniature version of a curb-appeal ritual straight out of the 1990s, and it’s the first thing anyone driving by will see.
It also dies like clockwork every August, for a good reason. That patch of ground is the hottest, most reflective, most compacted, most salt-battered square foot on the entire property.
Choose something that thrives on neglect — sedum, catmint, dwarf ornamental grass, or daylily in a pinch — and stop replanting it every June.
8. Lining the Walkway With Solar Stake Lights Like an Airstrip

Stake lights planted every two feet on both sides, marching all the way to the front door — that’s a runway, not landscape lighting.
Within a couple of seasons the look falls apart on its own: a third of the lights dim out, several lean sideways, one gets clipped by the mower, and the plastic lenses fog over to the color of old Tupperware.
Fewer, warmer fixtures win every time. Three or four well-placed lights aimed down at the paving — not glaring out at eye level — accomplish more than twenty stakes ever could.
9. Framing Beds With Scalloped Concrete Edging
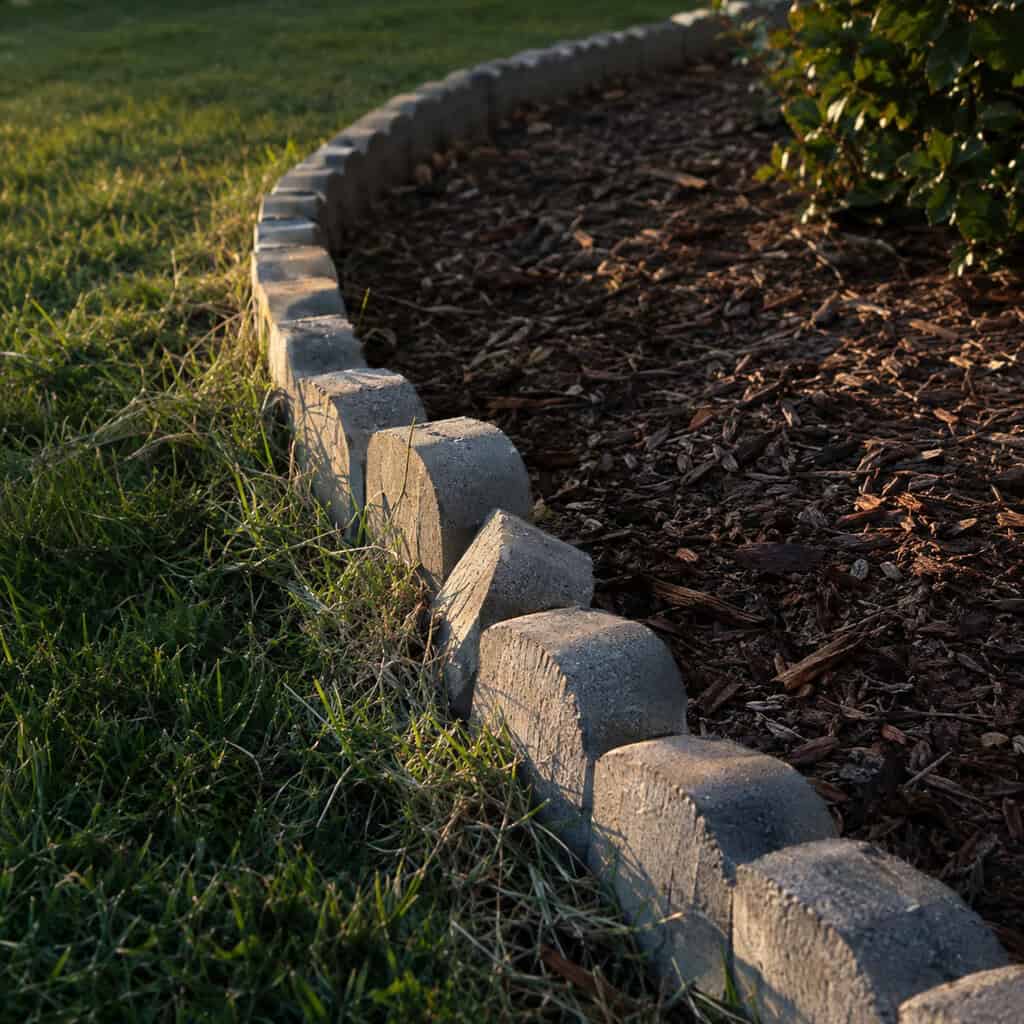
The wavy-topped gray block, or its black plastic cousin that heaves itself an inch out of the ground every winter.
Both put a hard, decorative frame around something meant to look soft, which works against the garden rather than for it. Worse, mowers can’t roll over either edging style, so a ragged strip of string-trimmed grass builds up along the entire border. That fringe is really what makes the bed look neglected.
A simple cut spade edge costs nothing and looks sharper. Flush steel edging costs a bit more but lasts thirty years.
10. Stacking Railroad Ties or Landscape Timbers
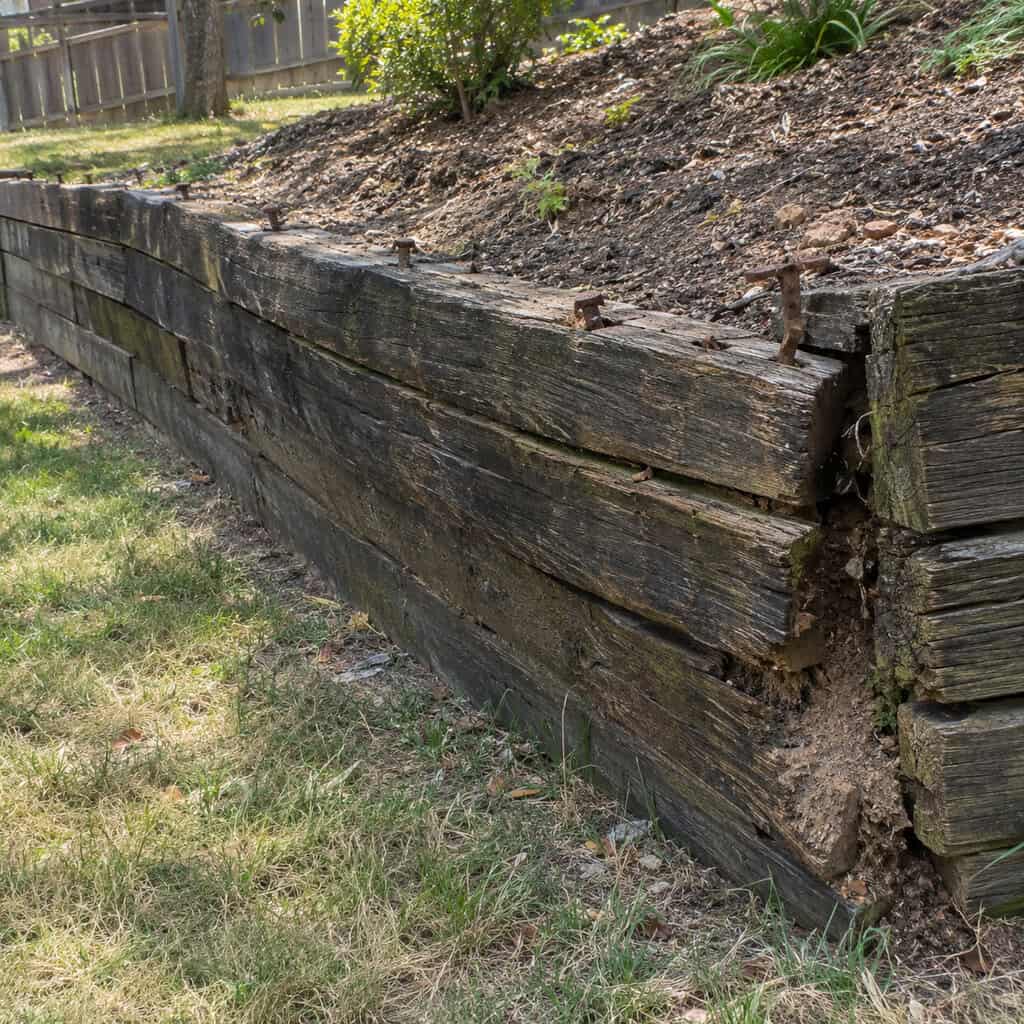
Creosote ties built nearly every terraced bed in the 1970s. Spike-pinned 4×4 timbers built the raised planters of the 1980s.
Both announce their age as they deteriorate. Wood rots unevenly, which bows the wall out in the middle, tips the top course, and eventually works the spikes loose until the corners pull apart.
Reclaimed ties also bring handling risks that modern wall block doesn’t — creosote-treated wood isn’t something you want kids sitting on or vegetables growing near. Segmented block or dry-stacked stone solves both the look and the chemistry problem in a single weekend.
11. Relying on Knock Out Roses as a Hedge Everywhere
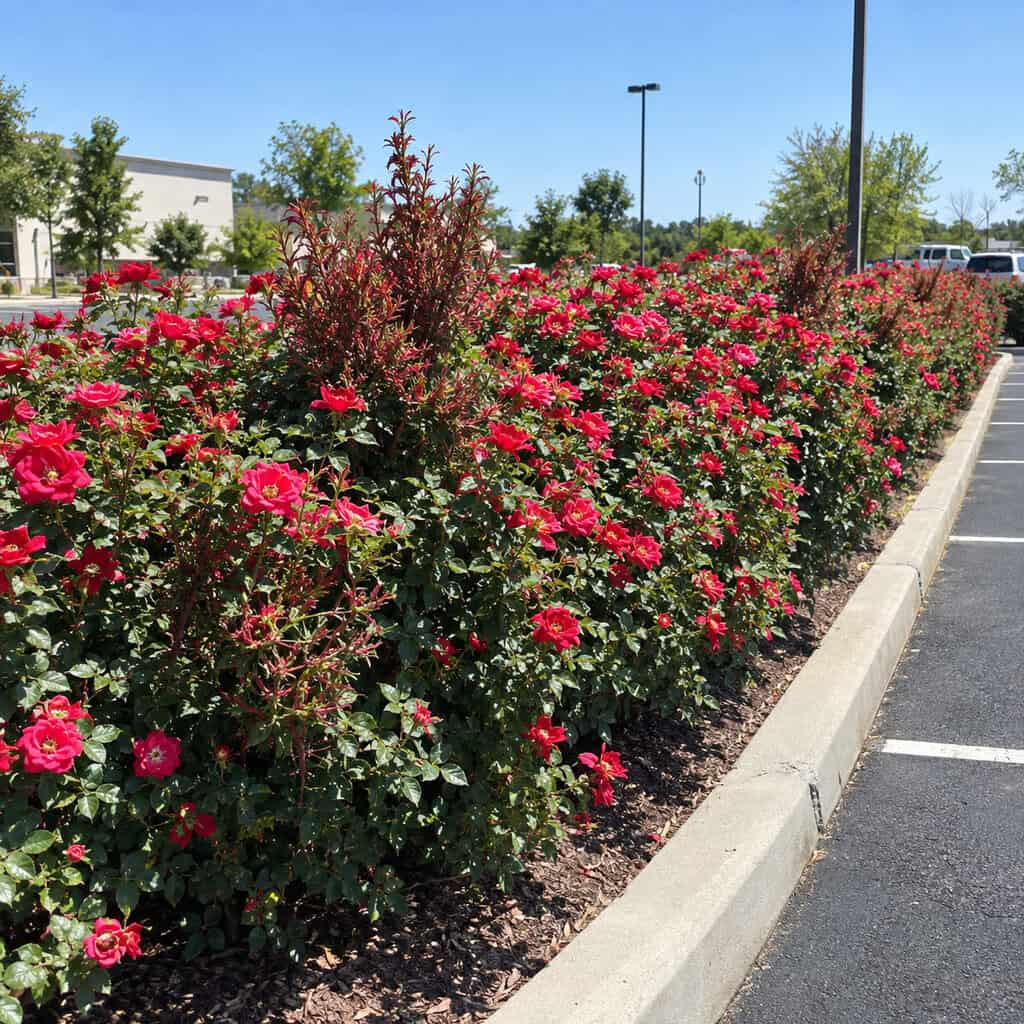
Introduced in 2000, this rose was in every bank median and apartment entrance in the country within ten years.
That sheer overuse is the issue. A row of Knock Outs doesn’t read as a garden anymore — it reads as commercial landscaping, since that’s where most people encounter them. Rose rosette disease has since thinned out plenty of these hedges too, leaving witch’s-broom clusters and reddish distorted growth with no cure.
Plant three, not thirty, and mix in something with different foliage between them.
12. Refreshing Bright Red Dyed Mulch Every Spring
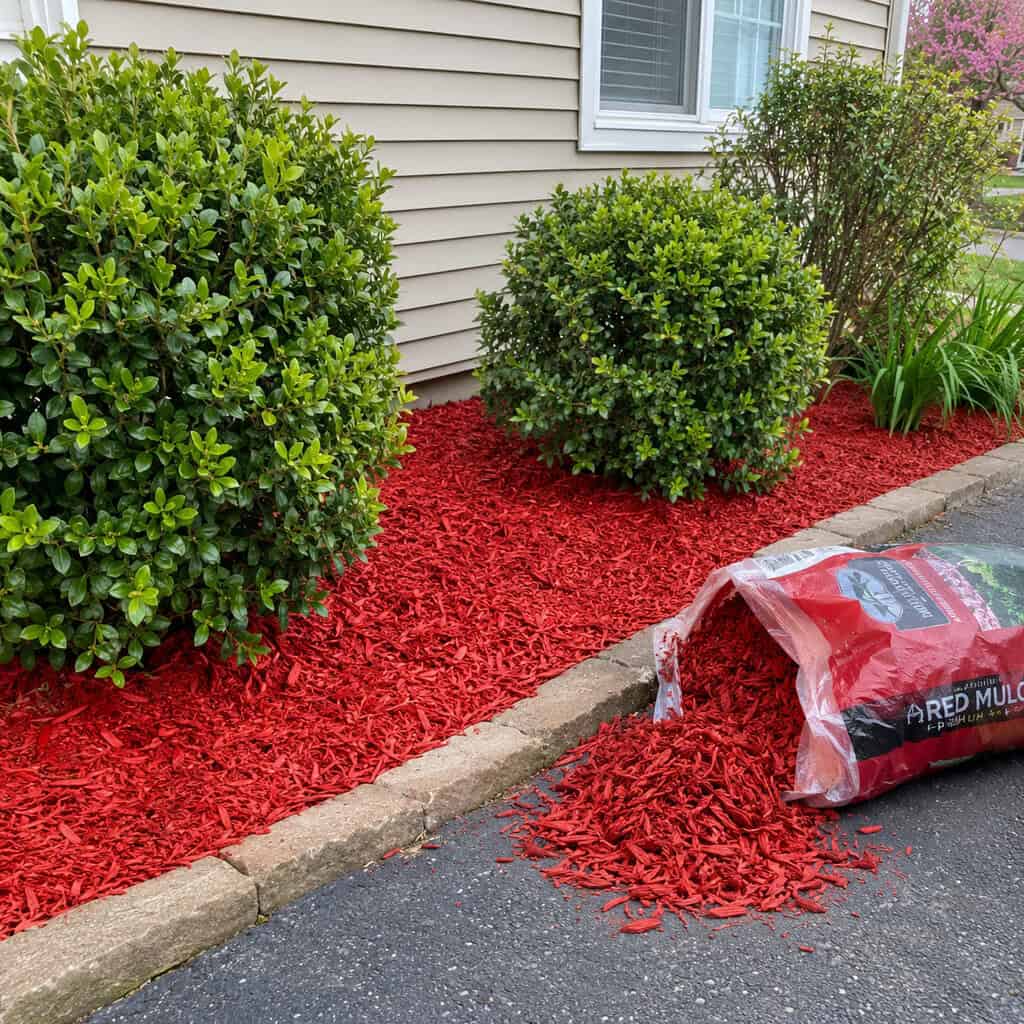
Nothing found in nature is fire-engine red — not soil, not bark, not stone.
That’s exactly why dyed mulch time-stamps a bed so obviously: the color doesn’t exist anywhere naturally, so the eye reads it as a product placed on top of the garden instead of part of it. Jet-black mulch achieves the same jarring effect from the opposite direction.
Undyed shredded hardwood or pine bark fades to a soft brown-gray within a season and then vanishes behind the plants — which is exactly the job mulch is supposed to do.
13. Installing a Solid White Vinyl Privacy Fence

Bright white vinyl was marketed as the maintenance-free upgrade of the late 1990s, and it dates a yard the same way white vinyl shutters date a house’s facade.
It doesn’t stay bright, either. The shaded side grows algae, panels bow in the summer heat, and every cap holds a grimy drip line down the rail.
Dark-stained cedar, black metal, or horizontal fence boards all read as current. Dark fencing has a bonus advantage, too — it visually disappears, keeping a small yard from feeling boxed in.
14. Laying Landscape Fabric Beneath a Rock Bed
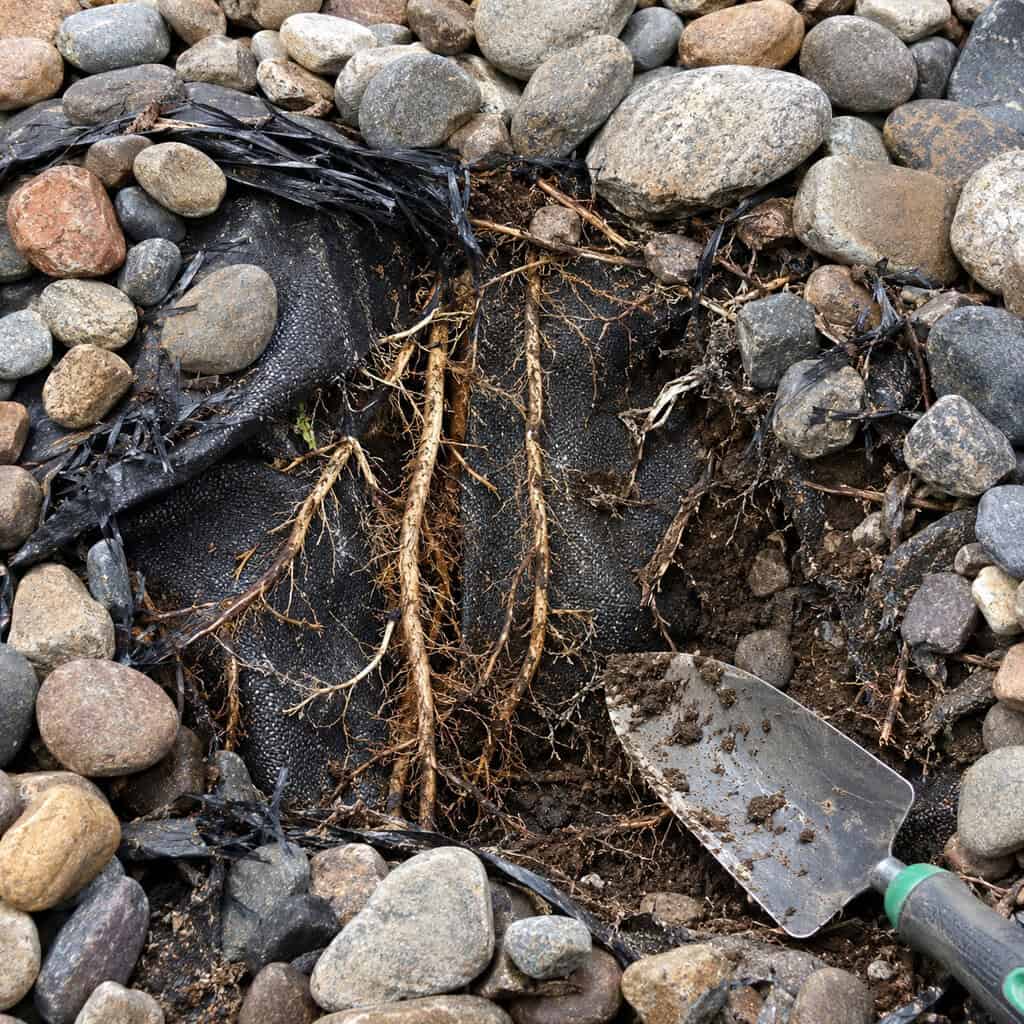
It’s marketed as a permanent solution. It never is.
University of Illinois Extension doesn’t sugarcoat it — fabric buys maybe a couple of clean years before weed seed blows in and germinates in the debris that collects on top, while tougher perennials simply root straight through the weave from underneath.
At that point the fabric itself becomes the problem. Pull a weed and you tear up a strip of shredded polypropylene along with it. Under rock, the only real fix is shoveling off the entire bed to get at it.
That’s why old fabric beds end up looking neglected instead of tidy. Three inches of mulch laid directly on bare soil does the same job while actually improving the dirt as it breaks down.
15. Letting Spreading Junipers Take Over the Foundation Line
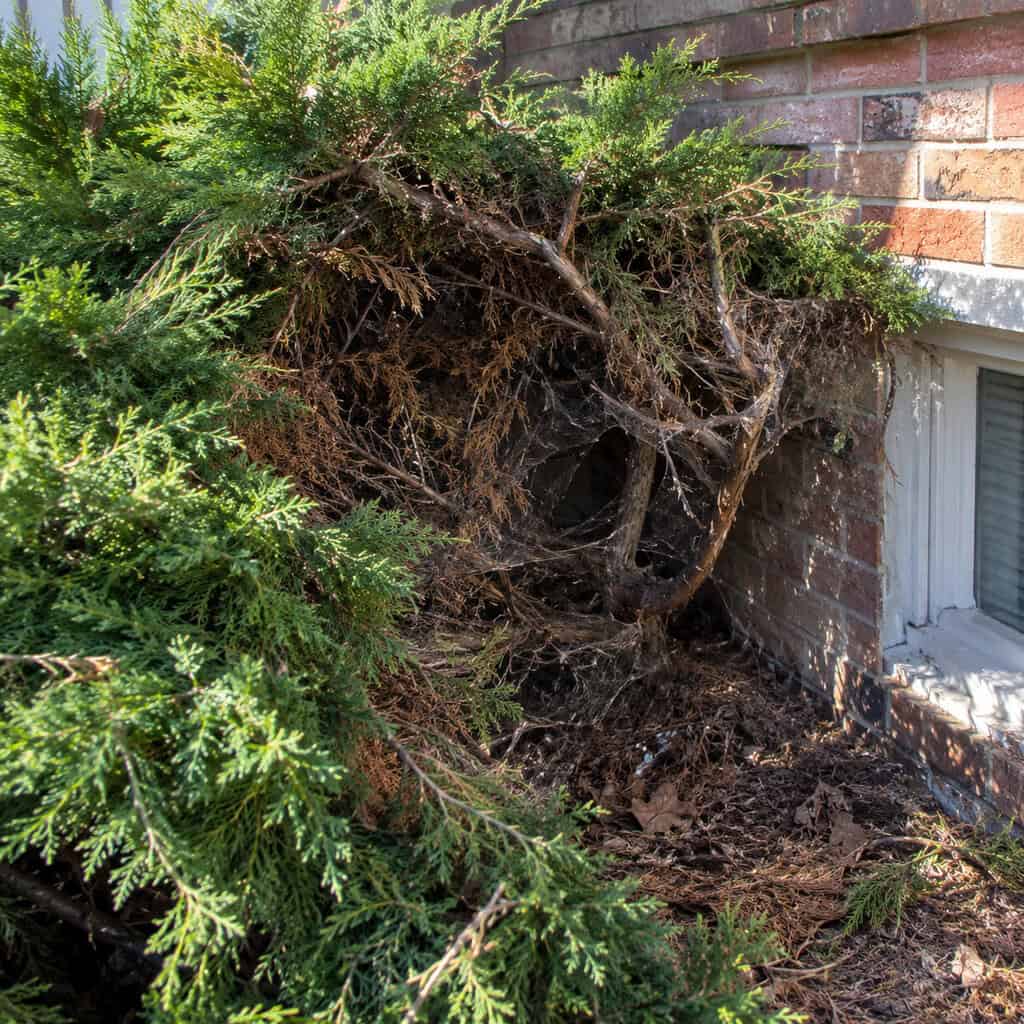
Blue rug, Andorra, Bar Harbor — sold as maintenance-free groundcover during the ranch-house years and planted by the dozen across the front of nearly every brick split-level in the country.
Thirty years on, the truth about a spreading juniper reveals itself: a brown, hollow mat with just six inches of green on top. The interior is packed with dead needles, spiderwebs, and whatever debris the wind has carried in. Nobody ever reaches inside, so nobody notices what’s actually living there.
And plenty is living there. That dry, dense layer against a warm foundation makes prime harborage — mice and voles nest inside it, chipmunks tunnel beneath it, and wasps build nests in the dead zone you’ll never spot until you’re pruning. Pest control operators treat overgrown foundation junipers as a recurring complaint, since the shrub creates a covered highway straight from the yard to your siding and weep holes.
Junipers also refuse to recover from hard pruning. Cut into old bare wood and it stays bare permanently — there are no latent buds left to push new growth. That’s the lesson most people learn too late.
Which means removal is really the only honest answer. Cut them off at the base, pull the root plates out with a mattock, and you’ll open up a bed you can actually plant something in. Low sedge, dwarf fothergilla, itea, inkberry — anything that keeps a see-through base works.
16. Piling Mulch Into Volcanoes Around Tree Trunks
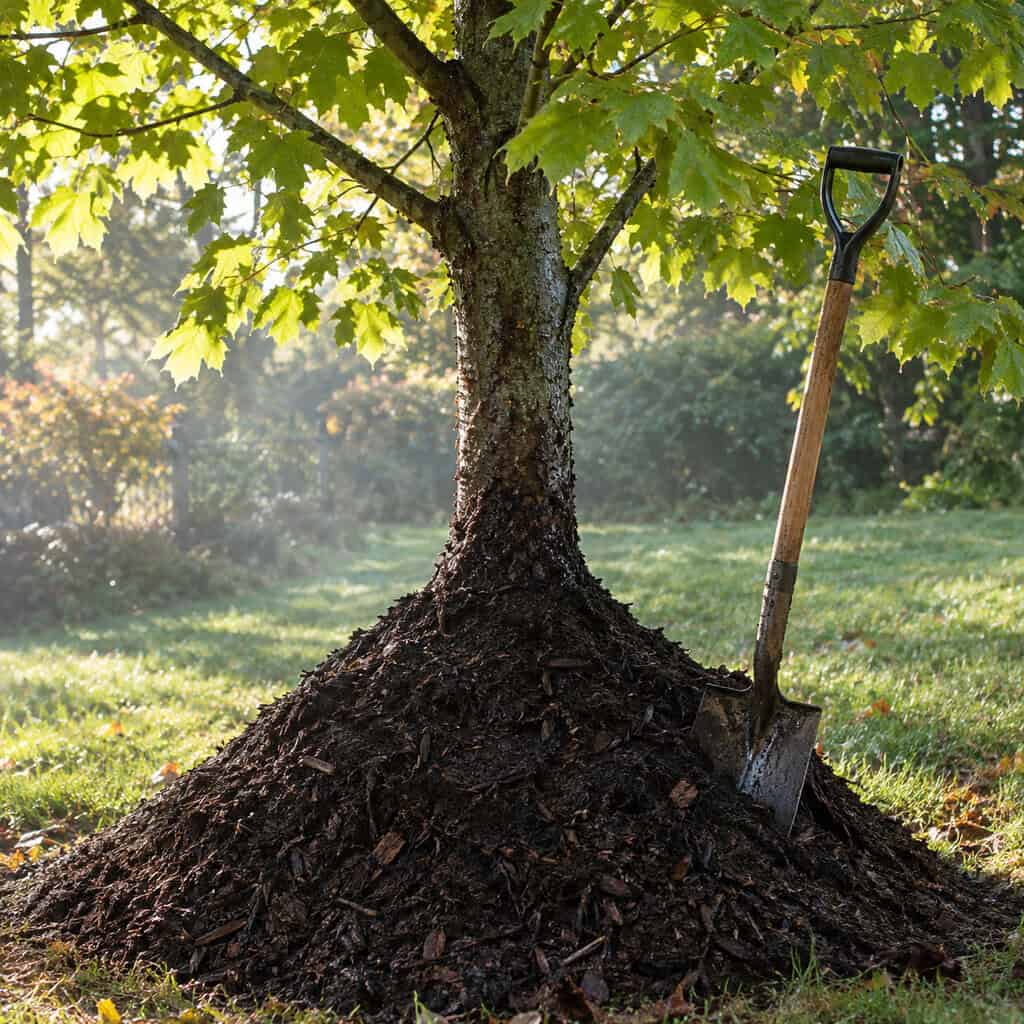
Ohio State Extension names them exactly what they resemble — mulch volcanoes.
Mulch heaped directly against the bark traps moisture where bark was never designed to stay wet, invites decay, and hands voles a sheltered tunnel straight to the trunk. They gnaw through the cambium all winter, and the tree dies come spring with no obvious cause.
It’s an eyesore, too — a young tree cone-shaped into the soil looks like it’s slowly sinking.
Go for a flat doughnut shape instead, two to three inches deep, with bare bark visible in the center. Pull the pile back this weekend.
17. Choosing a Bradford Pear as the Front-Yard Showpiece
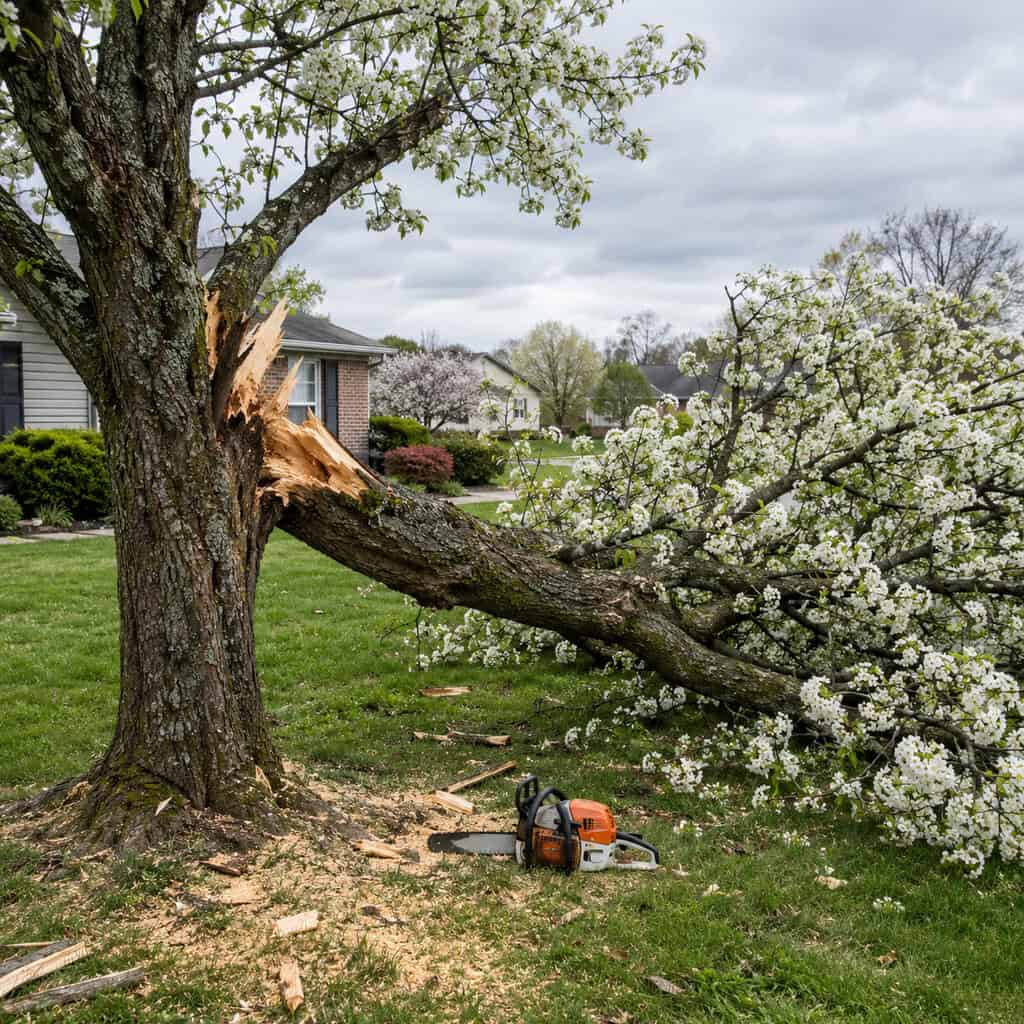
Every street in a late-1980s development seemed to get the identical tree — same lollipop shape, same white blooms every March, same faint sour odor if you stood underneath.
The Bradford pear was marketed as the ideal street tree: fast-growing, tidy, tolerant of poor soil. Its flaw took about twenty years to surface. All its branches leave the trunk at nearly the same height and narrow angle, so bark gets pinched between limbs instead of the wood knitting together properly. Around year 18 to 20, a single ice storm or summer squall splits the whole crown right down the middle.
There’s also an invasive angle. Bradfords were supposed to be sterile, but they cross-pollinate with other ornamental pear cultivars and produce fertile fruit that birds carry into fencerows and woodland edges. Ohio has banned the sale of callery pear outright, with the rule fully in effect as of January 2023, and South Carolina followed with its own nursery ban. Check local rules before replacing one pear with another.
If your tree is already mature, have an arborist examine where the main limbs join. Included bark, visible seams, or an existing crack means it’s not a candidate for pruning — it’s a candidate for removal, and it’s far cheaper to take down while standing than to clean up off a roof later. Expect to pay $800 to $2,500 depending on size and access.
Good replacements include serviceberry, a quality tupelo, Kentucky coffeetree, or redbud — none of which will ever match the neighbor’s tree.
Before planting anything new, it helps to understand what that tree becomes in five years.
18. Lining Up a Row of Identical Arborvitae

Fifteen identical Green Giants, spaced three feet apart, planted the same year the neighbors installed their pool.
Spacing is where it goes wrong. Crowded arborvitae shade each other out near the base and thin from the bottom up, leaving what amounts to a wall on stilts. Then bagworms, deer, or root rot claim a couple of them, and the gap never fills back in — arborvitae won’t regrow from bare wood either.
A staggered mix works better: a few evergreens, a couple of large deciduous shrubs, something with texture for winter interest. That gives you screening that can survive losing a plant. Plenty of the fastest-growing options come with problems that surface years later, so choose carefully.
19. Ringing an Above-Ground Pool With a Wooden Deck
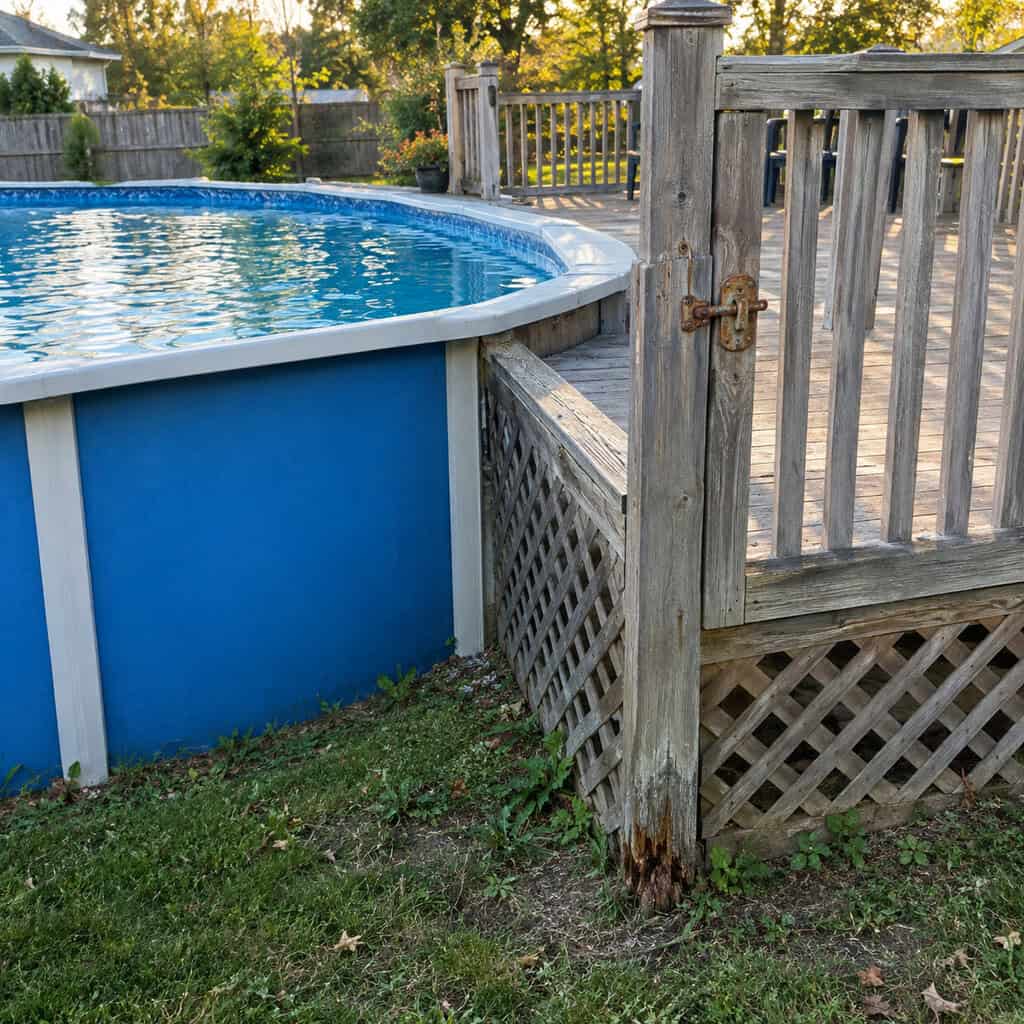
Few structures pin down an older backyard’s era faster: the blue-sided ring, the graying pressure-treated deck wrapped partway around it, the ladder gate with a latch straight out of 1991.
It dominates the whole space. From every window facing the backyard, it’s the thing your eye lands on.
Even a well-maintained pool gets dated by its deck detailing — 2×2 balusters, lattice skirting, a top rail wide enough to rest a drink on. Those details read 1994 the same way avocado appliances read 1973.
What actually deserves scrutiny is the deck structure itself. Pressure-treated framing built in the 1990s is often nearing or past its design life, and the real failure point is almost never the visible decking. It’s the ledger, the post bases sitting in soil or standing water on a footing, and the joist hangers where corroded galvanized nails meet ACQ-treated lumber. Push a screwdriver into the post bottoms and the joist ends near the pool — if it sinks a quarter inch, the inspection’s over.
Insurance factors in here too. Many homeowners policies require a self-latching, self-closing gate along with a specific barrier height around pool access, and a rotting deck doubling as that barrier is a claim waiting to happen. Some carriers exclude diving boards and slides entirely, and a few refuse to write a policy at all for an unfenced pool. Call your agent before rebuilding, not after.
If the pool still gets used regularly, rebuild the deck in dark composite with cable or black metal railing and skip the lattice altogether. If it hasn’t held water in three summers, removal is usually a one-day job that hands you back a third of your backyard.
20. Chasing the Perfectly Striped, Chemically Treated Lawn

For half a century, an emerald lawn with crisp mower stripes and razor-cut edges meant you had it all together.
That signal has reversed. Designers now view the wall-to-wall monoculture as sterile — heavy on inputs for a surface nobody actually sits on. British designer Charlotte Harris has said plainly that the era of the central lawn ringed by tidy edged borders is over.
You don’t have to remove your turf entirely. Just shrink it. Keep the section you actually use, widen the beds surrounding it, and let something more interesting happen at the edges.
21. Repurposing Old Tires and Toilets as Planters
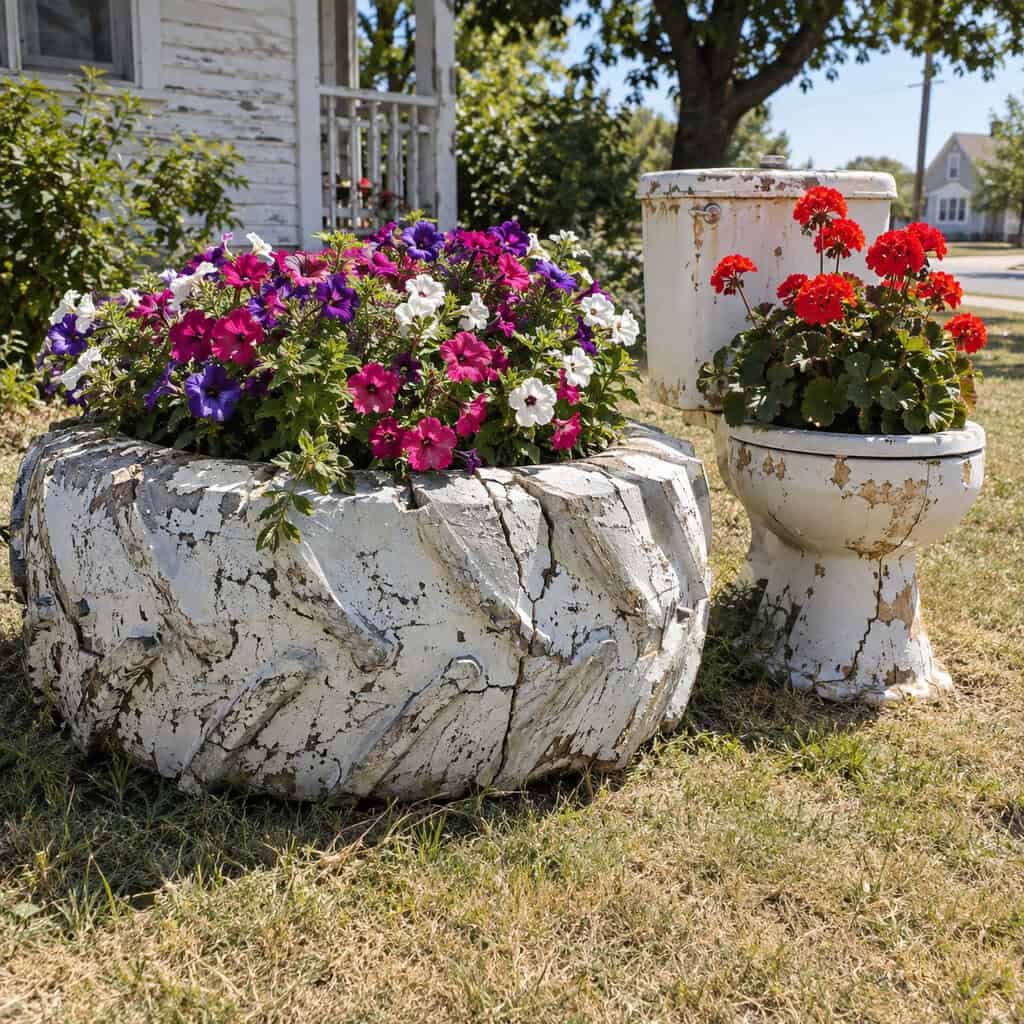
A whitewashed tractor tire packed with petunias, or an old commode planted with geraniums beside the front steps — both were genuinely practical solutions once: free containers, no hauling fee, and something built to outlast whoever installed it.
These days they signal a very specific era of rural and small-town yards, and a fresh coat of paint won’t erase that. Tires bring their own headache besides, since black rubber baking in full sun cooks the roots, and the sidewall traps water in the bottom bead — a perfect mosquito nursery.
For that same free, sturdy feel without the time stamp, try a galvanized stock tank with drainage holes drilled in, or a stacked-stone ring instead.
22. Sticking With a Narrow 36-Inch Walk to the Front Door
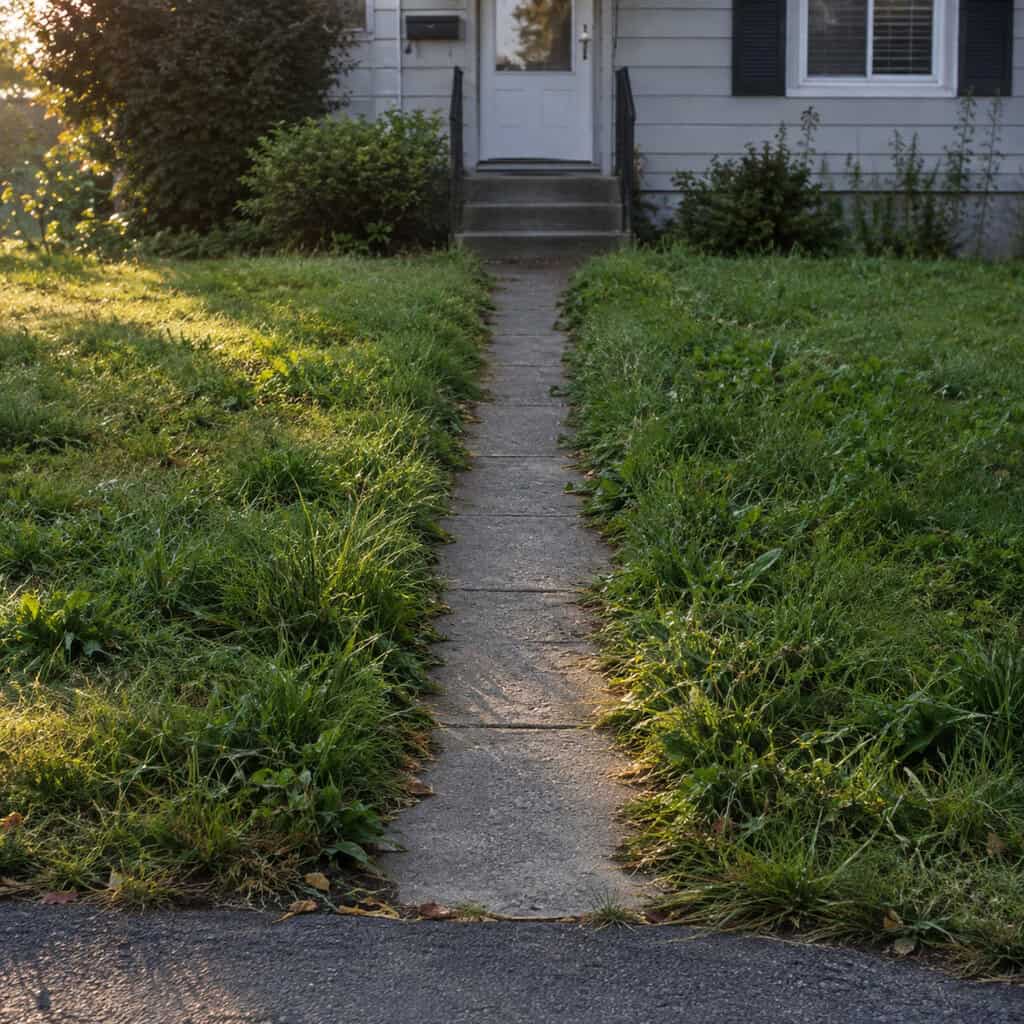
Postwar builders poured a three-foot ribbon of scored concrete straight from the driveway to the stoop, and plenty kept pouring the same width well into the 2000s.
Three feet only fits one person at a time. Two people can’t walk it side by side, so every arrival at the house starts with someone falling behind.
Widening it to four or five feet — even just adding a paver or flagstone border along one edge accomplishes this — scales up the whole front of the house instantly. It’s the cheapest way on this list to look modern overnight.
23. Covering Porch Steps in Green Indoor-Outdoor Carpet

Stapled directly over concrete, that unmistakable shade of AstroTurf green, curling up at the nose of every step.
It traps water against the concrete underneath, which leads to spalling and a permanently damp step. Come winter, it also hides ice you can’t see coming.
Pull it up and you’ll usually find decent concrete underneath. A coat of tinted concrete stain or a couple of slate treads finishes the job for under $200.
The thread running through every one of these 29 habits is the same: someone solved a problem correctly for its era, then simply stopped looking at it again.
Dated has little to do with taste. It’s really about a yard that stopped being edited over time.
Walk yours this weekend with a coffee in hand and no agenda. Whatever catches your eye first — the crooked stake light, the hollow juniper, the dry fountain — that’s your starting point.
24. Relying on Hostas and Daylilies as the Whole Shade Plan

Neither plant is inherently the problem — the combination itself is a dead giveaway of the era.
A bed made up entirely of hostas and orange ditch lilies peaks in June and goes flat by early August, as hosta leaves get slug-chewed and tired while daylily foliage flops brown at the base.
Keep that low-maintenance spirit but add texture: autumn fern, Pennsylvania sedge, heuchera for lasting color, epimedium for dry shade under maples. Plants that thrive where grass refuses to grow will do far more for a dim corner than yet another row of hostas.
25. Shearing Every Shrub Into a Matching Green Ball
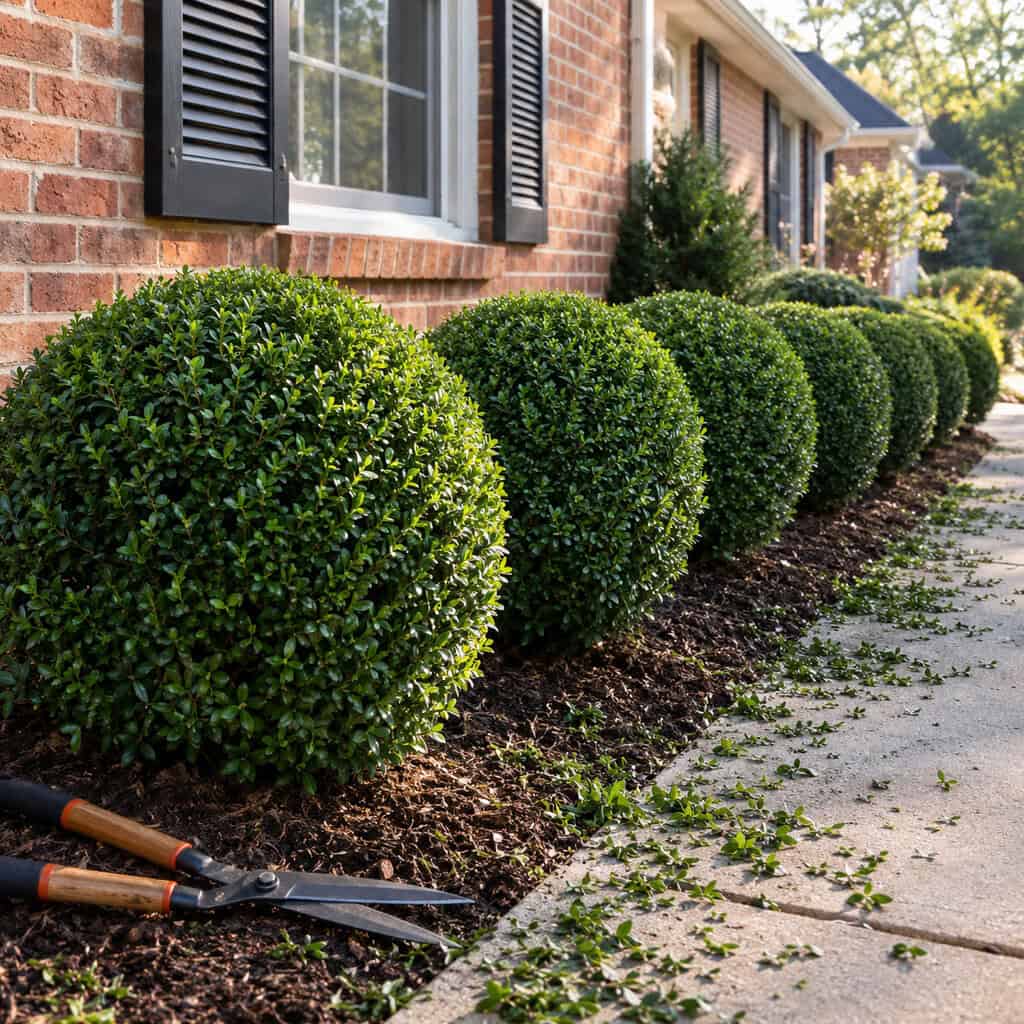
The plants themselves aren’t the issue — the control over them is.
A crew shows up twice a year with gas hedge shears and turns every yew, boxwood, and holly into the same tight green sphere. Clemson’s Home & Garden Information Center explains what all that repetition actually does: shearing forces a dense outer shell of growth, blocks light from ever reaching the interior, and leaves the inside of the shrub bare and woody. Eventually you’re left with a hollow lampshade balanced on a stick.
Cut one open sometime and see for yourself — it’s nothing but dead twigs in there.
Thin it instead. Reach in with hand pruners, remove a few of the oldest stems at the base, and let the shrub keep its natural shape. It takes about twenty minutes per plant, and it instantly stops looking like a parking lot hedge.
26. Cramming a Single Row of Shrubs Against the House

It’s been the builder default for thirty years: an 18-inch strip of mulch hugging the foundation with a single row of shrubs jammed into it.
The design problem is depth. One row at one height crammed into a narrow band gives the front of the house nothing to visually stand behind, so the whole facade looks flat from the street. University of Illinois Extension makes the case for pulling foundation beds outward and layering them in tiers instead.
The structural problem is worse. As those shrubs mature, their branches press against the siding, keeping the wall damp for hours after rain or irrigation. Wet siding invites rot behind vinyl, blistered paint on wood, and a highway for ants and termites that bypasses your soil treatment entirely. Pest inspectors call this a bridge, and failing an inspection over it is a real possibility.
Bed depth also determines where water actually goes. A narrow strip hugging the wall tends to keep mulch above grade and trap runoff right at the foundation — which is exactly how a damp basement corner shows up with no obvious explanation.
Pull the bed line out four to six feet from the house. Leave at least 18 inches of clear air between mature branches and the wall. Slope the soil away from the foundation at roughly an inch per foot for the first six feet, and keep mulch below the siding line. Then plant in three tiers: something low up front, mid-height plants in the middle, and one taller anchor plant at each corner.
It only costs a spade and an afternoon, and it might be the single biggest visual upgrade on this entire list.
27. Covering the Whole Yard in Artificial Turf

Turf was marketed as the forever lawn. A decade later, cracks are showing in that pitch.
Even people within the industry admit a full-coverage install can feel more like a commercial plaza than a livable yard — partly because the color never shifts and nothing in it ever moves in the breeze.
Heat turns out to be the bigger surprise. Synthetic turf in full sun runs dramatically hotter than the surrounding air, with surface readings 40 to 70 degrees above ambient common on infilled fields. On a 95-degree July afternoon, that’s a surface no dog will cross and no kid will sit on. Shade cloth doesn’t solve it. Rinsing only cools it for about twenty minutes.
Pet odor is another issue. Urine drains through the backing, but the solids and ammonia salts remain trapped in the infill, and the smell intensifies in humid weather. Owners end up on a rinse-and-enzyme-treat routine that resembles the very maintenance they bought turf to avoid. Crumb rubber infill is the worst offender; silica sand with an antimicrobial coating performs better.
Check the base layer before blaming the turf itself. Most odor and puddling complaints actually trace back to compacted fines under the pad, not the grass on top.
If less mowing is the real goal, there are better paths there. A smaller real lawn paired with wider beds, or ground covers that replace grass altogether, get you out of mowing without laying down an outdoor rug.
28. Floating a Round Island Bed in the Middle of the Lawn
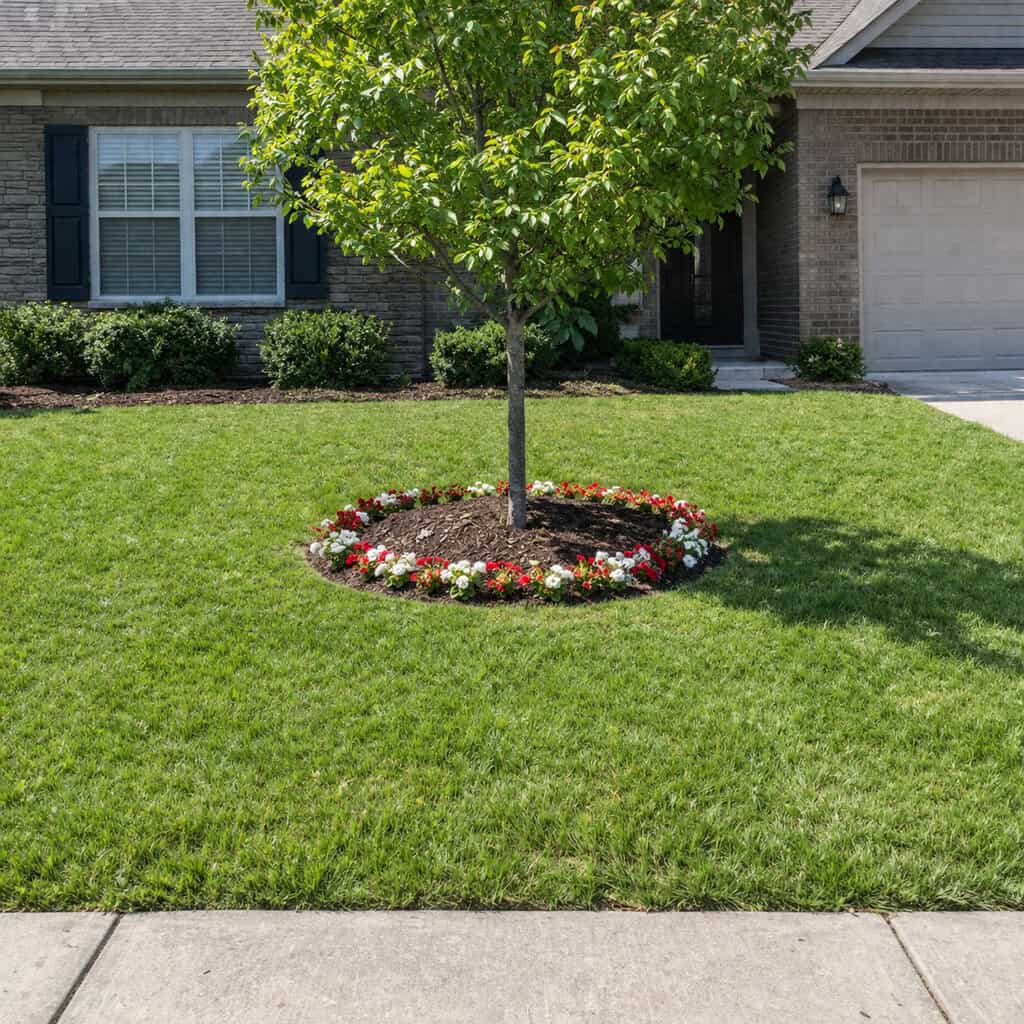
A circle carved out of the turf, a tree centered inside, a mulch ring, and a skirt of annuals along the edge.
The flaw is that it connects to nothing. Beds floating in open lawn read as afterthoughts, and they force you to trim a full circle by hand every single week.
Current design favors pulling planting into continuous, curving masses that visually tie the house to the property line. Extend that island toward the nearest bed and suddenly the whole yard starts to feel intentional.
29. Swapping in a New Seasonal Banner Flag Every Month

The bracket gives it away instantly — a single angled sleeve bolted to a porch post, ready to hold whatever nylon banner matches the calendar. Snowmen in January, tulips in April, a watermelon slice in July, a scarecrow come October: the habit dates a porch straight back to the years when craft stores devoted an entire aisle to these banners.
Nylon doesn’t age gracefully outdoors, either — six months of sun fades the colors to pastel, and the trailing edge frays into ribbons before anyone even notices.
If you love the look, invest in one good flag made of heavyweight fabric and fly it year-round, then take the empty bracket down between uses — a bare sleeve on a post looks worse than having nothing there at all.