


Drive through any neighborhood in November and you can pick them out in three seconds.
Same house sizes. Same builder shrubs. But one yard looks like somebody with a clipboard shows up every Tuesday, and the one next door looks like it gave up in August.
The difference almost never comes down to money spent on plants. It comes down to a specific set of jobs done in a specific six-week window, while the soil is still soft and the grass is still awake.
Most of them take an afternoon. A few take twenty minutes. Every one of them is still visible next April, which is the part people miss.
Here are the 30 things homeowners with expensive-looking yards get done before the first frost.
1. Recut Every Bed Edge With a Spade
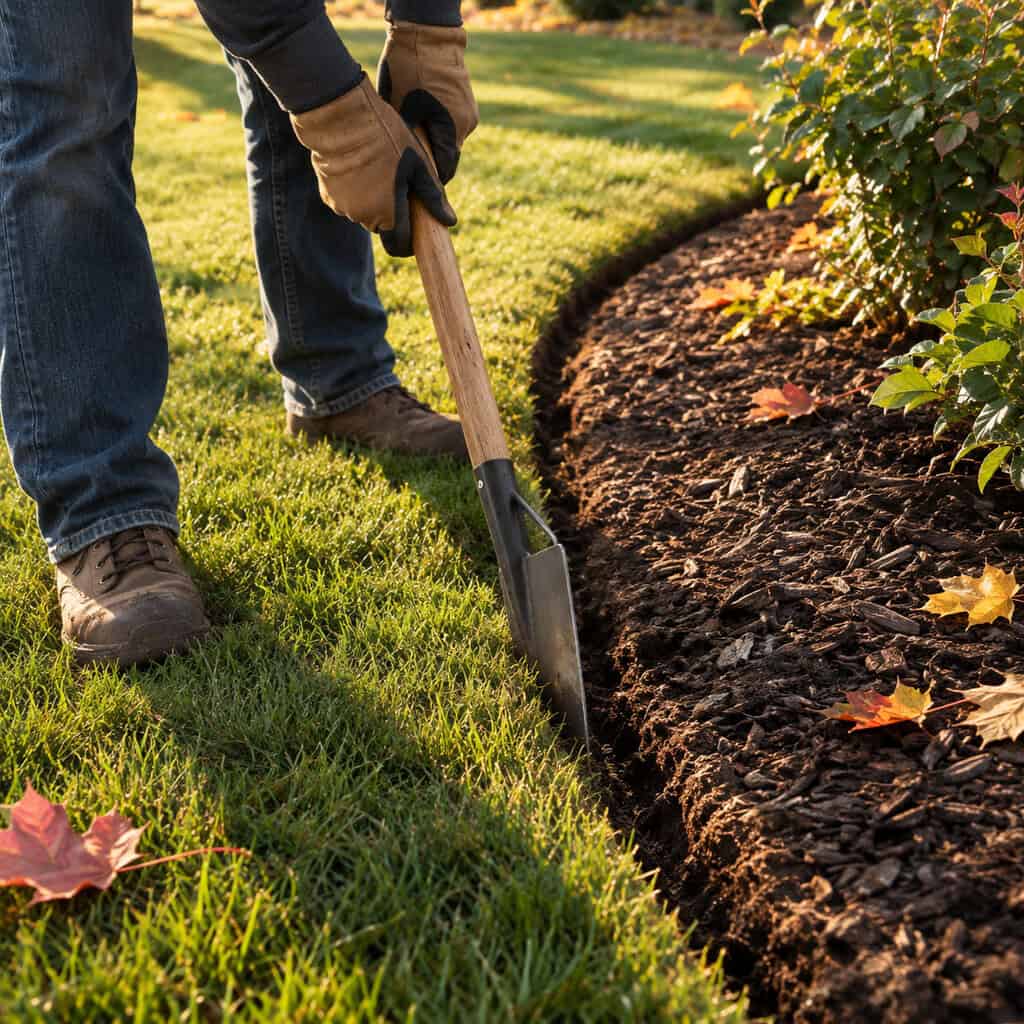
Nothing signals “maintained” faster than a clean edge. Not the plants, not the mulch color — the line where bed meets turf.
Cut a shallow V-trench with a flat spade, blade angled back toward the bed, about four inches deep. No plastic edging, no bricks. Just a crisp shadow line.
Do it now while the soil still slices instead of crumbling. That line will hold its shape through freeze-thaw and still read sharp in March, when every other yard on the street looks like it melted at the edges.
2. Mulch-Mow the Leaves Instead of Bagging Them
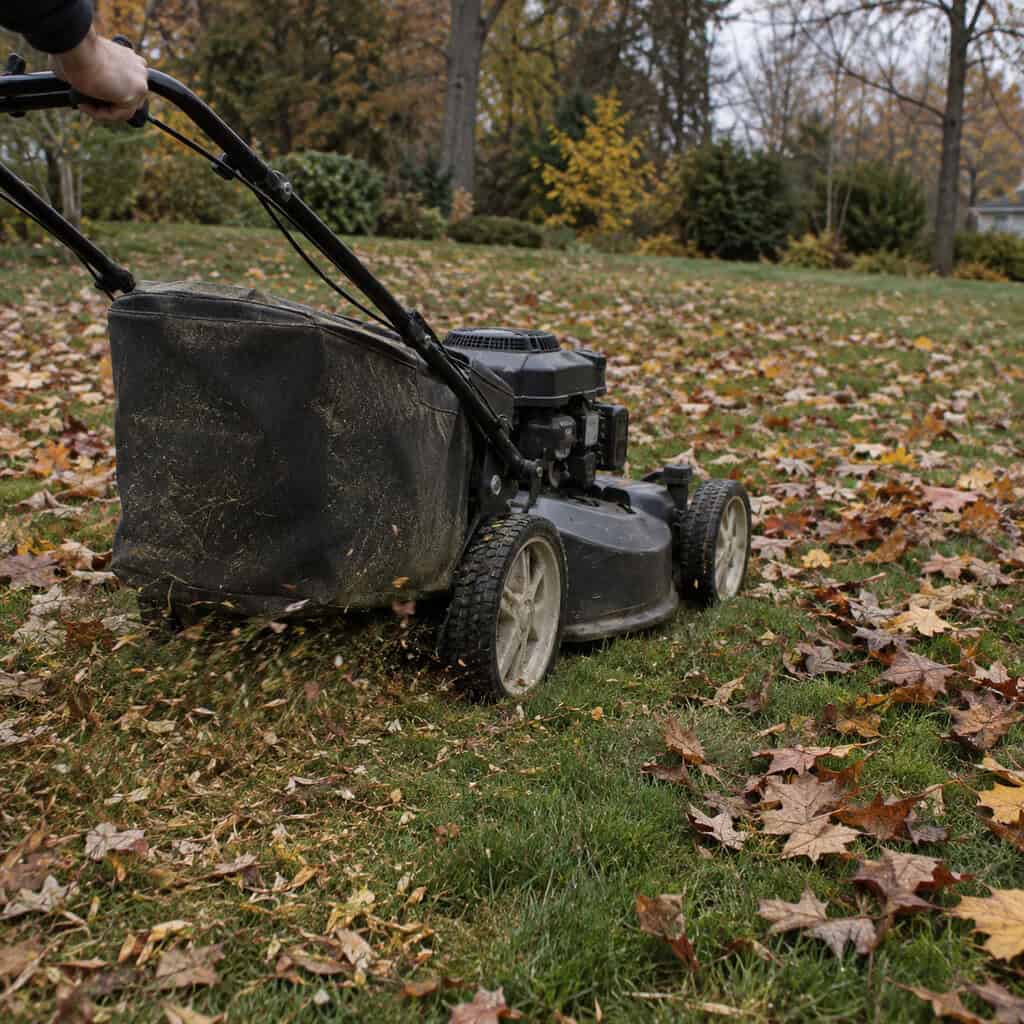
Your dad raked. You don’t have to.
Run the mower over dry leaves twice at a higher deck setting and the pieces drop into the canopy, decompose over winter, and feed the soil. K-State Research and Extension found mulched leaves can actually cut spring weed pressure, because the shredded layer closes the bare soil gaps where weed seeds germinate.
The rule is coverage, not volume. If you can still see grass blades through the shredded layer, keep going. If it’s a matted blanket after two passes, bag some off.
3. Plant Spring Bulbs in Drifts of 25, Not Polka Dots
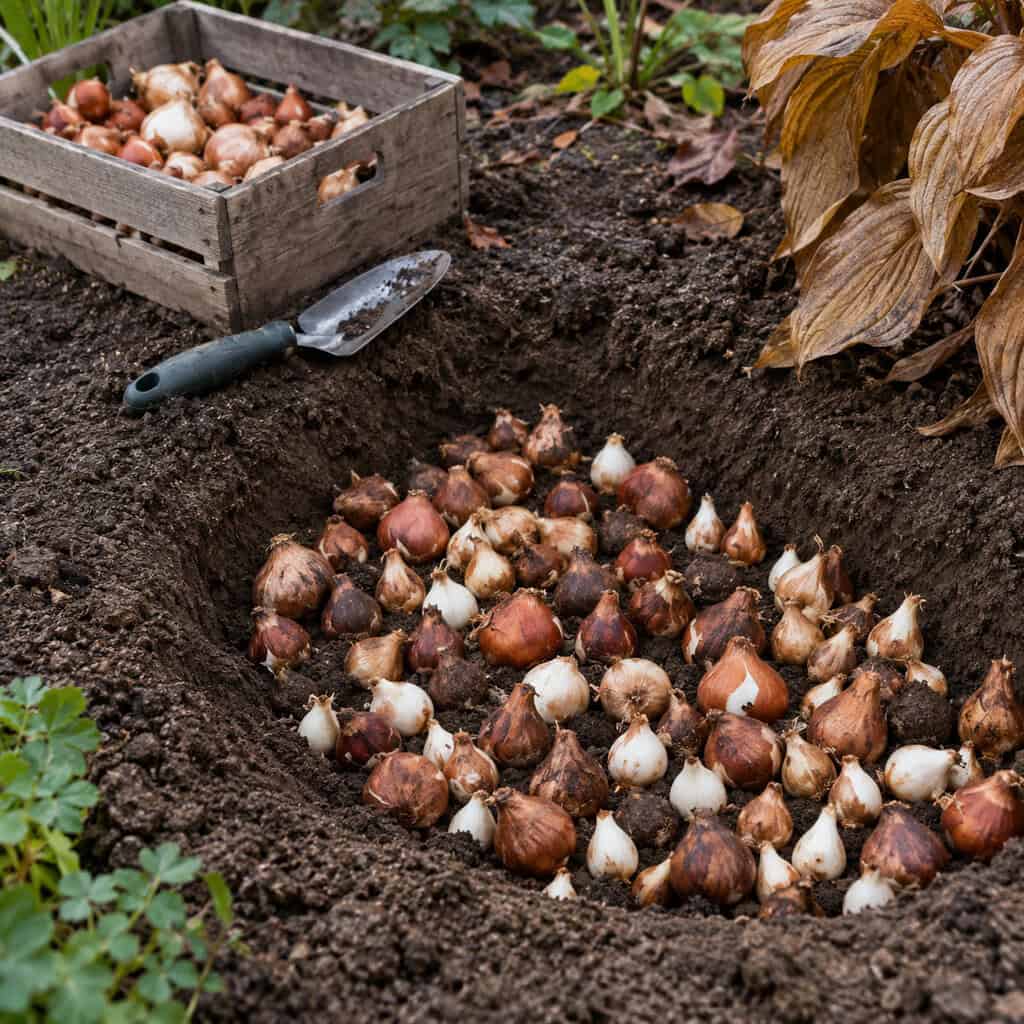
Ten tulips spaced evenly across a bed look like a mistake. Fifty of one color in a sweeping mass looks like a designer got paid.
Quantity is the entire trick. Buy one variety in bulk, dig a single wide hole instead of twenty little ones, and set them close — three inches apart is fine.
Wait until soil drops below about 55°F so they root instead of sprouting. Then forget about them until the ground thaws and your yard does something nobody else’s does in early April.
4. Blow Out the Irrigation and Kill the Hose Bibs

This is the one that costs real money when it’s skipped.
Water expands roughly 9% when it freezes. A sprinkler lateral can usually take that — it’s plastic, it’s buried, it flexes. The brass backflow preventer sitting above ground at the side of the house cannot. That’s where the split happens, and a replacement runs $300 to $800 before anyone touches a shovel.
Compressed-air blowout is the real answer in anywhere with a hard freeze. Shut the main supply, open the test cocks on the backflow, and run air through zone by zone at 50 PSI or less for poly pipe — high pressure will wreck gear-driven heads faster than ice will. Most irrigation companies charge $75 to $150 to do it, and they do it in forty minutes.
Manual drain systems only work if the installer sloped the lines and put drain valves at the low points. Plenty didn’t.
Then the hose bibs. Disconnect every hose — a connected hose traps water in the valve body even on a frost-free spigot, which is exactly how frost-free ones fail. Coil the hoses and store them off the ground. If you’ve got interior shutoffs on the supply lines, close them and open the outside spigot to drain.
The split usually isn’t at the spigot. It’s a foot back inside the wall, and you find out in April when someone turns the water on and the ceiling below starts dripping.
5. Time the Winterizer Feeding to the Last Mow
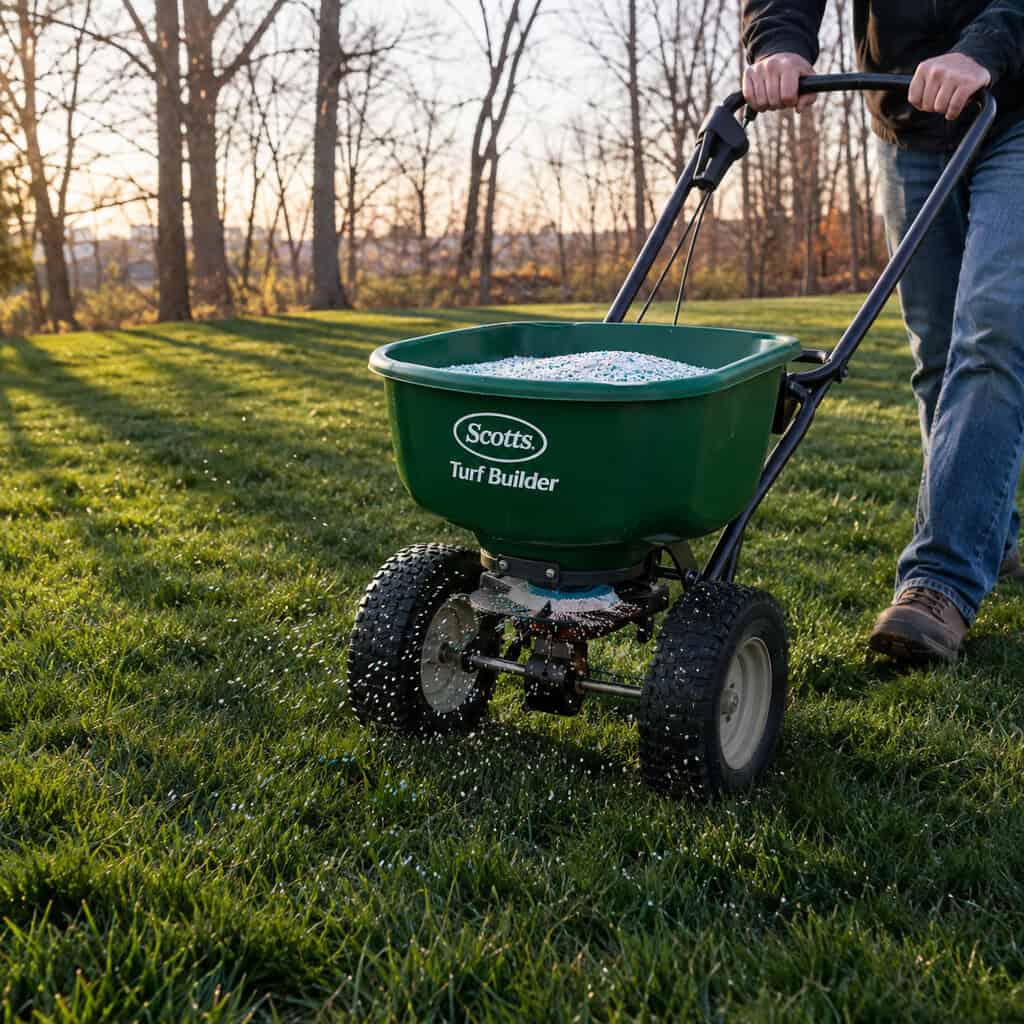
Here’s where regional advice gets people in trouble.
Cool-season lawns — fescue, bluegrass, rye — want a slow-release nitrogen feeding in late October or November, while the grass is still green and the soil hasn’t frozen. Top growth has slowed but roots are still working, and they bank that nitrogen for a fast, dark green-up.
Warm-season lawns are the opposite. Late nitrogen on bermuda or zoysia pushes tender growth straight into winter injury. Clemson’s guidance is to finish feeding at least two months before the average first frost date.
Know which grass you have before you open the bag. It’s a fifty-dollar mistake either way.
6. Swap the Fried Annuals for Mums, Pansies and Ornamental Kale

Expensive-looking yards are never caught in between seasons.
Crispy petunias in October say nobody’s been out here in six weeks. Pull them. Replant the same containers with mums, pansies, ornamental kale, or a few stems of dogwood for height.
Pansies are the sleeper pick — they shrug off light freezes, sulk through the worst of winter in mild zones, and come back blooming in March. Get them in four to six weeks before frost so the roots take hold.
7. Core-Aerate, Then Overseed the Same Afternoon
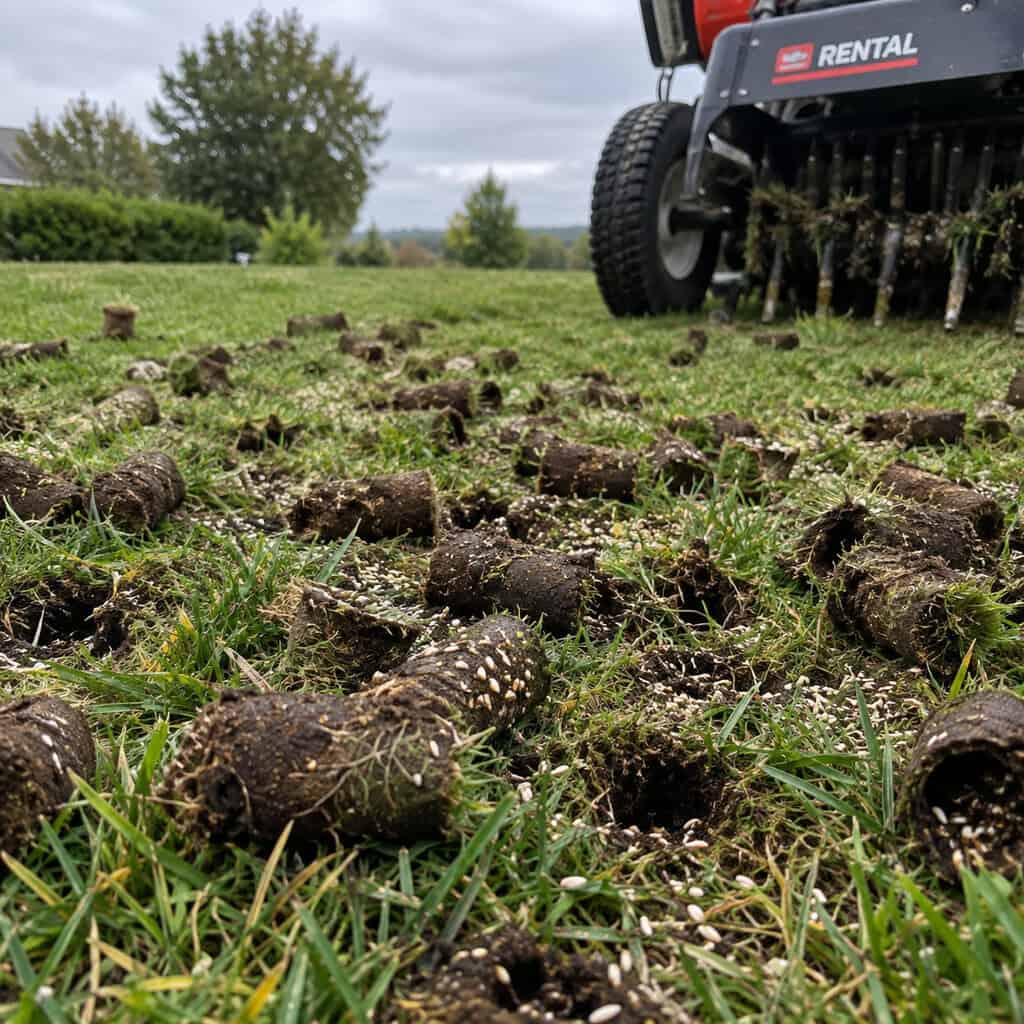
Pros stack these two jobs for a reason. The aeration holes are the seedbed.
Rent the core aerator, run two passes in opposite directions, leave the plugs on the surface to break down. Then spread seed immediately, while the holes are open and the soil is exposed — seed that lands in a hole has the soil contact it needs to germinate.
Timing matters more than technique. University of Maryland Extension points to roughly 45 days before first frost for cool-season seeding, which gives seedlings time to harden off. Mow low first — cutting the grass short before aerating gets more seed to the dirt.
8. Deep-Water the Evergreens Until the Ground Freezes
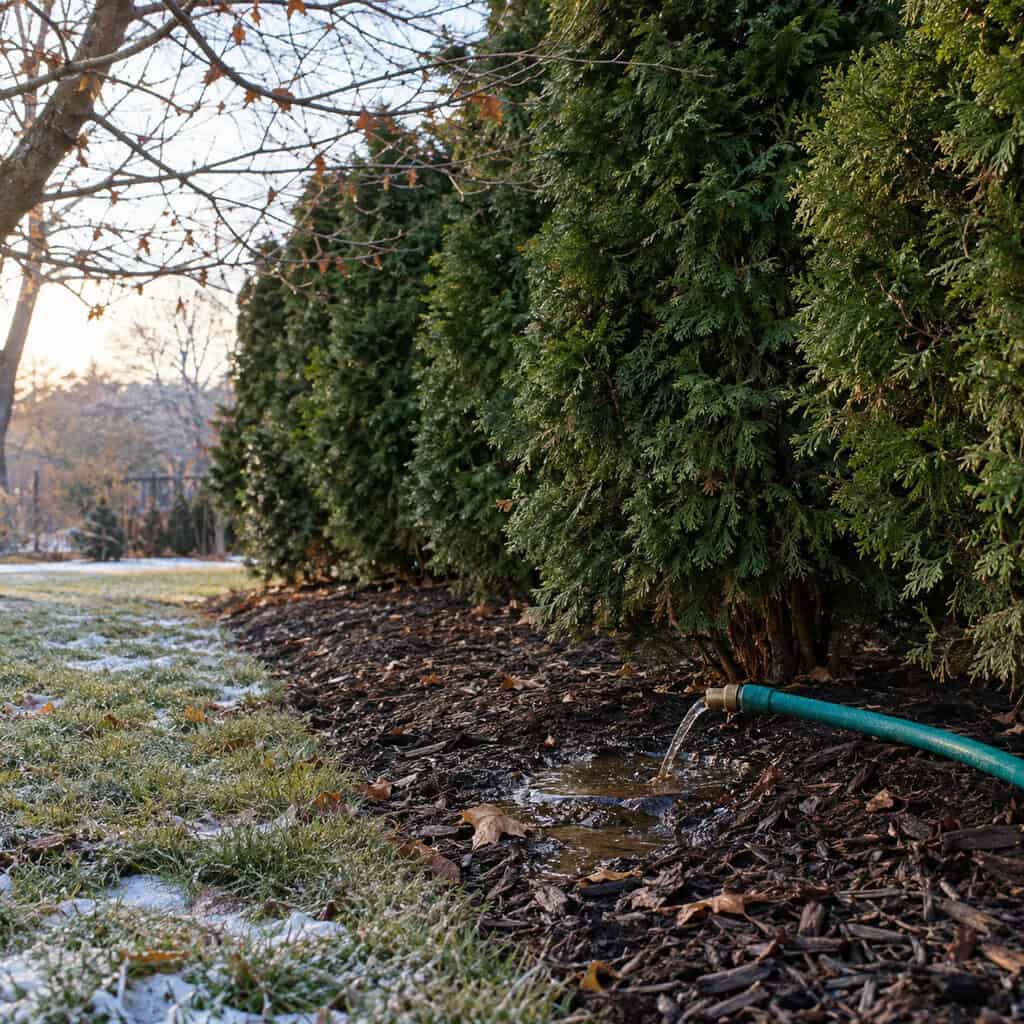
Ever wonder why the neighbor’s arborvitae go orange in March?
Evergreens keep losing moisture through their needles all winter. When the soil is frozen, they can’t replace it. The damage looks like drought because it is drought.
Run a slow hose at the base of every arborvitae, spruce, holly and boxwood for twenty minutes each, right up until the ground freezes solid. Newly planted ones matter most — their root balls are small and they dry out first.
9. Top Up the Mulch to a Flat 2–3 Inches — and Pull It Off the Trunks
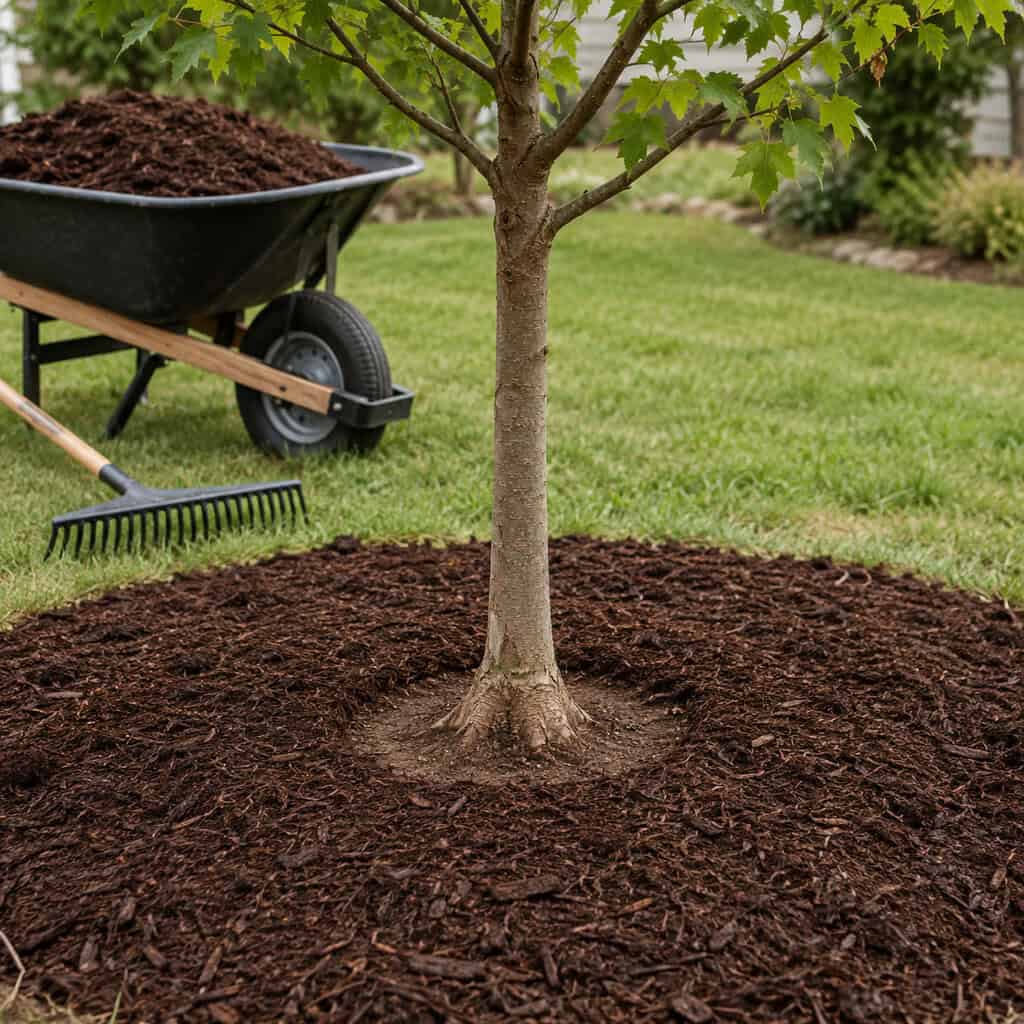
Fresh mulch is the cheapest luxury signal in landscaping. Two to three inches, raked flat, consistent depth across the whole bed.
Then go pull it back off the trunks. Mulch piled in a cone against bark holds moisture, invites rot and rodents, and encourages girdling roots. Kill the volcano.
Leave a bare three-inch collar around every trunk so you can see the root flare. That flare should be visible on every tree in your yard. If it isn’t, something’s buried that shouldn’t be.
10. Clear the Gutters and Get Water Six Feet From the Foundation
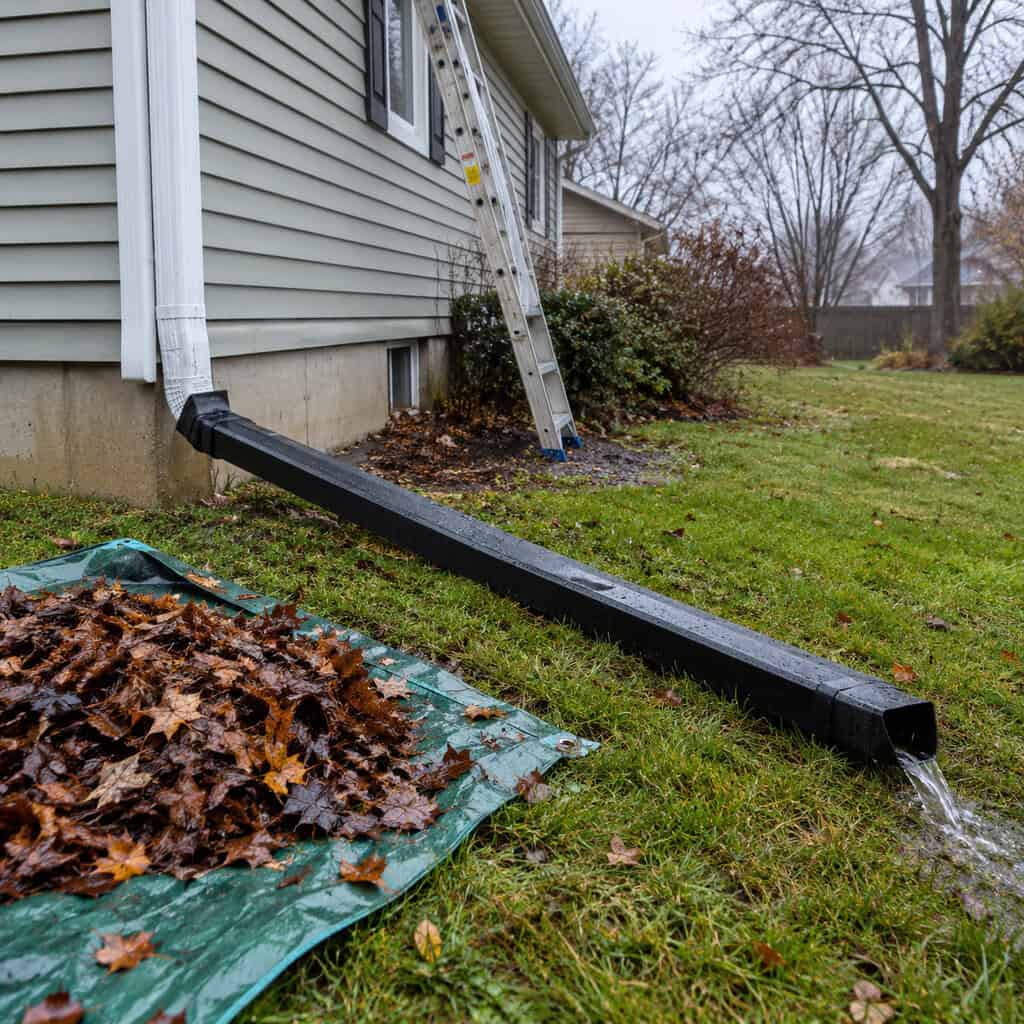
This is a yard job disguised as a house job.
A clogged gutter doesn’t just overflow — it concentrates the runoff from an entire roof plane into one spot. That torrent lands in the foundation bed, blasts the mulch out, compacts the soil, and drowns whatever was planted there. Those are the exact plantings guests and buyers actually walk past.
Clean the troughs after the bulk of leaf drop, then flush every downspout to confirm the underground runs aren’t packed. A downspout that gurgles and backs up is a plugged line, not a full gutter.
Now the part most people skip: where the water goes. A downspout dumping at the foundation puts hundreds of gallons into the soil right where you least want it. Extensions should carry discharge at least six feet out, ten is better on clay.
And check the grade while you’re there. Soil should drop about six inches over the first ten feet away from the house. Settled beds that slope back toward the foundation are how freeze-thaw season turns into a wet basement and a spring bill with a comma in it.
- Standing water within three feet of the foundation after rain
- Mulch washed into fan shapes across the walkway
- Soil pulled away from the foundation wall, leaving a gap
- Downspout elbows that discharge straight onto a splash block and nowhere else
11. Hit the Broadleaf Weeds in the Fall Window
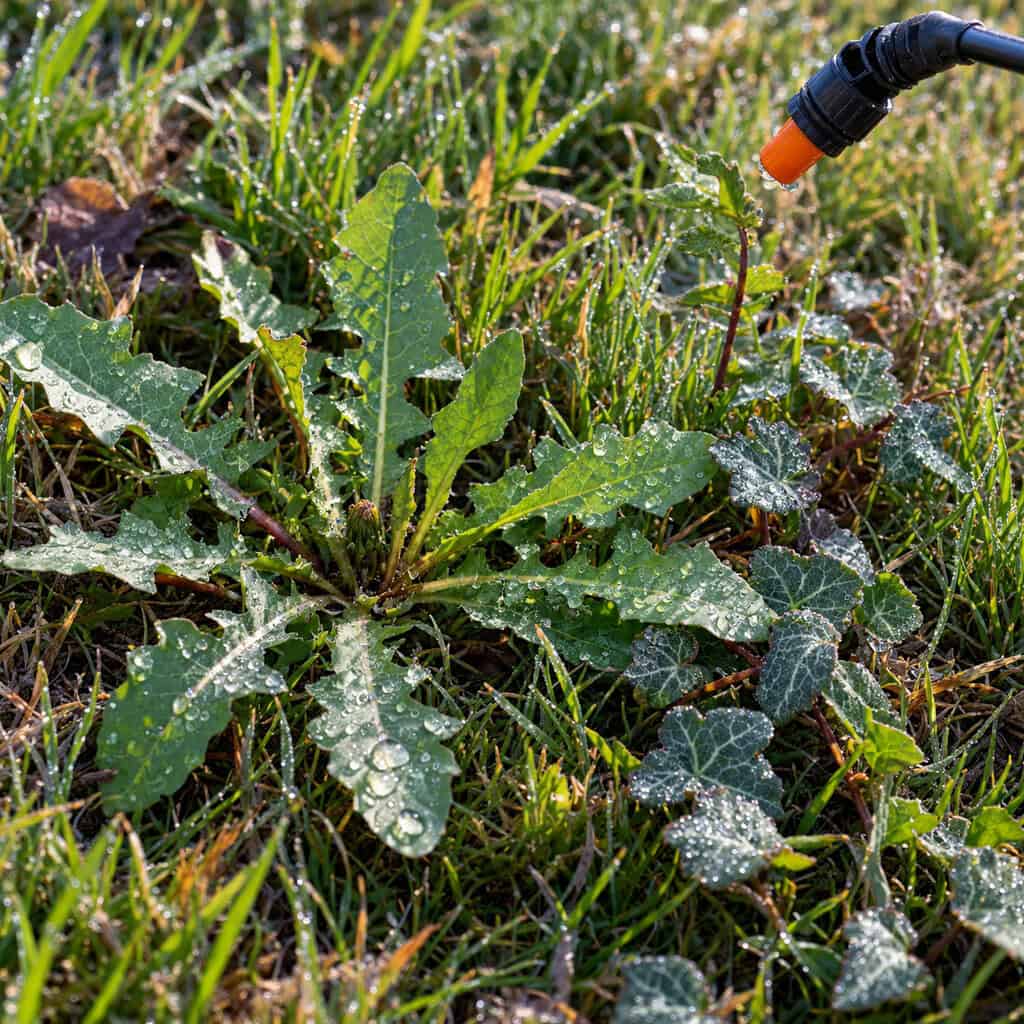
Spring feels like weed season. Fall is when you actually win it.
Dandelion, clover, ground ivy and plantain are pulling energy down into their roots right now to overwinter. Herbicide applied in that window rides along with it. SDSU Extension trials put fall timing at the best shot you get at excellent dandelion control.
The window runs early September through early November, and you want air temps above 50°F on application day so the plant is still actively translocating. If you overseeded, wait — most broadleaf products need new grass mowed three or four times first.
12. Leave the Ornamental Grasses and Seed Heads Standing
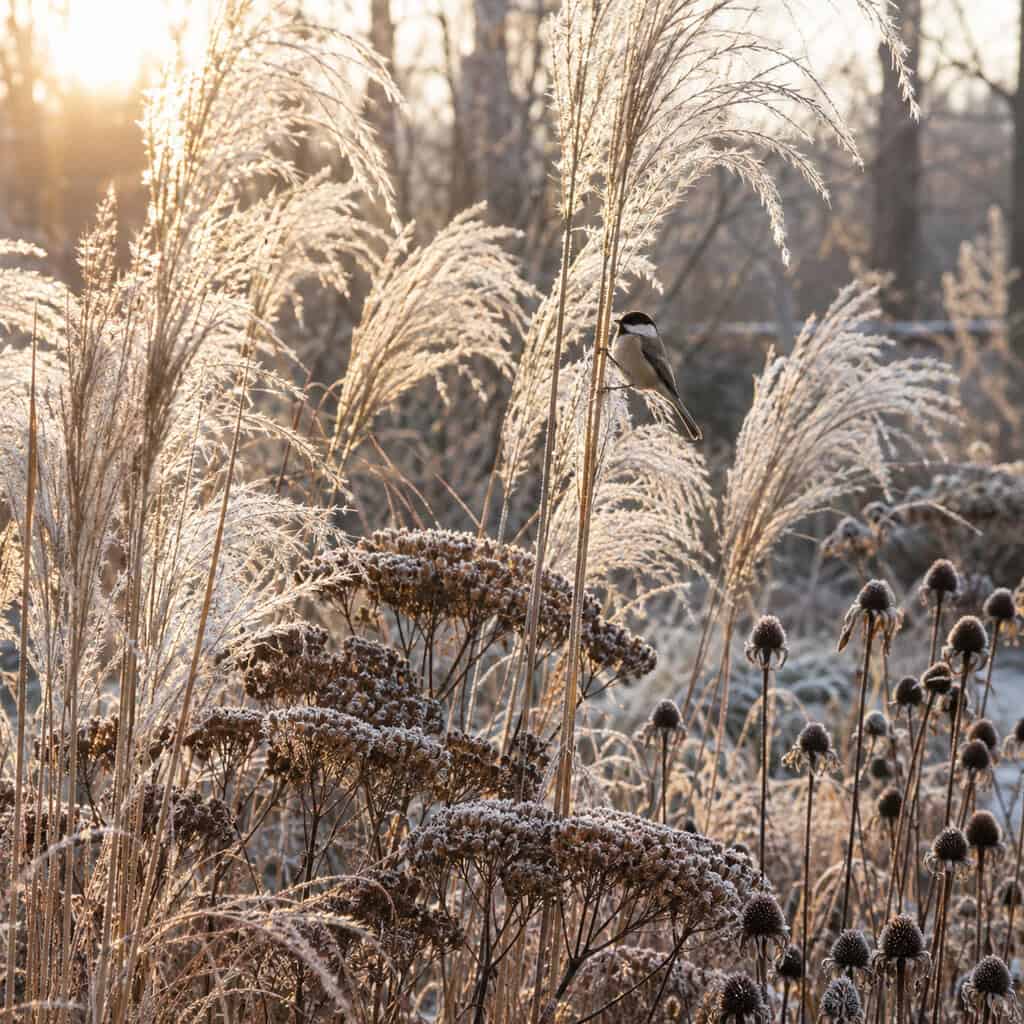
Restraint is the luxury move here.
Miscanthus catching low January light, sedum heads under a dusting of snow, coneflower stems with goldfinches working them over — that’s structure in a season when nothing else is happening. Cut it all down in October and the beds look like a vacant lot from December to April.
Wait until late winter. February into March, before new growth pushes, take the grasses down to a few inches with hedge shears and be done.
13. Plant the Trees and Shrubs Now, Not in Spring
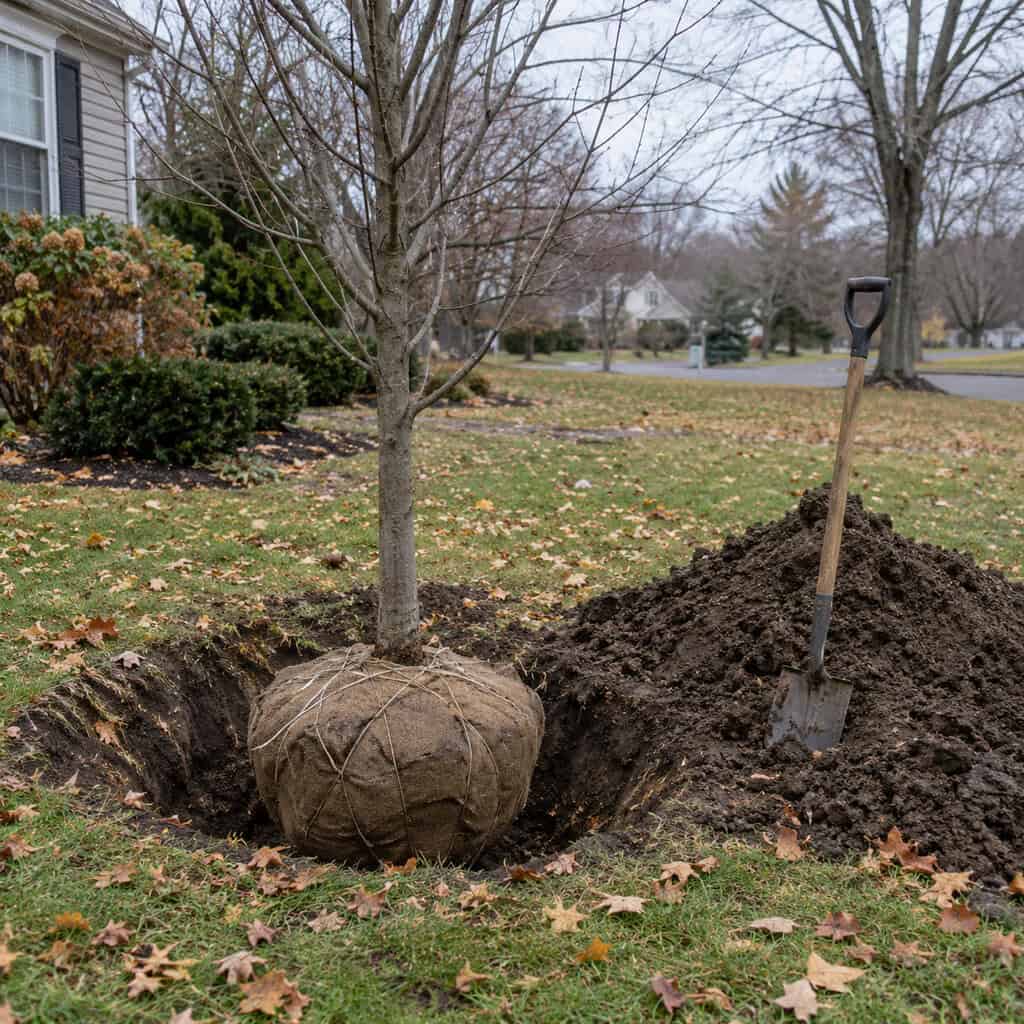
Soil stays warm long after the air turns cold. Roots keep growing in 50°F ground while the top of the plant does nothing at all.
That’s the whole advantage — establishment without the plant having to support new leaves at the same time. It’s why landscape crews are slammed in October.
Give it about six weeks before the ground freezes. Nurseries discount stock hardest right now too, though what that tree becomes in five years matters more than what it costs today.
14. Empty, Scrub and Flip the Terracotta Pots

Terracotta is porous. It drinks water all season, and when that water freezes inside the clay wall it acts like a wedge.
One hard freeze is all it takes. You get a hairline in November and a sheared-off rim by February.
Dump the soil, scrub the interiors, dry them, and store them upside down or under cover. Glazed ceramic cracks the same way. A row of split planters flanking the front door undoes every other thing on this list.
15. Wrap the Young, Thin-Barked Trees Before the Sun Does the Damage
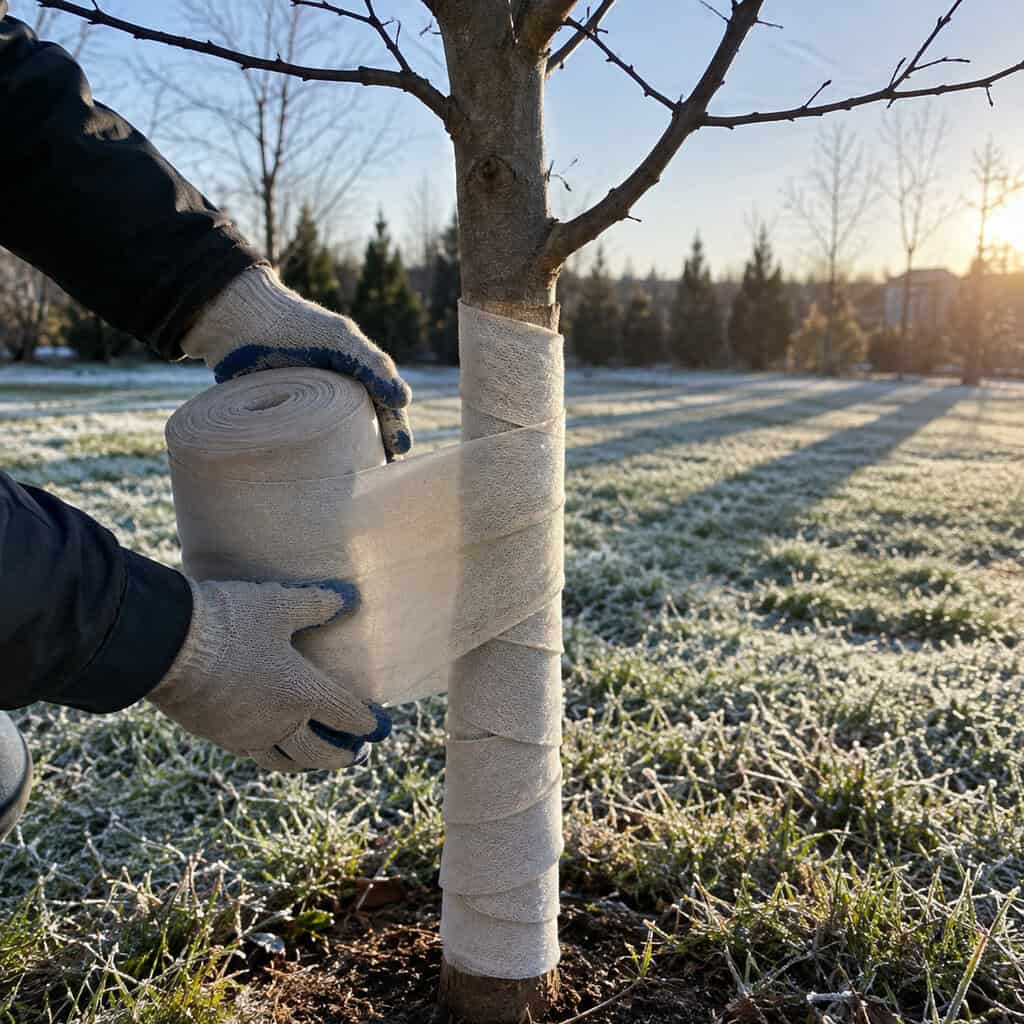
Southwest-facing bark on a young maple can hit 60°F on a clear February afternoon while the air sits at 20.
Then the sun drops behind the house and that tissue crashes forty degrees in an hour. It splits. The crack is vertical, it runs a couple of feet, and it never fully closes.
Maples, lindens, honeylocust, young fruit trees — anything smooth and thin-barked under about eight years old. Light-colored tree wrap from the base up to the first branches, applied in late fall. Take it off in early spring so it doesn’t trap moisture.
16. Wash the Patio and Re-Sand the Paver Joints
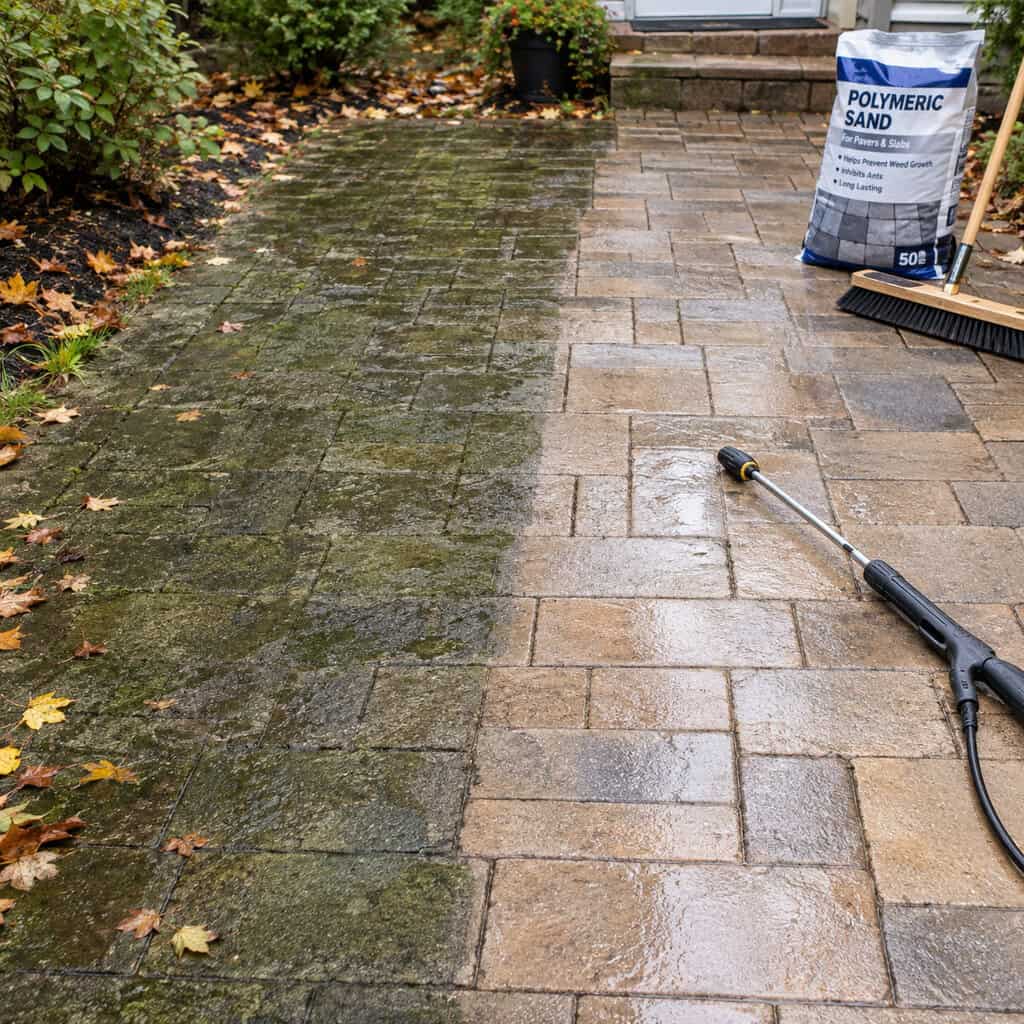
The patio is usually the single most expensive thing in the yard. It’s also the first thing that starts looking neglected.
Green algae film in the shaded corners, black organic staining under the tree, weeds in the joints — none of that is structural, all of it reads as abandoned. Wash it during the last stretch of dry weather before freeze-up, when there’s still enough warm days to dry everything fully.
Keep pressure moderate. A 3000 PSI wand held too close will blast out joint sand and etch the surface of concrete pavers, and then you’ve created the problem you’re trying to fix. Use a wide fan tip, keep it eight to twelve inches off the surface, and work in overlapping passes.
Then re-sand. Sweep polymeric sand into every joint, compact it in with a broom and a few taps, sweep the surface completely clean, and mist it with a fine spray to activate the binder. Leftover haze on the paver faces dries into a cloudy film that’s miserable to remove.
Polymeric sand needs a dry window — no rain for 24 hours and ideally daytime temps above 50°F for it to cure. Below that, wait until spring rather than wasting the bag.
Locked joints matter because loose ones let water in, and water in the joints freezes and heaves. That’s how a flat patio becomes a wavy one over two winters. If you’re sealing, do it after the sand has cured, not the same afternoon.
17. Lift and Divide the Perennials That Outgrew Their Spot
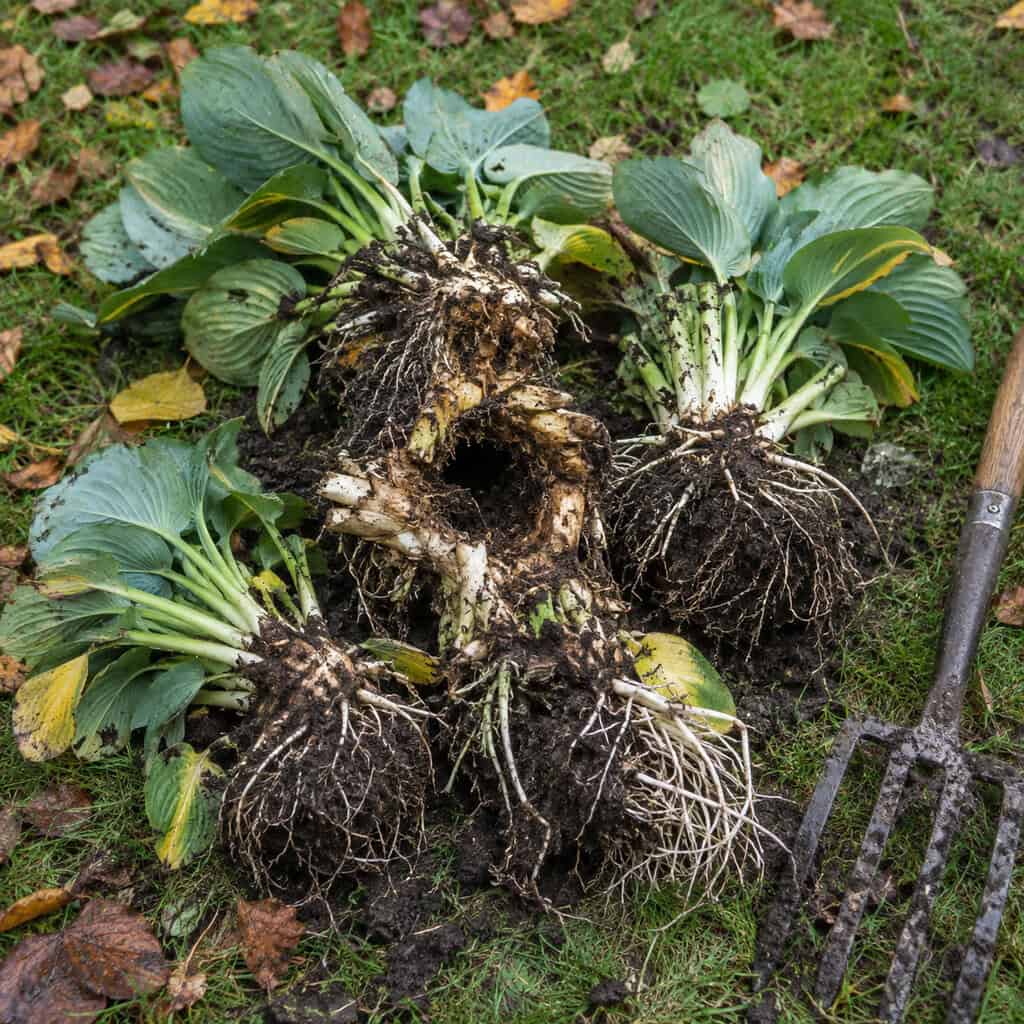
Hostas, daylilies and bearded iris all do the same thing when they get crowded: they die out in the middle and push growth to the ring. A donut-shaped clump reads as neglect even from the sidewalk.
Dig the whole clump, split it with a spade or two forks back to back, discard the dead center, replant the healthy outer sections.
Now you have free plants. Repeat the same variety three or four times down the bed — repetition is the cheapest designer trick there is. Do it four to six weeks before the ground freezes.
18. Drop the Last Mow Half an Inch
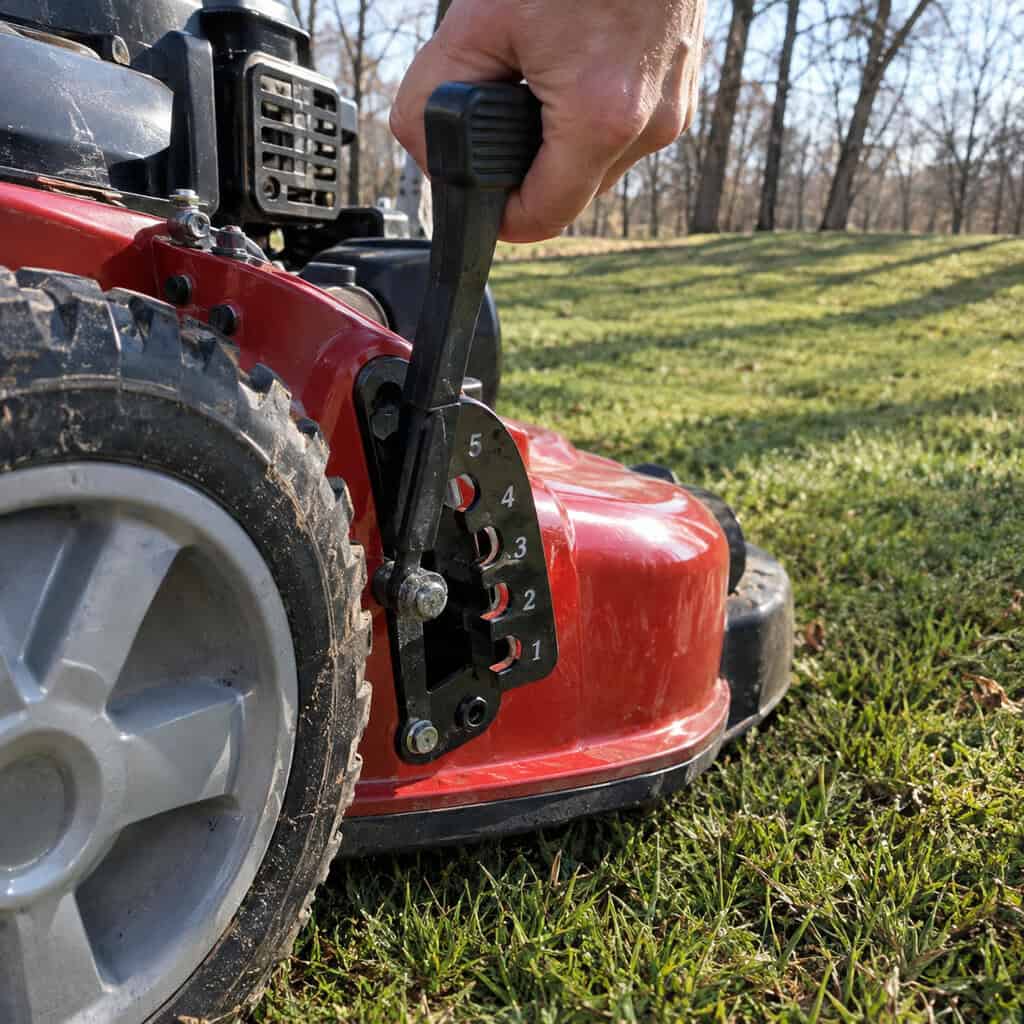
One notch. Not a scalping.
Tall grass mats down under snow, stays wet, and breeds snow mold — which is why some lawns green up in patchy gray streaks. Slightly shorter turf doesn’t fold over the same way.
Take the final cut once growth has actually stopped for the season, then park the mower at the right final height and leave the lawn alone.
19. Strip the Diseased Foliage Out of the Beds and Trash It
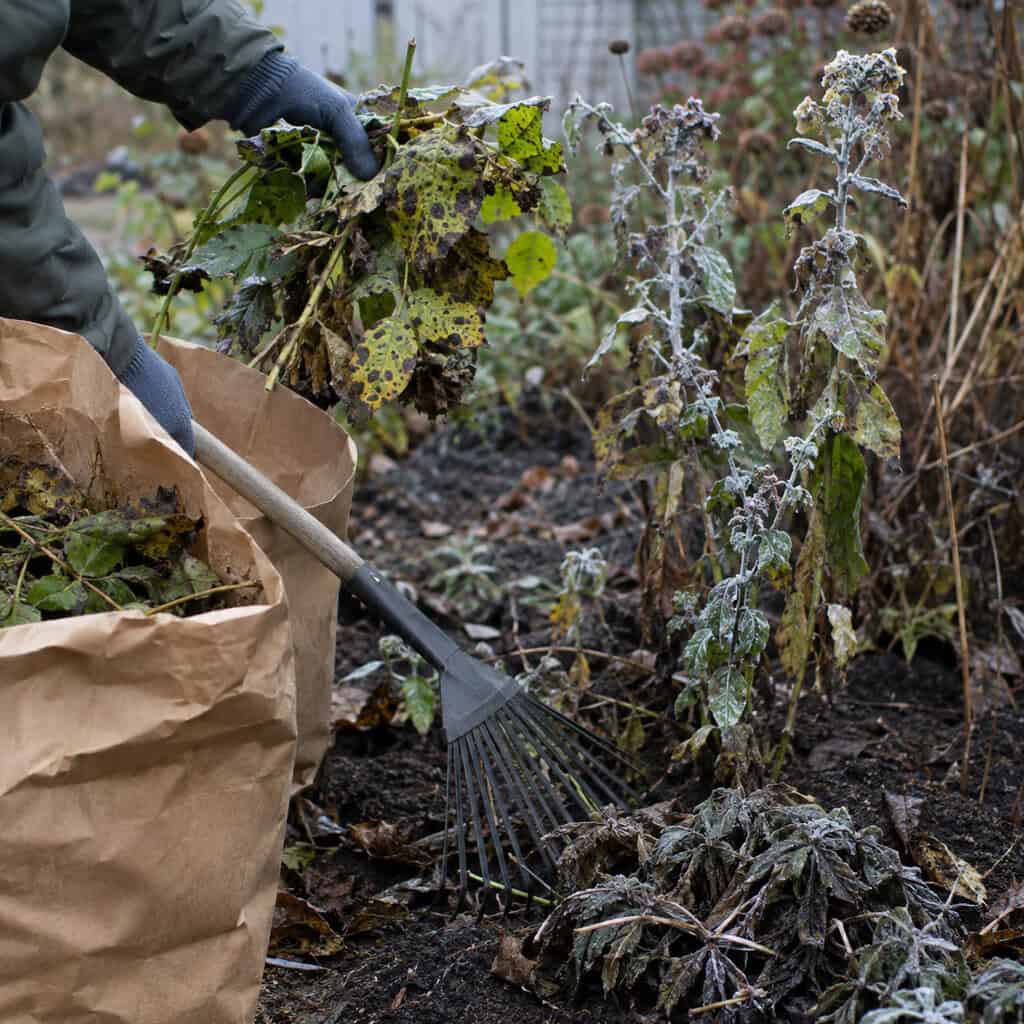
Black-spotted rose leaves. Powdery mildew on the phlox and peonies. Blighted tomato vines.
All of that overwinters exactly where it fell and reinfects everything in May. Spores don’t care that it’s cold.
Rake it out after the first light frosts drop the foliage, bag it, and put it in the trash. Not the compost pile — home piles rarely run hot enough long enough to kill the pathogens. This is the one fall cleanup job that should never be left standing.
20. Reset the Landscape Lighting for a 5 P.M. Sunset

For roughly half the year, your yard is only seen in the dark.
At the fall time change, walk the whole system. Replace dead bulbs, dig the fixtures that got swallowed by mulch back out, re-aim the uplights that shifted, wipe the lenses. Then reset the timer to the new sunset.
Three working path lights and two uplights on a tree do more for perceived value than $400 of new shrubs. It’s the cheapest high-end effect money buys.
21. Vole-Proof the Trunks and Bed Edges
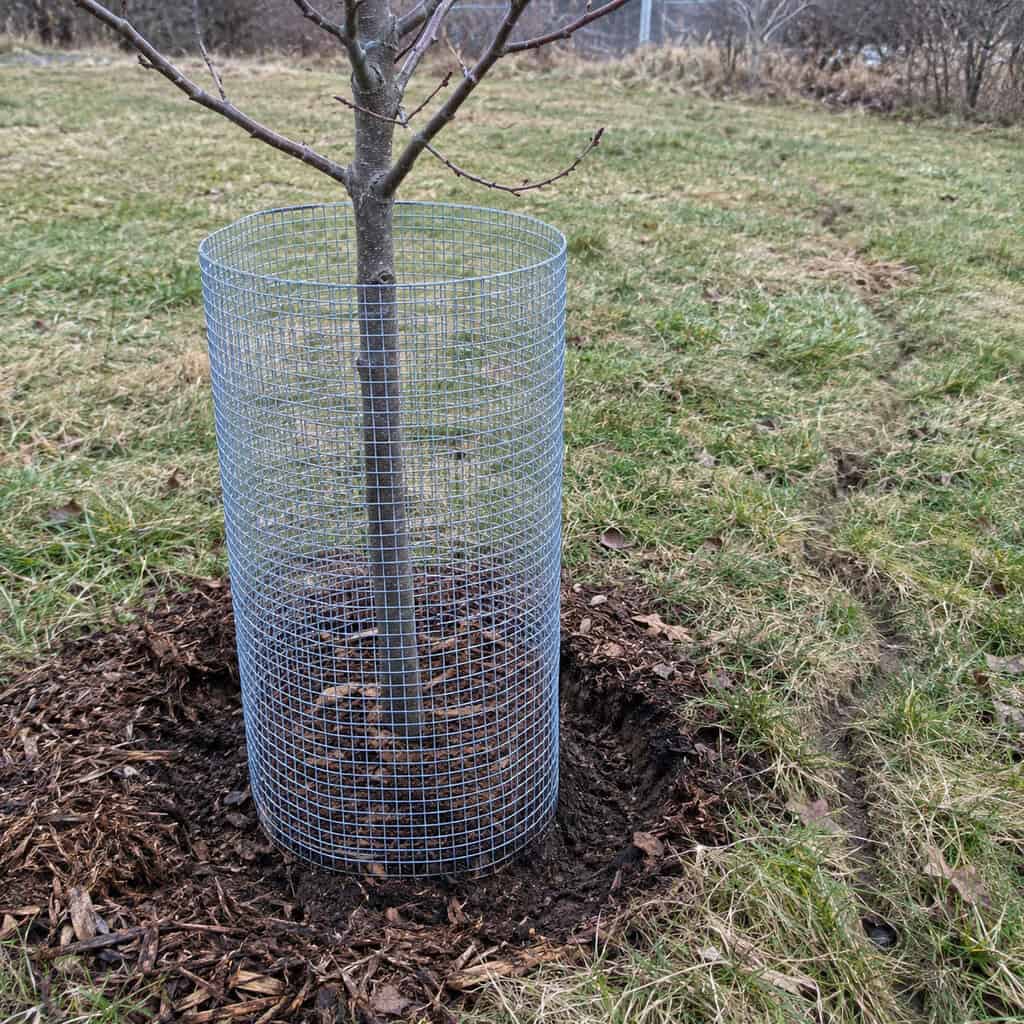
This damage happens entirely out of sight, which is why it wrecks people.
Voles tunnel under snow cover and chew bark off the base of young trees and shrubs all winter. In spring the snow melts, the plant looks fine, and then it simply never leafs out — because it was girdled in January.
Tell voles from mice by the damage pattern. Vole gnawing is at or below the soil line, irregular, with visible quarter-inch tooth grooves running at angles. You’ll also see their surface runways in the turf when snow melts: narrow, matted trails about two inches wide, often with grass clipped short along them. Mice chew higher up and leave finer marks.
The fix is mechanical, not chemical. Wrap trunk bases with quarter-inch hardware cloth — quarter-inch mesh, not chicken wire, which they walk right through. Make the cylinder two to three inches wider than the trunk so it doesn’t bind, run it 18 to 24 inches high to clear expected snow depth, and push it an inch or two into the soil so they can’t tunnel under.
Then remove the habitat. Pull mulch back six inches from every trunk, mow the grass short along bed edges and fence lines, and clear out the tall weedy strip behind the shed. Voles won’t cross open ground if they can help it.
Get this done before the first lasting snow. After that, everything is invisible until it’s too late.
22. Pull a Soil Test While the Ground Is Still Workable
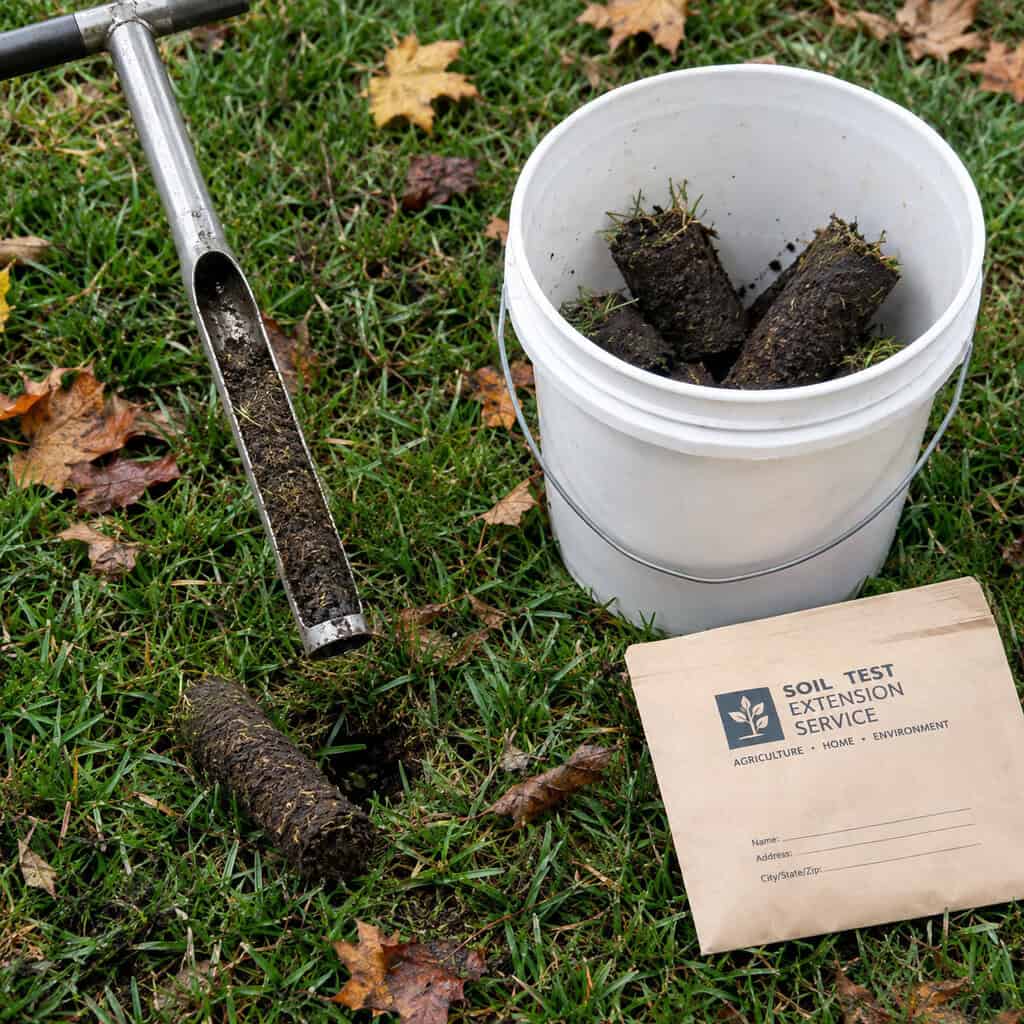
Everyone else guesses at fertilizer. Expensive yards test.
Your county extension office runs them for $15 to $25. Pull a dozen plugs from around the lawn, mix them in a clean bucket, send a cup.
Fall is the right time because lime and sulfur need months of moisture and freeze-thaw cycling to actually move pH. Apply an amendment in April and you’re waiting until the following year to see it work.
23. Top-Dress With a Quarter-Inch of Compost
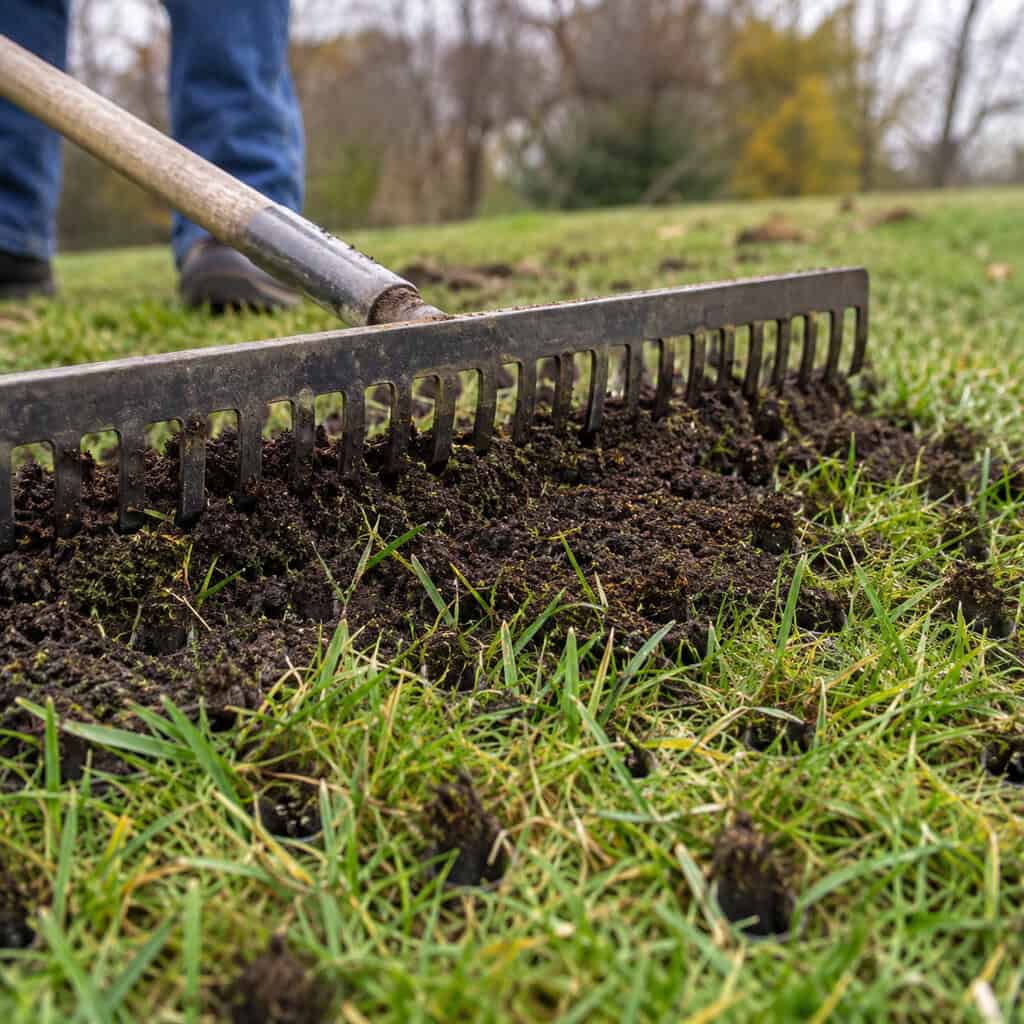
This is the move behind lawns that look level and velvety instead of just green.
Spread finished compost a quarter-inch deep right after aeration, while the holes are still open, then drag it in with the back of a rake. It fills the holes, feeds soil biology, and gradually smooths the low spots that make a lawn look lumpy in raking light.
No bagged product replicates that texture. Leveling a lawn with compost is slow — a quarter inch a year — which is exactly why so few people bother and why it looks so different when someone does.
24. Screen the Boxwood and Broadleaf Evergreens From Winter Wind

Boxwood, holly and rhododendron bronze out on the windward side and stay ugly until June.
The fix is a screen, not a wrap. Drive stakes on the windward side and staple burlap to them, leaving air space between the fabric and the foliage. Burlap pressed tight against leaves traps ice and does its own damage.
Wait until the plants have hardened off but before the deep cold sets in. These are the formal evergreens carrying the most design weight in the yard — they’re the last thing you want looking scorched in March.
25. Put the Pruners Away for the Spring Bloomers

Lilac, forsythia, azalea, bigleaf hydrangea. All four set next spring’s flower buds during the previous summer.
A tidy fall haircut on any of them is a decision to cancel spring bloom. People do it every year and then blame the winter.
Prune these right after they finish flowering in late spring instead. Save the fall pruning for dead wood and crossing branches — that’s it.
26. Drain the Fountain, Birdbath and Pond Pump
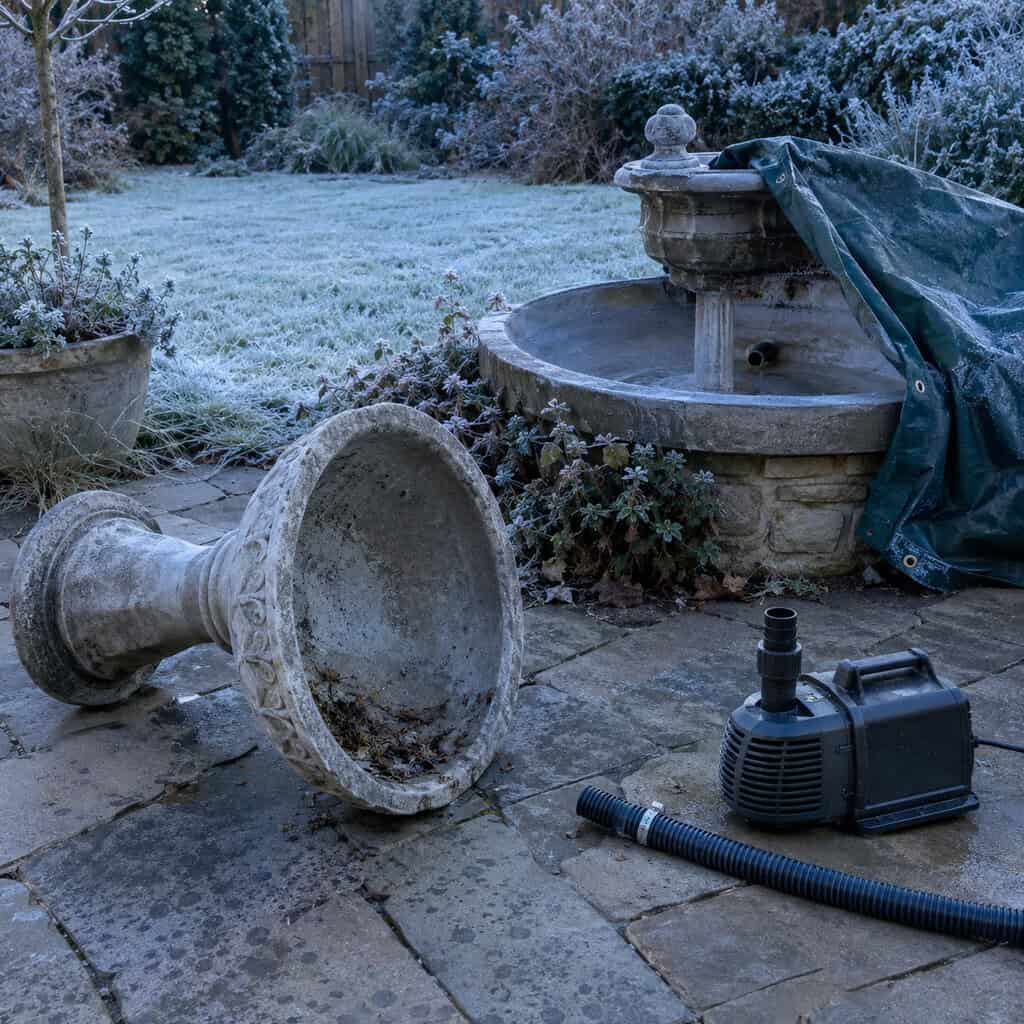
Water trapped in a basin, a pump housing, or the plumbing between them freezes and splits whatever’s containing it.
Concrete cracks. Resin cracks. Impellers crack. And a fountain basin is rarely repairable — you’re buying a new one.
Drain everything, dry it fully, and either cover it with something that sheds water or bring the small stuff inside. Pumps go in a bucket of water in the basement so the seals don’t dry out and fail.
27. Winterize the Mower, Sharpen the Blade, Clean the Tools

Ethanol fuel starts going bad in about 30 days. Left in a carburetor over five months, it turns to varnish and plugs the jets, which is why small-engine shops have a three-week backlog every April.
Either run the tank dry or fill it and add stabilizer. Pull the blade and sharpen it now — a dull blade tears grass tips, which brown off and make the whole lawn look dingy from the street.
Wipe the pruners, oil the pivots, hose the caked clay off the spade. Spring’s first warm Saturday should be a working day, not a repair-shop day.
28. Walk the Yard With a Phone Camera and Write Next Year’s List

Yards look expensive because somebody was paying attention.
Take twenty photos right now, on the last mild evening before frost. Stand at the curb. Stand at the front door looking out. Shoot the side yard nobody looks at.
Photos show you what your eyes have stopped seeing — the gap where something died in July, the corner that’s gone shapeless, the total absence of anything with fall color. Write it down while it’s in front of you.
By April you’ll have forgotten all of it. That list is the difference between next year being a repeat and next year being better.
29. Pre-Emergent in the Beds for Winter Annual Weeds
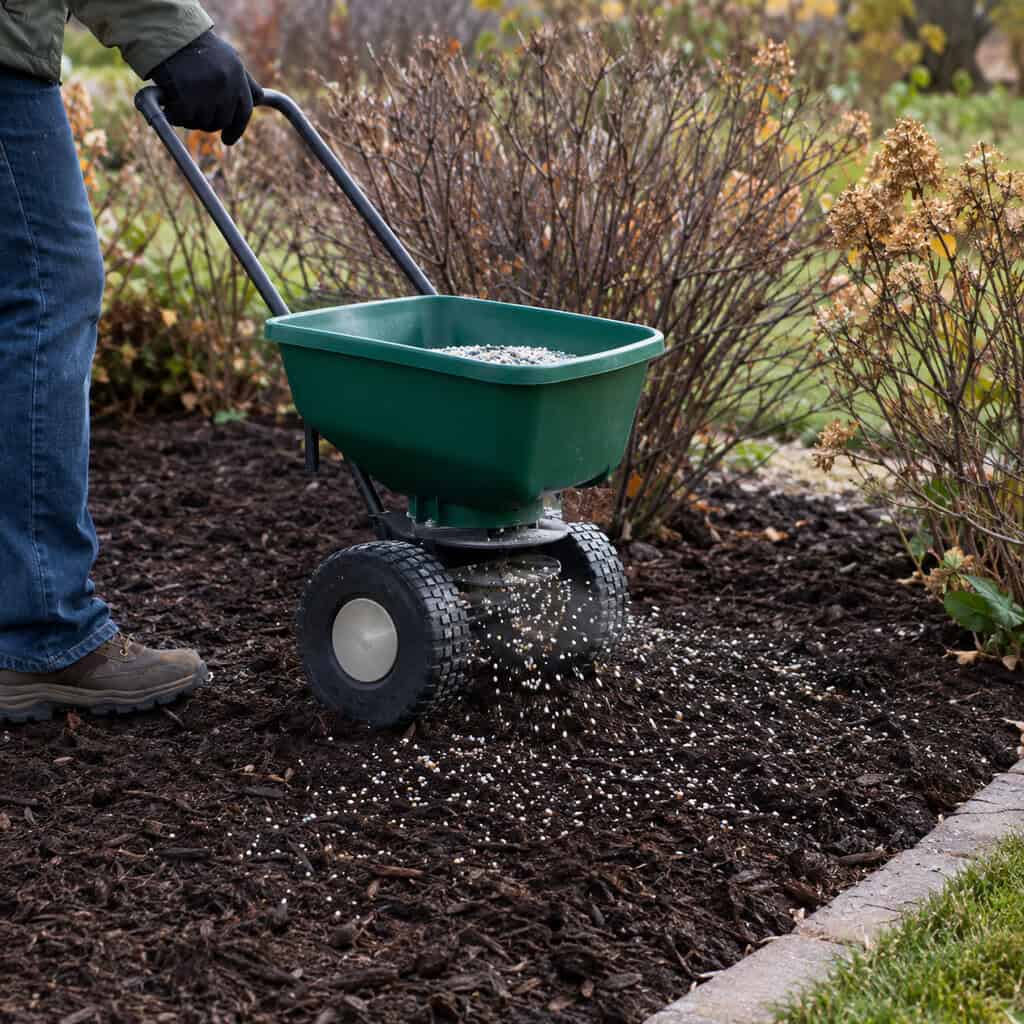
Chickweed, henbit and bittercress germinate in fall, sit there quietly through winter, and explode into a green carpet across your mulch in March.
A pre-emergent in the beds in early fall, before germination, stops all of it. Apply it after you’ve finished top-dressing mulch so you’re not burying the barrier, and water it in.
The mistake is timing. Once you can see the seedlings, pre-emergent does nothing.
30. Mark Bed Lines and Driveway Edges Before the Snow

Snow country only, but it saves real money.
A plow driver working at 6 a.m. in a whiteout cannot see where your driveway ends and your bed begins. Fiberglass markers set every ten feet along the pavement edge and at the corners of beds solve it for about twenty dollars.
Set them while the ground still takes a stake. Same markers keep de-icing salt spray and piled snow off the shrubs you actually care about.
Every one of these is finished work by the time the ground locks up. Nobody sees you doing them.
That’s the point. Expensive-looking yards aren’t built in May when everyone’s out buying flats of annuals — they’re built in the six cold weeks when the only person out there is you and a spade.
Do eight of these. You’ll notice it in March.